Chicken burrito bowls are packed with ground chicken, cilantro lime cauliflower rice, black beans, corn, and tomatoes. They are perfect for meal prep and make a great lunch or easy dinner for busy weekdays.
Say goodbye to fast-food burrito bowls like Chipotle, and hello to healthy, home chicken burrito bowls made by YOU!
These chicken burrito bowls are better than anything you can buy on the go. They’re also more nutritious and so easy to make.
I like to prepare them on the weekend when I am doing my meal prep, so I have them ready to go for lunch or a light dinner during the week.
If you prefer to keep them 100% plant-based, try swapping in crispy baked tofu for the ground chicken.
Is A Burrito Bowl Healthy?
Making a homemade burrito bowl is definitely healthy! Made from real whole food ingredients, these bowls are certainly a nutritious meal. Let’s break it down!
Cauliflower rice offers a delicious veggie base for these bowls. If you prefer a whole grain (which I often do), you can swap in brown rice, quinoa, or wheat berries. Really any whole grain you like will work. But I love how light the cauliflower rice is.
Ground chicken offers a great source of protein. I like to buy organic meats whenever I can find them. Keep in mind, that you can also make these burrito bowls using ground turkey, ground beef, or even tofu.
Black beans also provide lots of protein and are also rich in fiber. Plus beans are super affordable. I love to keep them stocked in my pantry.
Tomatoes provide our bodies with vitamins A, and K, lots of B vitamins, and a huge dose of vitamin C. They also add a lovely fresh flavor to the bowls.
Corn is another ingredient packed with fiber, and also has a variety of vitamins and antioxidants. I always look for non-GMO, organic corn options. And I love using frozen corn for this recipe.
How To Make a Burrito Bowl
Building a burrito bowl is very easy to do. Here’s the cliff notes – see the recipe card for the full step-by-step instructions.
Heat olive oil in a non-stick saute pan and saute garlic until fragrant.
Add the cauliflower rice, season with salt, pepper, and chicken broth (or water), and cook until tender.
Transfer to a bowl, cool, and stir in scallions, cilantro, and lime juice.
Heat a saute pan over medium heat, add olive oil, and ground chicken. Season and cook until opaque, breaking the chicken into small crumbles.
Sprinkle in taco seasoning and stir to coat the chicken with the spices. Cook for a couple of more minutes or until the chicken is cooked through. Shut off the heat and allow it to cool.
Assemble! Starting on one side of your meal prep container, layer the cauliflower rice, corn, black beans, chicken, and tomatoes. Repeat until you have four burrito bowls.
*OPTIONAL: combine Greek yogurt, chipotle sauce, and lime juice. Stir well and serve over your burrito bowl.
Say good-bye to fast food (like Chipotle) and hello to this healthy homemade DIY chicken burrito bowl. Packed with ground chicken, black beans, corn, tomatoes and cauliflower rice these burrito bowls are both delicious and nutritious.
Prep Time15 minutesmins
Cook Time20 minutesmins
Total Time35 minutesmins
Course: DIET, KITCHEN BASICS, LUNCH, salad + dressing, VIDEO
Heat one teaspoon of oil into a large non-stick saute pan. Toss in garlic with a pinch of salt and sauté until fragrant.
Add cauliflower rice to the pan along with salt, pepper and chicken broth (or water). Pop on the lid and cook for 3-4 minutes or until the rice is tender.
Transfer to a bowl and allow to cool before stirring in scallions, cilantro and lime juice. Set aside.
Heat a large non-stick saute pan over a medium heat, add in remaining oil and ground chicken. Season with salt and pepper and break into crumbles with a rubber or wooden spatula until the chicken is in crumbles.
Once the chicken has turned from translucent to opaque, add in taco seasoning and stir to coat the chicken with the spices. Cook for a couple more minutes or until chicken is cooked through. Shut off the heat and allow to cool.
Once all of your ingredients are prepped and ready to go, you are ready to assemble your bowls.
Starting on one side of your meal prep container, layer cauliflower rice, corn, black beans, chicken and tomatoes. Repeat until you make 4 burrito bowls.
Zucchini taco boats are easy to make and a fun way to put a healthy twist on taco night! This zucchini boat recipe is low-carb, paleo, keto, and Whole 30 friendly, so they work for just about everyone!
Taco Stuffed Zucchini Boats
Stuffed zucchini boats are one of my all-time favorite meals. I shared a recipe for turkey-stuffed zucchini boats a few years back and it quickly became one of the most popular recipes on Clean & Delicious. So I suspect, that you also really like stuffed zucchini boats too!
The best part about zucchini boats is that you can make so many different flavors, and I’m not sure why it took me so long to make these. Building a taco inside of a zucchini boat is both insanely delicious and one of the healthiest ways to enjoy a taco.
Plus, this meal is super family-friendly and perfect for meal prep as well.
What Type of Meat Should You Use For The Filling?
I wrote this recipe using grass-fed ground beef as the base but you can certainly sub in ground turkey if you prefer. You can also sub in ground chicken or ground bison if you’d like. Really, any ground meat that you love or have on hand will work for this recipe.
Whichever meat you choose, do your best to get the best quality meat that you can find and afford. There is a lot to be said for good, high-quality ingredients. Not only are they better for us, but they tend to taste better as well.
I get 80% of my meat from Butcher Box. They deliver high-quality grass-fed meat, pastured chicken, and heritage pork right to my doorstep on a monthly basis. Not only is the meat of great quality but it’s also super convenient. And they are always offering great deals for new members. I highly recommend checking them out if you have been wanting to upgrade the quality of the meat you and your family are eating.
But, with all that being said, don’t get fanatic. Make the best choice you can and then choose to feel good about whatever choice you make. I think that is one of the healthiest things we can do for ourselves.
Are Zucchini Taco Boats Keto + Whole 30?
Yes… and no, depending on what recipe you follow.
This recipe is 100% keto because I make the base of the recipe using cauliflower rice in place of brown or white rice. This keeps the carbs super low while adding extra veggies to the dish.
If you wanted to make this recipe Whole 30 compliant, you would have to skip the cheese. I recommend adding some fresh guacamole or diced avocado once it’s done baking. This will add a beautiful layer of rich, buttery goodness without the dairy.
Heck, I recommend adding the avocado even if you add the cheese (just not if you are doing Whole 30).
And if you want to be in control of all of your ingredients, try making your taco seasoning from scratch. So easy and so good!
Thanks so much for reading! You can watch the video down below and if you make this recipe I would love for you to give it a ★ rating below. And be sure to follow me on YouTube, Pinterest, Instagram and FaceBook for more healthy food inspiration!
Zucchini taco boats are easy to make and a fun way to put healthy twist on taco night! This zucchini boat recipe is low-carb, paleo, keto, and Whole 30 friendly, so they work for just about everyone!
Trim the top and bottom of zucchini off. Lay the zucchini flat and slice in half lengthwise. Repeat with all four zucchini.
Using a spoon, scoop the center of the zucchini out leaving 1/4 inch wall around the bottom and sides of the zucchini. Repeat with each zucchini halve.
Reserve 1 cup of the zucchini meat from the center of the zucchini and give it a rough chop. We will use this in the filling.
Add a thin layer of salsa to the bottom of a baking and lay the zucchini boats on top. You may need two dishes to fit all of the zucchini.
Ina large non stick skillet, heat olive oil. Once the oil is hot, add in the onion along with a pinch of salt.
Once the onion is translucent, push to the side and add in ground beef. Season with salt and break up into crumbles. Add taco seasoning and stir to coat.
Next, add in cauliflower rice, garlic, bell pepper and zucchini 'meat'. Season with a little more salt and pepper and stir.
Pour in remaining salsa, stir everything together, and simmer for 5-10 minutes. Turn off the heat and allow to cool until it's easy to handle.
Divide the mixture evenly amongst all 8 zucchini boat halves and then sprinkle each half with shredded cheddar cheese.
Cover with aluminum foil and bake for 25 minutes or until the cheese has melted and the zucchini is tender.
Top with fresh tomatoes and cilantro and enjoy!
Video
Notes
I always buy my cauliflower rice pre-made at the grocer store. You can use fresh or frozen for this recipe, both work.
If you want to keep this recipe Whole 30 compliant, be sure to leave off the cheese.
Banana oatmeal pancakes are a healthy, satisfying, family-friendly breakfast. These fluffy pancakes are gluten-free, sugar-free, dairy-free and absolutely delicious. An easy-to-make pancake recipe made with real, simple ingredients!
This banana oatmeal pancake recipe is as easy as it gets. Simply blend all of the ingredients in your blender until you have a nice, thick pancake batter and cook away. Easy peasy!
There’s no flour, no butter, and no added sugar, so these pancakes are perfect for just about everyone (Unless you don’t like bananas! Then you may want to try my banana-free oatmeal pancakes!).
Are Banana Oatmeal Pancakes Healthy?
Health means different things to different people. For me, healthy food is about eating real, whole foods, most of the time. So yes! These banana oatmeal pancakes are about as healthy as a pancake gets.
I like to think of these pancakes as a bowl of oatmeal in pancake form. It’s one of the most delicious ways to eat your oatmeal; blended with bananas and egg whites. And if you really want to elevate this breakfast, top your pancakes with a fat schmear of homemade almond butter (store-bought works as well!).
The ingredients for this oat pancake recipe are all super simple and probably items you already have in your kitchen. The ingredients are also all nutritious, so you can feel good about serving these pancakes to your family.
Ripe bananas – Since ripe bananas are the only true sweetener in this recipe, the riper the better!
Egg whites – Egg whites add fluffiness to this gluten-free pancake recipe. Feel free to use 2 eggs instead of the egg whites.
Rolled oats – They wouldn’t be oatmeal pancakes without the oats! Oats are technically a gluten-free food, but they can be processed with the same equipment that gluten foods are processed with, so if you definitely need gluten-free, look for a certified gluten-free option.
Cinnamon – Can’t go wrong with a dash of ground cinnamon.
Baking powder – Baking powder is the way to go for fluffy pancakes! You’ll need 1 teaspoon.
Salt – just a pinch to bring the flavors together.
Optional – add your favorite mix-ins like chopped walnuts or maybe some chocolate chips!
Coconut oil – for cooking the pancakes. Feel free to swap this with cooking spray or a different oil.
How To Make Banana Oatmeal Pancakes
These banana oatmeal pancakes are incredibly easy to make and come together in just about 10 minutes.
Place bananas, egg whites, oats, cinnamon, baking powder and salt into a blender.
Blend until you have a nice thick pancake batter.
Stir in your favorite pancake add-ins. I went with walnuts but chocolate chips or blueberries would be delish.
Cook for two minutes on each side or until golden brown and set through.
Serve with your favorite pancake toppings.
Eat and enjoy!
Tips For Pancake Success
These pancakes could not be easier to make, but here are a few tips so that they are perfect every time!
Old-fashioned rolled oats work best in this recipe. Quick-cooking oats will work in a pinch. Do NOT use steel-cut oats.
The riper the banana, the sweeter the oat pancakes will be, naturally. Over-ripe bananas are awesome! Whenever you have bananas about to go bad, don’t throw them out! Peel them and put them in a baggie in your freezer until you want to use them for muffins, bread, or energy bars. When you need them, take them out of the freezer and let them sit out for a bit or microwave them for about 45 seconds.
The pancakes are ready to flip when the edges are set and you see little bubbles on the surface of the pancakes.
Place cooked pancakes in a 200ºF oven to keep them warm, while cooking the rest of the pancakes.
Pancake Add-ins & Toppings
Feel free to get creative and add in any favorite ingredients! Toss berries, chocolate chips, sprinkles and/or nuts into the batter!
Another great way to change up your pancakes is with a variety of different tasty pancake toppings.
I like to serve banana oat pancakes with banana slices, almond butter and a drizzle of maple syrup. You can also go all out and add toppings like caramel sauce, fresh berries, whipped cream, chocolate chips and/or chopped nuts.
How To Freeze Banana Oatmeal Pancakes
I love making these pancakes on the weekend when I am doing my meal prep. I often make a double or triple batch so I can freeze the pancakes for the next few weeks.
Once you’ve cooked your pancakes, let them cool to room temperature. You want all of the steam to be gone, so you are not left with wet pancakes.
Place pancakes on a rimmed baking sheet, lined with parchment paper and pop in the freezer for one hour. Transfer to a freezer bag and store in the freezer for up to one month.
When you are ready to eat your pancakes, you can either pop them in the microwave for a minute or two (times vary depending on the microwave) or place them in your toaster oven until heated through.
Banana oatmeal pancakes are naturally gluten-free, sugar-free and made with real, simple ingredients. These fluffy pancakes are healthy and easy to make in the blender.
Combine banana, egg whites, oatmeal, cinnamon, baking powder, and salt in the blender.
Blend ingredients until you have a nice thick batter. Stir in walnuts or any other add-ins you like. Blueberries, pecans, and chocolate chips are some of my other favorites.
Heat a large non-stick skillet over medium heat and lightly coat it with coconut oil. Pour pancake batter in the pan to form small-medium sized pancakes. Cook for two minutes or until small bubbles begins to form on the top. Flip and cook for another two minutes or until golden brown and set through. Repeat until you have used all the batter. You should end up with 9 pancakes.
Serve with your favorite pancake toppings and enjoy!
Video
Notes
**I love adding walnuts to this recipe, but pecans, blueberries, apples, chocolate chips and/or chopped peaches would also be delicious.
A delicious way to use up your summer zucchini; bake it into this easy and healthy zucchini bread recipe. Made with wholesome ingredients and lots of fresh zucchini, this homemade baked bread will become a fast family favorite.
Is Zucchini Bread Healthy?
That’s a great question that really depends on your recipe. If you are making a traditional zucchini bread with white flour and refined sugar, it’s not the most nutritious version of zucchini bread you can eat. But my zucchini bread is full of wholesome ingredients like whole wheat flour, coconut oil, coconut sugar, walnuts and of course, plenty of fresh grated zucchini.
No matter what type of flour, sugar and oil you choose, there is always something beautiful and nutritious about making something thats homemade and in season. Never under estimate the the nutrient-dense power of love.
Can I Make Zucchini Bread With Applesauce?
If you want to keep the recipe low-fat, you can certainly swap out the oil for some applesauce. It will add enough moisture to keep the zucchini bread nice and light and moist without having to use any oil.
You’ll also notice that I only use 1/2 cup of sugar for the entire recipe. I really like the subtle sweetness of this zucchini bread, I find it to be just perfect. But if you know that you like your zucchini bread extra sweet, you can consider stirring in some raisins or chocolate chips. Both would be delicious, add great texture, flavor and a bit of extra sweetness.
How Can I make Zucchini Bread Without Eggs?
To make this zucchini bread without using any eggs, simply swap in some chia eggs. Grind down your chia seeds in a food processor and then combine 1 tablespoon of ground chia seeds with 3 tablespoons of water for each egg needed. Allow to sit on the counter for five minutes or until it has thickened.
Chia eggs work really well in baked breads and muffins, so they are a great plant based option for this zucchini bread.
How To Make Healthy Zucchini Bread:
Pre heat oven to 350 Fahrenheit.
Grease a 9-inch loaf pan with coconut oil, butter or cooking spray.
Grate zucchini on the small holes of a box grater.
Combine white whole wheat flour, baking soda, salt, cinnamon, nutmeg and coconut sugar.
Whisk together eggs, coconut oil, unsweetened almond milk, and vanilla extract.
Add the wet ingredients in to the dry and stir well.
Stir in zucchini and walnuts
Transfer into prepared loaf pan and top with extra walnuts
1.5 cupshredded zucchini, (1 large or 2 small zucchini)
1/2cupchopped walnuts
Instructions
Pre heat oven to 350 Fahrenheit.
Grease a 9-inch loaf pan with coconut oil, butter or cooking spray.
Grate zucchini on the small holes of a box grater. Set aside.
In a large bowl, combine white whole wheat flour, baking soda, salt, cinnamon, nutmeg and coconut sugar.
In a medium bowl, combine eggs, coconut oil, unsweetened almond milk, and vanilla extract. Whisk together and then pour the wet ingredients into the dry and stir until everything is just combined and you have a nice thick batter.
Add the zucchini and walnuts to the batter and mix until evenly distributed.
Pour batter into prepared loaf pan and top with extra walnuts (if desired!).
Bake for 50 minutes or until set through and a toothpick comes out clean. Cool and enjoy!
Video
Notes
*Swap out the eggs for chia or flax eggs to keep this recipe 100% vegan.
Cold-brew iced tea is easy to make, super refreshing and has a clean, smooth finish that you just can’t get with traditional tea. Plus, you can make it ahead and keep it in your fridge for days.
There is nothing more refreshing than a glass of homemade iced tea on a hot summer day. It’s light, clean, and refreshing and could not be any easier to make.
Why Cold Brewing Makes The Best Iced Tea
Heat brings out the tannic, bitter flavors in tea (and in coffee!). Without the heat, you end up with a very smooth, light, and refreshing tea with a flavor that just can’t be beaten.
This is why I always cold brew my iced tea and recommend you do the same. Other than it being the best-tasting tea, it’s also the easiest to make.
Let me show you how.
How To Make Cold Brew Iced Tea
This method for making iced tea is as easy as it gets! I like to use one tea bag for every 8 ounces of water. If you like a super-strong brew, reduce the water to 6 ounces per teabag.
Place 8 tea bags in the bottom of a glass container or pitcher. I like using this container because it has a lid. But I also own a glass pitcher (similar to this one), which I use when serving friends and family.
Pour 8 cups of cold or room temperature water over the tea bags and give it a gentle stir.
Pop the lid on the container and place it in the refrigerator for a minimum of eight hours (maximum 12 hours).
Remove the tea bags and enjoy your tea.
Serve over ice with fresh lemon. Enjoy!
What Tea Should I Use For Making Iced Tea
For traditional iced tea, you want to use black tea. You can choose any brand that you like, but remember, the better the quality of the tea you use, the better the flavor will be for your iced tea.
I love using earl grey tea. Earl Grey is a black tea that is infused with bergamot oil which has a light, citrus flavor that makes for a delicious iced tea.
Also, keep in mind that you can use this method to make any type of iced tea you enjoy. Some of my favorites are green tea, lemon verbena tea, chamomile tea, peach tea, and/or mint.
How To Sweeten Iced Tea Without Sugar
I like to drink my iced tea slightly sweetened but I don’t like using white refined sugar to sweeten my tea.
Liquid Stevia
My personal favorite way to sweeten cold-brewed iced tea is with liquid stevia. Stevia is a sugar-free, plant-based substitute for traditional sugars that has no calories and will not affect blood sugar levels (this is the one I’ve been using).
It’s perfect for iced tea because it’s already in liquid form, so it stirs right into the tea. I find using somewhere between 6-8 drops makes for a perfectly sweetened glass of iced tea.
Honey
Another option for sweetening your iced tea without using refined sugar is to use honey. I find you can sweeten an entire batch of iced tea with just 3-4 tablespoons of honey (depending on your taste preferences of course!).
Just be sure that you add some warm water to the honey before stirring it into your iced tea. this way the honey will dissolve and easily stir into your iced tea without turning into honey clumps.
Light, refreshing cold brew iced tea is easy to make and perfect for a hot summer day. Try adding in some of your favorite fruits for even more fresh flavor.
This artichoke, asparagus and green bean salad combines ingredients from the pantry with ingredients from the garden to create an easy, light, fresh and delicious summer salad.
I love making this salad as a side dish to bring along to bbq’s and cookouts. It’s perfect for a potluck style get together.
Artichokes are one of my all time favorite vegetables. I grew up eating them. My Mom usually cooks them whole and then stuffs them.
When I make them myself, I love to steam them, quarter them and then finish them on the grill.
But sometimes, when time is not on my side, I am grateful that I can turn to my pantry for an artichoke shortcut.
Canned (or jarred) artichoke hearts are a delicious and easy way to work artichokes onto the menu without doing a ton of work. They’re perfect for salads just like this one, and are also great for sandwiches too.
How To Make Artichoke Asparagus + Green Bean Salad
Combine artichoke hearts, onions, garlic, lemon, olive oil, salt and pepper in a large bowl. Gently toss everything together and set aside.
Cut green beans and asparagus into one inch pieces.
Steam the green beans and asparagus until al dente.
Gently toss the hot veggies into the bowl with the artichoke hearts, onions, garlic, lemon, and olive oil.
This healthy, delicious Steamed Beet Arugula Salad comes together in just 15 minutes (hint: I buy my beets pre-steamed at the grocery store!). It’s layered with spicy arugula, pre-steamed beets, raw walnuts, sweet dried cranberries, and creamy goat cheese; and then simply tossed in a balsamic vinaigrette. A fresh and flavorful recipe that can be enjoyed on its own or alongside grilled chicken, fish, or steak.
Beet salad with arugula has been a favorite salad recipe of mine for years. Steamed beets have an earthy flavor with a touch of sweetness, plus they are super nutritious (more on that below!). The arugula provides a light peppery taste, the walnuts add the perfect crunch and the creamy, tangy goat cheese brings everything together.
Reasons why you will love this recipe:
Delicious & Versatile: Loaded with nutrient-rich, simple ingredients and tons of flavor, this healthy beet arugula salad recipe is a great main meal to enjoy on its own or accompanied by your favorite protein (I love it with my cast-iron salmon!).
Healthy: This salad is naturally gluten-free, vegetarian, and filled with antioxidants! Simply, omit the cheese to make it vegan.
Quick & easy to make: It’s so easy to prepare! You can roast or steam the beets ahead of time, or do what I do and take a shortcut by buying them pre-steamed at the grocery store. Then, combine all of the ingredients in a bowl.
Benefits of beets:
Beets are one of my favorite vegetables! I LOVE adding them to salads (have you tried my Beet Quinoa Salad? So good!) and I also make a bright and beautiful Beet Salad Dressing that is to die for! But not only are beets delicious, but they are really nutritious as well!
Good for your heart: Beets are rich in nitrates, which can help lower blood pressure and improve blood flow to your heart, reducing your risk of heart disease.
Boosts your energy: The nitrates in beets can also improve athletic performance by enhancing oxygen delivery to your muscles, which can increase endurance and reduce fatigue.
Promotes healthy digestion: Beets are a good source of fiber, which can help keep your digestive system regular and may also help lower cholesterol levels.
Supports brain health: The antioxidants in beets, particularly betalains, may have anti-inflammatory and neuroprotective effects, which may benefit brain health and cognitive function.
May reduce inflammation: Beets contain compounds that may help reduce inflammation in the body, which can lower the risk of chronic diseases.
Beets:Steamed beets are easy to make at home, or simply buy them already cooked in the produce section of your grocery store.
Walnuts: For a delicious nutty crunch packed with heart-healthy omega-3 fatty acids.
Dried cranberries: Adds a nice start flavor and chewy sweetness.
Goat cheese: Crumbled goat cheese provides a mild, tart creaminess that ties everything together.
Balsamic vinaigrette dressing: This is easy to whisk together with extra virgin olive oil, balsamic vinegar, dijon mustard, crushed garlic, and salt & pepper.
How to make this recipe
This beet and arugula salad is surprisingly easy to make. Here’s the simple method:
Combine the salad ingredients: Start by piling a bunch of arugula into a large bowl and then top with steamed (or roasted) beets, walnuts, dried cranberries, and goat cheese.
Make the dressing: In a small spouted cup or mason jar, combine extra virgin olive oil, balsamic vinegar, dijon mustard, garlic, salt, and pepper. Whisk or shake to combine.
Dress the salad & serve: Drizzle dressing over the salad and gently toss together. Adjust seasonings, serve, and enjoy!
Expert tips
To save time, buy the arugula pre-washed.
To truly enjoy this as a 15-minute recipe, buy pre-steamed beets in the produce section of the grocery store. It’s a great way to enjoy beets when you don’t have the extra time to roast or steam them yourself. If you can’t find them, steam your beets ahead of time to keep this recipe quick and easy.
Beets can easily stain your hands and whatever else they touch. It’s a good idea to wear plastic gloves when handling them.
Be sure not to dress the salad until you are ready to eat it. Arugula is a delicate green and will wilt quickly if the salad sits too long in the dressing.
You may not need to use all the dressing for the salad, so be sure to store the extra in an airtight container. This balsamic vinaigrette works on all types of salads, so having some extra on hand is super convenient.
Frequently asked questions
What pairs well with beets?
Beets pair well with a variety of foods. They are great with the arugula and goat cheese in this recipe and they also taste good with other root vegetables like carrots, onion, or radishes, as well as other greens like cabbage, celery, scallions, cucumber, spinach, and avocado.
What is the best way to eat beets?
Fresh, raw beets can be peeled and finely grated into salads for color or used as a garnish for soup and other meals. However beets are most often served roasted, boiled or steamed and cut into thin slices, cubes or chunks.
Variations
We love this arugula salad recipe as written, but it’s very flexible and easy to change up depending on what ingredients you have in your kitchen. Here are some options:
Greens: Not a fan of arugula? Any greens will work in this salad, from chopped romaine to baby spinach or a spring mix.
Nuts: Try toasting your nuts for extra flavor and use any nuts you like. Pecans, pistachios, or almonds are all great choices. Feel free to leave the nuts out if you have a nut allergy or just don’t prefer them.
Cranberries: Raisins are a great substitute for dried cranberries. They both have a similar shape, flavor, and texture.
Cheese: Feta cheese is a great substitute for goat cheese and doesn’t have such a strong flavor. You can also keep this dairy-free by omitting the cheese.
Storage recommendations
To get a head start, you can make the dressing in advance and then store it in an airtight container (a mason jar would be perfect) so everything is ready to go.
storage tip: If you plan to have leftover salad, store the dressing on the side and then put any leftover beet salad in an airtight container and pop it in the fridge for up to 2 to 3 days.
If you want to keep this salad dairy free, skip the cheese and add in some Kalamata olives. The olives will give you the same rich, buttery, salty flavor. This recipe serves two as a main meal or four as a side.
This raw zucchini salad with tomatoes and feta cheese is the perfect way to get fresh, seasonal ingredients onto your plate. I love finishing this salad with fresh basil and lemon zest, to create flavors that explode in your mouth.
If you have a garden and you live in the garden state (aka New Jersey) there’s a good chance you have an abundance of tomatoes and zucchini getting ready to flood your kitchen.
Working with fresh, seasonal ingredients is one of the best ways to create dishes that are both insanely delicious and super nutritious.
And remember, what grows together, goes together. So any ingredients that grow in the same season, will absolutely taste great together. That’s just the way mother nature designed it.
Is It Safe To Eat Raw Zucchini?
If you love raw zucchini, I have great news for you! It’s 100% safe to eat zucchini raw. Not only is it safe, it’s also really good for you.
Raw zucchini makes a great snack. Sometimes, I’ll slice my zucchini into rounds and then serve them alongside hummus or guacamole in place of crackers or chips.
Because zucchinis hold a lot of water, they make a super refreshing snack and also taste great in raw salads, just like this one.
A Few Tips for Working with Raw Zucchini
Trim off the ends. The ends can be tough and bitter, so be sure to cut them off.
Buy in season. You want your zucchini to be young, fresh and tender and the best way to ensure this is to buy in season.
Cut it thin.Cut the squash as thin as you possibly can. You can easily do this with a good sharp knife. Keeping them thin will ensure that the zucchini soaks up all the flavors.
Keep them at room temperature. You will get the most flavor from your zucchini when they are at room temperature (this is true of most summer produce). When you eat fresh, delicate flavors cold from the fridge you lose a lot of their flavor.
How To Make Zucchini and Tomato Salad
Making this zucchini and tomato salad is about as easy as it gets. Just be sure to use a nice sharp knife to cut your veggies. This will make your life a whole lot easier!
Start by slicing the zucchini super thin. If you have a manoline, you can use it. But I prefer a sharp knife.
Cut tomatoes in half. You can also do quarters if they are a bit larger.
Add sliced zucchini and tomatoes into a large bowl.
Season with lemon juice, extra virgin olive oil, feta cheese, salt and pepper. Gently mix together.
Finish with lemon zest, fresh basil and an extra drizzle of extra virgin olive oil.
This easy green smoothie is my “go-to” green smoothie recipe. It’s simple to make, jam-packed with greens, protein, and healthy fat, and oh-so-delicious!
I’ve shared lots of green smoothie recipes in the past, but this is the one I come back to time and time again. This really is my go-to green smoothie recipe.
If you follow me on Instagram, you may recognize this green smoothie. I’ve shared the recipe a few times but wanted to make it official by posting it here on the blog.
Side note: if you like day-to-day behind the scene type of content, be sure to follow along on Instagram.
How To Make My Go-To Green Smoothie
Let me show you just how easy it is to make this smoothie (and why it’s so nutritious!)
Start by grabbing a big handful of leafy greens and popping them in the bottom of your blender. I love using baby spinach because it’s tender and sweet, but you can really use any leafy green you have on hand. All leafy greens are anti-inflammatory and are packed with antioxidants, so we definitely want to include lots of them in our diet.
Next up is avocado. Loaded with heart-healthy fats, creamy, buttery avocados are delicious in a smoothie. Avocados are also rich in fiber, potassium, and vitamins B6 and C. They are said to be a natural mood booster.
Fresh mint is another key component of this smoothie. It elevates the flavor and brings a bright, fresh boost that you can only get from fresh herbs. Plus it’s great for digestion and absolutely delicious.
Frozen blueberries bring the perfect amount of sweetness without adding too much sugar to this smoothie. They are also jammed packed with antioxidants and add a good dose of energy to this meal.
Persian cucumbers are small, seedless crunchy cucumbers that contain lots of water and are great for hydration. I love how they add an easy, fresh flavor to this smoothie.
I love addingvanilla whey protein to this smoothie. It ramps up the amount of protein in the smoothie which helps to promote muscle growth and recovery. You can also use a plant-based protein if you prefer.
And then finally hemp seeds. Another great source of protein, hemp seeds also contain vitamins, minerals, and plenty of fiber. I love adding them into the smoothie and then sprinkling a few on top for texture.
You will also need some liquid. I usually go with unsweetened almond milk, but you can use any type of milk you love. Water would also get the job done.
If you are wanting to add more green smoothies into your diet, this is a great place to start. And if you’d like some more variety, be sure to check out some of these smoothie recipes as well:
This easy green smoothie is my “go to” green smoothie recipe. It’s simple to make, jam-packed with greens, protein and healthy fat and oh-so delicious!
Prep Time5 minutesmins
Total Time5 minutesmins
Course: BREAKFAST, drinks, LUNCH, protein shakes + smoothies
Gluten-free chocolate chip cookies are about to become your new go-to cookie recipe. They are 100% grain and flour-free and can easily be made dairy-free and vegan.
Crispy on the outside and gooey on the inside, they are everything you want in a chocolate chip cookie, and could not be any easier to make. This, my friend, is about as healthy as a chocolate chip cookie gets.
Best gluten-free chocolate chip cookies
Some of you may remember these cookies. They have been my go-to chocolate chip cookie recipe for years. Anytime I make these cookies, at least one person asks me for the recipe.
This is very understandable because they really are that delicious! Grab a pen and paper (or just hit the print button!) and prepare to make the best gluten-free chocolate chip cookie recipe you’ve ever had.
Ingredients in gluten-free chocolate chip cookies
The key to making a gluten and grain-free chocolate chip cookie is almond butter. One cup of all-natural almond butter creates the base for this cookie recipe and here’s everything else you’ll need to make these flourless cookies:
Almond butter – No flour or flour substitutes needed, just one cup of almond butter is the base of this cookie recipe.
Turbinado sugar – Sometimes called sugar in the raw, the granules in turbinado sugar are larger than most sugar varieties and add a nice texture to the cookies. This sugar also has a delicious light caramel flavor.
Egg – You’ll just need one egg in this cookie recipe. Organic, pastured eggs are best. To make this recipe vegan, see tips below.
Vanilla extract – Do NOT forget the vanilla. And use pure vanilla extract, not imitation. It’s worth it!
Baking soda+ kosher salt – to help these cookies bake up properly.
Chocolate chips – I typically use standard-sized semisweet chocolate chips, but feel free to use chunks or mini semisweet chips. I think dark chocolate or a combination of dark chocolate and semisweet chocolate would also be wonderful. To keep this recipe dairy free, be sure to use a dairy-free chocolate chip.
Ingredient substitutions
Nut butter – If you don’t have almond butter in your kitchen or you just aren’t a fan, you can sub with all-natural peanut butter.
Swap the sugar – I recommend the turbinado sugar for it’s wonderful texture and flavor, but you can definitely use coconut, granulated, or brown sugar, if you’d like. It’s a 1:1 substitute.
Egg – You can make these gluten-free cookies vegan by swapping the egg for a flax or chia egg. Instructions below.
Chocolate chips – Feel free to mix things up and use white chocolate chips, peanut butter chips, toffee chips, mint chips, caramel bits, or any other fun baking add-ins.
How to make gluten-free chocolate chip cookies
Other than being one of the most delicious cookies you’ll ever eat, these cookies are also crazy easy to make. This is a one-bowl, dump and stir recipe. My favorite kind!
Preheat oven and give your almond butter a good stir.
Combine almond butter, sugar, egg, vanilla, baking soda and salt in a large mixing bowl. Stir well until you have a nice thick cookie dough batter.
Add in the chocolate chips and gently mix them into the dough.
Scoop up one tablespoon of cookie dough and shape into a small round disc. Place on a rimmed baking sheet lined with either a silicone mat or parchment paper. Repeat until you have used all the dough. You will need to work in batches or use two baking sheets.
Bake cookies for 12 minutes or until they are golden brown on top and your kitchen smells amazing.
Cool and enjoy! These cookies are super delicate when they are hot, so be sure to let them cool completely before removing them from the baking sheet. This will be the hardest part of the cookie making process!
How to make gluten-free chocolate chip cookies vegan
I know that we have a good amount of vegans in the Clean & Delicious community, so I wanted to be sure that you could enjoy these cookies too!
It’s very easy to make this cookie recipe vegan.
The first focus is the egg. Simply swap the pastured egg for a chia or flax egg.
How to make a chia or flax egg
Grind up a few tablespoons of chia seeds or flax seeds, depending on what you use. (you can also purchase already ground chia/flax)
Scoop one tablespoon of ground flax/chia into a small bowl.
Add three tablespoons of water to the ground seeds and let it sit for 10 minutes.
Once the mixture as thickened and is gel-like, it’s ready to go.
When it’s time to add the egg in this recipe, simply add the seed mixture in its place.
Dairy-free + vegan chocolate chips
The other swap we need to make is the chocolate chips. Traditional chocolate chips will contain dairy, but this is a super easy fix.
Simply look for brands that are 100% vegan. If you’re not sure where to start, these chocolate chips would be perfect.
Tips for perfect gluten-free chocolate chip cookies
Follow the suggestions below and you’re sure to have the BEST gluten-free chocolate chip cookies of your life!
Stir almond butter. Do NOT dump out the oil that pools at the top of a new jar of almond butter when you make these cookies. Stir the oil back into the jar, so that your almond butter is smooth, creamy, and almost pourable. Be sure to stir all the way to the bottom of the jar.
Bake time + temp. Baking at 350ºF will guarantee your cookies bake at the perfect speed to get those crispy edges with a soft and chewy center. Bake for about 12 minutes, depending on how gooey you like the centers. Keep in mind, cookies continue to bake even after they are removed from the oven. Also, your bake time will vary depending on the size of your cookie. I baked my cookies for 12 minutes with great results.
Extra chocolate + flaky sea salt. Adding several extra chocolate chips on top of the cookies while they are still warm will make them look extra tasty. We also love to add a sprinkle of flaky sea salt to the tops of warm cookies. It really takes the flavor to the next level!
Bake on parchment or silicone. Parchment or a silicone baking mat makes for the most perfect cookies. Greasing the baking sheet creates an overly greasy foundation, which may cause your cookies to spread too much. Silicone baking mats will grip the bottom of your cookies to prevent them from spreading too much. The mats also promote even browning.
Cooling cookies. These cookies are very delicate when hot, so it’s important to let the cookies cool completely before removing them from the baking sheet.
How to store and freeze gluten-free chocolate chip cookies
To store: feel free to keep these gluten-free chocolate chip cookies in an airtight container at room temperature for 1-2 days, then transfer them to the fridge or freezer.
To freeze: make sure the cookies are completely cooled, and then transfer them to an airtight container lined with wax or parchment paper or a freezer-safe bag before storing them in the freezer for up to 2 months. I like to place them in a single layer to avoid any cookies breaking. Once ready to eat, simply thaw out at room temperature and enjoy!
If you make this delicious gluten-free chocolate cookie recipe, be sure to leave a comment and star rating below letting me know how it turned out. Your feedback is so helpful for me and our Clean & Delicious community (thank you!).
Start with a new jar of room temperature almond butter. Be sure to stir any oil that pools at the top back into the almond butter. You want the almond butter to be smooth, creamy and almost pourable.
In a large bowl, combine almond butter, sugar, egg, vanilla, baking soda and salt. Stir everything together until you have nice thick cookie dough.
Add in chocolate chips and gently stir, so they are evenly distributed throughout the batter.
Scoop up one tablespoon of cookie dough and shape into a small round disc using your hands (see video). Place on a rimmed baking sheet lined with either a silicone mat or parchment paper. Repeat until you have used all the dough. You will need to work in batches or use two baking sheets.
Bake for 12 minutes or until golden brown on top. Cool completely before removing from the baking sheet. They are very delicate when hot, so this is an important step. Enjoy!
Video
Notes
To make vegan: a flax or chia egg can be used in this recipe to replace the egg. Be sure to also use dairy free chocolate.To store: feel free to keep these gluten-free chocolate chip cookies in an airtight container at room temperature for 1-2 days, then transfer to the fridge or freezer.To freeze: make sure the cookies are completely cooled, and then transfer them to an airtight container lined with wax or parchment paper or freezer-safe bag before storing them in the freezer for up to 2 months. I like to place them in a single layer to avoid any cookies breaking. Once ready to eat, simply thaw out at room temperature and enjoy!
Three easy sandwiches that are perfect to pack for school or work. Choose between a green goddess sandwich, turkey hummus and radish sandwich or a flavor packed chicken pesto sandwich.
I love a good sandwich, so I partnered with my friends at Arnold bread to share some super simple and wholesome sandwich recipes to keep your lunch hour easy and delicious.
I love the Oatnut bread for sandwiches because it loaded with oats, nuts and seeds yet it’s still soft and delicious.
This is my bread because my whole family will eat and enjoy it. That my friends, is pure gold (and I know all of you Moms know what I mean).
Green Goddess Veggie Sandwich
How To Make A Green Goddess Sandwich
If you are wanting to find more easy and delicious ways to work more vegetables into your diet, this sandwich is for you. It’s the perfect combination of creamy and crunchy.
Next layer on some spicy watercress. The more the better!
Then line up some thinly sliced cucumber on top of the watercress.
Fan half of an avocado over the top of the cucumber.
Sprinkle on some hemp seeds for an extra dose of protein and fat.
Pop the lid on and enjoy!
Turkey Hummus + Avocado Sandwich
If you prefer a mix of veggies with some turkey, then this is the sandwich for you! It’s the perfect combination of savory turkey, creamy hummus, and crisp, crunchy vegetables. I love how the ArnoldⓇ Oatnut bread pairs with this sandwich because it’s nice and soft but still adds great texture to the nuts and seeds.
To finish things off, I love sprinkling a bit of everything bagel seasoning right over the top, to add one more layer of flavor.
How To Make Turkey Avocado + Radish Sandwich
Start by layering some butter lettuce on the bottom layer of your ArnoldⓇ Oatnut bread.
This chicken pesto sandwich screams New Jersey summer! Here in the garden state, tomatoes and basil grow tall during the summer months. I always have both growing in my small garden and am forever looking for ways to work them into the kitchen.
Needless to say, pesto is a recipe I come back to over and over again. It’s so simple, flavorful, and can be used in so many different ways.
This chicken pesto sandwich is the perfect example of how to put your pesto to work.
How To Make A Chicken Pesto Sandwich
Combine 1 cup of shredded or chopped chicken (rotisserie is perfect) with 1/4 cup pesto.
Season with some salt and pepper as needed
Next, layer some fat slices of tomato on the bottom layer of your ArnoldⓇ Oatnut bread.
Then, pile the pesto chicken salad on top of the tomatoes.
Pop the lid on and enjoy!
I hope you enjoy these sandwiches as much as I have. Can’t wait to hear which one you will try first!
If eating raw eggs makes you uneasy, this Caesar salad recipe is for you. This caesar salad is bright, fresh, full of flavor and much lighter than a traditional caesar salad.
I’m sharing my go-to recipe for healthy caesar salad dressing plus how-to make crispy roasted chickpeas (which is a fun, nutrient-dense swap for croutons!).
I’ve been a fan of caesar salad for years. I love the bright, fresh, briny flavor of a great caesar salad dressing and how they are are hearty enough to be a main meal, yet still fill light and satisfying.
I’m excited to share some of my tips for making your caesar salad super nutritious (and obviously, delicious!).
Let’s do this!
How To Make Lighter Caesar Salad
My approach to a lighter caesar salad starts with the dressing and finishes with roasted chickpeas.
I lighten things up in the caesar dressing by using a mix of plain Greek and mayonnaise as the base (no raw eggs in this recipe!).
Then, I kick up the nutritional profile by swapping out a traditional crouton with some crispy roasted chickpeas.
These simple swaps create a caesar salad that is lighter, fresher and even more delicious then the original.
How To Make Crispy Roasted Chickpeas
Pre-heat over to 400ºF.
Drain and rinse chickpeas.
Dry chickpeas by rolling them around on a lint-free dish towel.
Transfer onto a rimmed baking sheet.
Drizzle with olive oil and season with salt and pepper.
Toss them around to coat the chickpeas with the oil and spices.
Bake for 30 minutes, giving the pan a shake half way through.
That’s it! Not only do these crispy, plant based, roasted chickpeas taste great on caesar salad, but they are also a delicious snack.
Consider doubling the recipe and then storing the extra chickpeas in an airtight container. They make a fabulous head-start ingredient.
How To Make Lighter Caesar Salad Dressing
Combine plain Greek yogurt and mayonnaise in a small spouted cup or bowl.
Add in anchovy paste, garlic, dijon, Worcestershire, lemon juice, extra virgin olive oil, parmesan cheese, salt and pepper.
Stir everything together until you have a thick and creamy caesar dressing.
If you don’t use all the dressing on your salad, store the remainder in an airtight container (I like using mason jars). This dressing will last up to one week in your fridge.
How To Assemble Your Lighter Caesar Salad
Combine chopped romaine and fennel in a large bowl. The fennel is optional but trust me when I tell you it works do well in this salad.
Drizzle on the caesar dressing. You may not need it all, so start small and add as you go.
Toss the salad together, coating all of the veggies with the dressing.
Please leave a comment below and let me know what you think. Don’t forget to snap a picture and tag me on Instagram or FaceBook using #cleananddelicious. I just LOVE seeing what you are cooking in your very own clean and delicious kitchen.
1large(or two small) fennel bulbs, cored and sliced into quarter moons,(2 cups)
Instructions
Roasted Chickpea Croutons
Pre-heat over to 425°F. Spread the chickpeas on a clean dish towel and pat them dry. The drier, the better!
Place the dried chickpeas into a medium bowl and season with avocado oil, salt, garlic powder, and pepper. Toss them around to coat the chickpeas with the oil and spices
Transfer the seasoned chickpeas onto a small rimmed baking sheet (I reccomend 1/4 shee
Pop in the oven and bake for 30-35 minutes, or until golden brunch and crispy. Set aside to cool.
Creamy Caesar Dressing
Add garlic and anchovies to a small food processor and pulse until brolen down.
Add the Dijon mustard, yogurt, mayonnaise, lemon juice, Parmesan cheese, salt and pepper. Blend until you have a thick, creamy salad dressing.
Caesar Salad
Add romaine lettuce and fennel into a big bowl and gently toss to combine.
Add 1/3 cup salad dressing and gently toss to coat all of the greens in the dressing. Take a taste! If you like more dressing, add it now and toss again.
Sprinkle a little extra Parmesan cheese, black pepper and crunchyychickpea crouotns over the top. Serve and enjoy!
Video
Notes
Store extra dressing in an airtight container. It will last up to one week in your fridge!
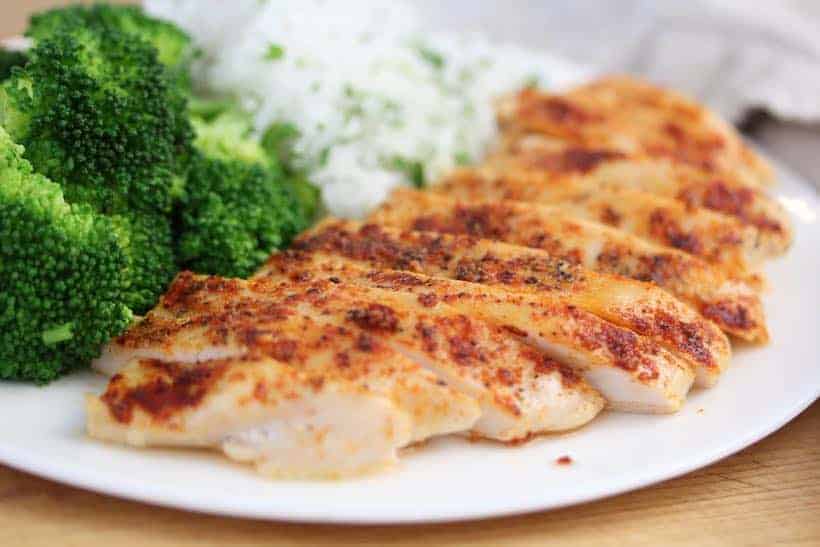
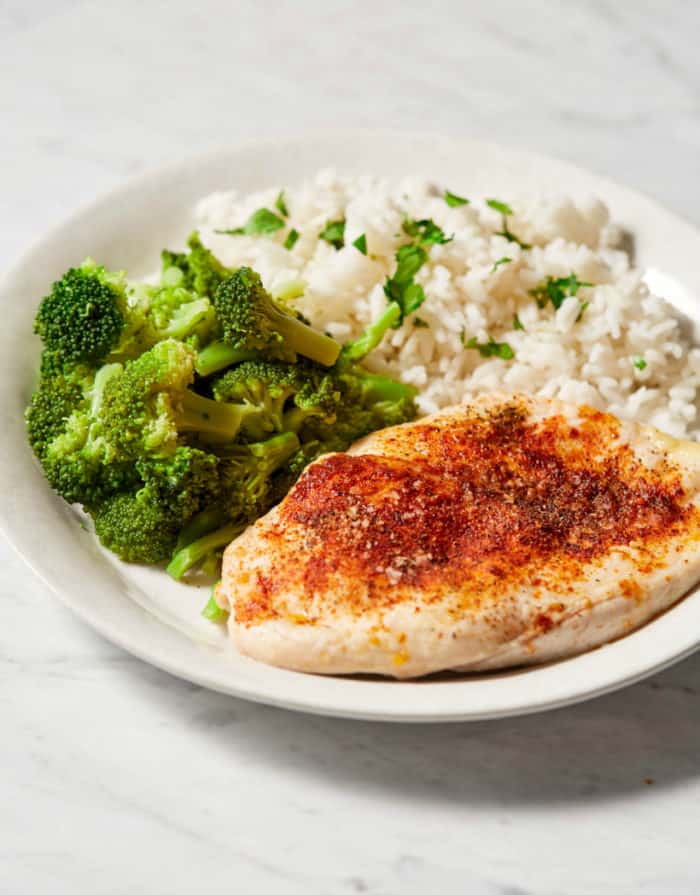
This lemon garlic baked chicken recipe is tender, juicy and super easy to make. A simple combination of fresh lemon juice, lemon zest, olive oil, garlic and herbs paired with some simple cooking tips creates a pop of flavor that your whole family will enjoy.
I know that a lot of you have given up on baking chicken breast. Their low fat content often results in dry, rubbery chicken that nobody wants to eat. But that does not need to be the case, these baked lemon chicken breasts come out juicy and delicious every time.
There are just a few simple tricks that you need to know to make a tasty chicken breast. So let’s jump to it!
Lemon Garlic Chicken Breast | What You Need
To make this baked chicken breasts recipe, you will need:
Boneless, skinless chicken breasts: You can but them fresh or frozen, just be sure to let them defrost and come to room temperature before baking. I like to look for organic pastured chicken, and often use chicken that comes in my monthly delivery from Butcher Box.
Olive oil: Don’t use your fanciest oil for this since we will be heating it. A standard olive oil will do the job.
Lemon: Fresh lemons are key. You will be using the juice and the zest, so buy organic if you can.
Garlic: Fresh garlic is key. I like to crush the garlic to release all the flavors.
Italian Seasoning: I love buying spice blends when I can. It’s an easy way to incorporate lots of flavors without breaking the bank.
Also, if you make baked chicken regularly in the oven, I recommend having a heavy, sturdy rimmed baking sheet and a cooking thermometer on hand.
A rimmed baking sheet is one of my most used kitchen essentials and a thermometer is the easiest way to ensure that your chicken is not over or under cooked.
These are the tools that I use and recommend:
Rimmed baking sheet: I use these pans for so many things in my kitchen and definitely consider them a kitchen staple.
Instant-read cooking thermometer: I just ordered this one on Amazon. It has excellent reviews and is reasonably priced at $10.99.
How To Make Lemon Garlic Baked Chicken
Lemon garlic baked chicken breasts are super easy to make and if you follow these easy steps, you can rest assured your chicken breasts will be tender and juicy each and every time.
Gently pound the chicken to create a uniform thickness all around. This step will help to ensure that the chicken cooks evenly and you don’t end up with any areas that are over or under cooked.
Make your marinade by whisk together lemon juice, lemon zest, olive oil, garlic, Italian seasonings, salt and pepper.
Pour the marinade over the chicken and let it sit for 20-30 minutes before you get it into the oven. The closer the chicken is to room temperature, the more tender and juicy your chicken will be.
Bake at 425ºF for 20-25 minutes, depending on how thick your chicken breasts are. If you are new to baking chicken, I highly recommend using your thermometer to make sure that you do not over cook your chicken. Pull the chicken out of the oven when the internal temperature of the meat reaches 160ºF (as the chicken rests, the residual heat from the chicken will raise the internal temperature to 165ºF, which is where you want the final temperature of your baked chicken to be).
Rest your chicken once it comes out of the oven. Yes, this is the hardest part, but it will give the juices an opportunity to redistribute and allow the chicken to come up to 165ºF without overcooking the chicken. If you cut in right away, you will lose all of the delicious juices and some of the tenderness that we’re going for.
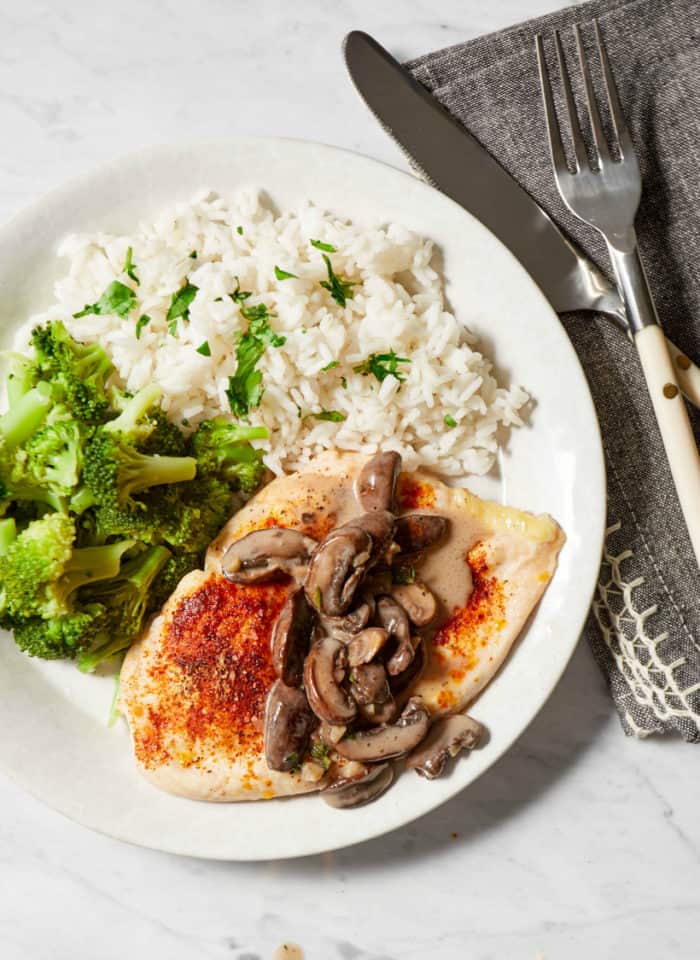
Creamy Dill Sauce for Your Lemon Baked Chicken
This lemon garlic baked chicken does not need extra sauce to add more flavor but I just love how it pairs with this creamy dill sauce. If you want to take the dish to the next level, I definitely recommend whipping up this sauce.
All you have to do is combine; plain Greek yogurt, fresh chopped dill, garlic, olive oil, salt and pepper.
Homemade guacamole is easy and delicious to make. All you need is avocados, onion, tomatoes, cilantro, green pepper, lime juice, garlic and salt. You will find yourself making this guacamole recipe over and over again. It’s just that good!
This guacamole recipe is as good as it gets. Simple, fresh and full of flavor! Using fresh, high quality ingredients is the secret to making your guacamole pop. No need to be fancy. Stick to the basics and get ready for a dance party in your mouth.
You will quickly see, homemade guacamole is a crowd pleaser. You can serve it with fresh veggies, corn chips, and margaritas (classic!). But it’s also great on tacos, over chili, or along side some grilled chicken.
No matter which road you travel, this guacamole recipe will not disappoint. So grab a pen and paper (or just print the recipe), and get ready to make the best guacamole ever.
How To Pick Ripe Avocados For Guacamole
It’s super important that your avocados are ripe if you want to make really good guacamole.
I like to use the ‘press test’. Place your thumb on your avocado and using gentle pressure, press into the skin. You want your avocado to be firm, but have some give.
Be sure that your avocados are not hard. And on the flip side, yo udon’t want them to be soft and mushy either.
Firm with some give. That’s how you know have a good avocado for great guacamole.
Guacamole Ingredients
The beauty of delicious, homemade guacamole is that you only need these few ingredients:
Avocados: bright green and firm with some give.
Lime juice: fresh is best
White onion: nice and mild with great crunch. Be sure to chop them small.
Tomatoes: beautiful, ripe tomatoes are the best. Remove the seeds so you don’t end up with wet guacamole.
Green pepper: I use a green bell pepper to keep the guacamole family friendly. But if you like heat, swap these out for some jalapenos.
Garlic: 1 big or 2 small cloves of garlic crushed.
Cilantro: I know, people either love it or hate it. If you hate it, you can skip it or try using parsley. Personally, I love it.
Kosher salt: with larger salt crystals than table salt, kosher salt is my favorite salt to use in the kitchen. You will use less salt over all, and I love the crunchy texture it has.
How Do You Make Homemade Guacamole?
Prepare yourself for the easiest recipe ever.
Cut your avocados in half, remove the pits and scoop the avocado out of the skin and into a bowl. Add a fat squish of fresh lime juice and then use the back of a fork and mash the avocados against the sides of your bowl. You can make your guacamole as chunky or creamy as you desire.
Next, add the onions, tomatoes, garlic, pepper, cilantro and salt and stir until everything is mixed together.
Pat yourself on the back my friend, you have just made some really good, homemade guacamole.
1/4cupdiced green bell pepperor jalapeo if you like spice
1-2clovescrushed garlic
2tablespoonsfresh chopped cilantro
1/4th teaspoon kosher salt
Instructions
Slice the avocados in half, remove the pit and scoop the avocado out of the skin and place in a mixing bowl.
Using the back of a fork, mash the avocado against the sides of the bowl until it rich and creamy. You can make your guacamole as smooth or chunky as youd like.
Add the remaining ingredients and stir together. Taste, adjust seasoning as needed and enjoy!
Video
Notes
Be sure to look for avocados that are nice and ripe. They should be easy to mash with the back of a fork.
Try adding some fun stir-ins to this classic guacamole recipe. I chopped mango, chopped pineapple or crumbled bacon are all delicious choices.
This gluten free carrot cake is the best! Moist, fluffy and deliciously spiced! It’s so easy to make from scratch with wholesome, clean eating ingredients. The perfect healthy treat for Easter, Mother’s Day or an ordinary weekday!
This healthy vegetable frittata is packed with roasted vegetables and is super easy to make. It’s a great recipe to add to your breakfast or brunch menu and is equally perfect for meal prep.
We love eggs in our home and I have found crustless quiche, egg bakes, and vegetable frittatas to be close to the perfect meal! Everyone loves these versatile egg recipes and so I’m always creating a new version! This easy-baked frittata recipe is loaded with veggies, packed with protein and healthy fats, and works well for breakfast, lunch, or dinner.
Vegetable frittata ingredients
This frittata recipe is made with nourishing ingredients that you can feel free to mix and match to truly make it your own. Here are the key ingredients:
Vegetables – For this frittata recipe, I am using zucchini, peppers, and onions, but feel free to use whatever vegetables you love or have on hand. This is such a flexible recipe!
Eggs – You’ll need a dozen large eggs for this recipe. I recommend organic pastured eggs.
Milk – I used whole milk because that’s what we had on hand, but you can use any milk of choice: skim, 2%, almond, or cashew milk.
Cheese – There’s something fabulous about the combination of goat cheese, veggies, and eggs. But, you can use any cheese you’d like. I think feta crumbles would be great too.
What pan is best for making a frittata?
Frittatas are very easygoing and can be made in a variety of different pans. You can use a cast-iron skillet, large sauté pan, muffin cups, or a baking dish.
Each pan or dish will create a delicious vegetable frittata, so use what you have on hand or prefer. You will need to adjust the cooking time, depending on the pan you use. I cooked my vegetable frittata in a 9×13″ baking dish and it took about 30 minutes. You will know your frittata is done when the eggs puff up and the center is set.
If you use a cast-iron skillet or sauté pan, the cooking time will be similar (although you, of course, want to keep an eye on it) and if you opt for muffin cups, they should be done in about 20 minutes.
How to roast veggies
You definitely want to pre-cook any vegetables that you’ll be adding to your frittata, otherwise, they’ll leach water if they cook in the egg mixture and make your frittata watery. I find the easiest way to cook the veggies is by roasting them. Here’s my method:
Chop the veggies. Start by chopping all the veggies into fairly uniform size pieces, so they cook evenly.
Oil + season veggies. Add the veggies to a large bowl, drizzle with avocado or olive oil and season with salt and pepper. Toss so veggies are coated with oil and salt and pepper.
Cook. Transfer the vegetables to a rimmed baking sheet and spread them out evenly. Roast at 425ºF for 30 minutes, flipping them halfway through.
How to make this vegetable frittata
Once your veggies are roasted, this breakfast frittata is super quick and easy to put together! Here’s a quick rundown of the recipe:
Reduce the oven temperature and prepare your pan. Set the oven at 350ºF and grease your pan with butter, coconut oil, or cooking spray.
Whiskeggs. In a large mixing bowl, whisk together eggs, milk, salt and pepper.
Addroasted veggies. Stir cooled veggies in with the egg mixture.
Transfer into prepared pan. Pour the egg and veggie mixture into the pan and top with dots of goat cheese and sliced scallions.
Bake. Pop in the oven and bake for 30 minutes or until the eggs have puffed up and are set through the center. Serve and enjoy!
Customize your vegetable frittata
Feel free to mix and match veggies and ingredients in this versatile frittata recipe. Here are a few options to try:
Protein. The recipe as written is vegetarian, but sometimes I like to add in some cooked turkey sausage, cooked diced ham or cooked crumbled bacon.
Vegetables. You can add to the veggies in the recipe or swap any of them out with your favorite cooked vegetables. Some ideas: spinach, mushrooms, baby potatoes, broccoli, asparagus and carrots. Just make sure they are chopped up well and cooked before adding them to the mix.
Cheese. Feel free to omit the cheese to make this recipe dairy-free. You can also swap out the goat cheese with crumbled feta, shredded cheddar cheese or shredded pepper jack.
What to serve with your breakfast bake
This easy breakfast bake recipe pairs well with a variety of breakfast sides! Below are some of my favorite options:
This healthy vegetable frittata is perfect for meal prep on Sunday! Leftovers keep well in the fridge and you can enjoy slices of this for breakfast for the next 5 days without having to do any additional cooking!
Storing leftovers. Place any leftover frittata in an airtight storage container in the refrigerator for up to about 5 days.
To reheat. Pop individual servings in the microwave and cook for 30-second intervals until warm. You can also place the casserole dish in the oven at 350ºF. If using the oven, loosely cover with foil and place the dish on the center rack for 15 to 25 minutes, until warmed through (the larger the serving, the longer the cooking time).
Freezing. Place leftovers in an airtight freezer-safe storage container or a freezer-safe baggie in the freezer for up to 3 months. Let thaw overnight in the refrigerator before reheating.
Thishealthy vegetable frittata is packed with roasted vegetables and is super easy to make. It's a great recipe to add to your breakfast or brunch menu and is equally perfect for meal prep.
Grease a 9×13" baking pan with butter, coconut oil or cooking spray.
Place chopped onion, peppers, zucchini, garlic in a large bowl. Drizzle with avocado oil and season with salt and pepper. Toss everything together and transfer the veggies onto a rimmed baking sheet. Bake for 30 minutes, flipping the vegetables half way through.
Remove veggies from the oven and allow to cool. Reduce cooking temperature to 350 degrees farenheit.
Meanwhile, in a large bowl, whisk together eggs, milk, salt and pepper.
Add cooled veggies to the egg mixture and transfer into prepared pan and top with dots of goats cheese and sliced scallions.
Pop in the oven and bake for 30 minutes or until the eggs have puffed up and are set through the center. Serve and enjoy!
Video
Notes
Storing leftovers. Place any leftover frittata in an airtight storage container in the refrigerator for up to about 5 days.To reheat. Pop individual servings in the microwave and cook for 30 second intervals until warm. You can also place the casserole dish in the oven at 350ºF. If using the oven, loosely cover with foil and place the dish on the center rack for 15 to 25 minutes, until warmed through (the larger the serving, the longer the cook time).Freezing. Place leftovers in an airtight freezer-safe storage container or a freezer-safe baggie in the freezer for up to 3 months. Let thaw overnight in the refrigerator before reheating.Inspired by this recipe.
Crispy baked tofu is a delicious source of plant-based protein that is super easy to make! It’s crispy on the outside, tender and creamy in the center and you can customize the flavoring with your favorite sauces and seasonings.
We don’t eat a ton of tofu in our house, but once in a while I like to make this family-friendly, crispy baked tofu as a fun, plant based protein option.
There are so many ways to make tofu but I find baking it in the oven is fool-proof. I also love that I can prep the rest of my meal while it’s baking, making it a very practical option for a busy weeknight.
But first things first….
What Type of Tofu Should You Buy?
Look for extra-firm, non-gmo, organic tofu. This is what I buy whenever I make crispy baked tofu.
The majority of soybeans grown in the U.S are genetically modified and treated with fertilizers, herbicides and insecticides (yuck!). An easy way to avoid this is to look for non-gmo and organic labels on your tofu. It’s usually easy to find and doesn’t cost too much more than conventionally grown tofu.
You will also notice that tofu comes in a few different textures; soft, firm and extra firm being the most common.
The firmer the tofu the less water content it holds. This is why extra firm tofu is the best choice for making crispy tofu. The drier your tofu is, the crispier it will be.
Should You Press Your Tofu?
The short answer is yes!
Remember, the drier the tofu the crispier it will be, and pressing the tofu helps to press out even more water.
Once you have your tofu cut into bite sized pieces, lay them between two lint-free dish towels and then look around your kitchen for some heavy objects. I start with a rimmed baking sheet and then top it with my cast iron skillet (does the trick every time!). You can also use a tea kettle or some canned soup or beans to help add some extra weight.
How To Season + Bake Your Baked Tofu
Place tofu cubes in a large bowl.
Toss with a tablespoon each of low sodium tamari and avocado oil.
Sprinkle a bit of cornstarch over the top and mix well.
Lay the tofu out on a rimmed baking sheet, being careful not to overcrowd.
Bake for 30 minutes, flipping tofu half way through.
Serve and enjoy (or add some extra sauce and seasonings!).
Delicious Ways To Enjoy Baked Tofu
You can of course enjoy these crispy little baked tofu bites, just as they are, straight of the oven. The are simple, delicious and rather addicting.
BUT, it’s also super fun to finish them with some other sauces (store-bought or homemade). A few of our family favorites are baked buffalo tofu bites, bbq tofu bites and teriyaki tofu bites.
Baked Buffalo Tofu Bites
If you’re looking for a meatless Monday alternative to buffalo wings, this is the recipe for you.
Here’s all you need to do:
Follow the recipe below to make crispy baked tofu bites.
Combine 2 tablespoon hot wing sauce with 1 tablespoon blue cheese dressing.
Gently toss to the tofu in the sauce to coat.
Serve along side cut up carrots and celery with extra blue cheese for dipping.
Enjoy!
Baked Teriyaki Tofu Bites
Follow the recipe below to make crispy baked tofu bites.
Add 2 tablespoon of teriyaki sauce to a bowl (I like this one).
Gently toss to the tofu in the sauce to coat.
Serve on top of some brown rice and steamed broccoli.
Sprinkle sesame seeds over the top and enjoy!
Baked BBQ Tofu Bites
Follow the recipe below to make crispy baked tofu bites.
Please leave a comment below and let me know what you think. And don’t forget to snap a picture and tag me on Instagram or FaceBook using #cleananddelicious. I just LOVE seeing what you are cooking in your very own clean and delicious kitchen.
Chopped BBQ tofu salad is topped with saucy bites of baked bbq tofu, black beans, corn, tomatoes, red onion and ranch dressing. So simple and So delicious.
After making my crispy baked tofu bites, I wanted to find some fun and flavorful ways to flavor the tofu and so into a bowl of bbq sauce they went.
Because the BBQ tofu bites reminded me of BBQ chicken, I immediately knew I wanted to use them on a salad, and that my friends, is how this BBQ tofu salad was born.
Please leave a comment below and let me know what you think. And don’t forget to snap a picture and tag me on Instagram or FaceBook using #cleananddelicious. I just LOVE seeing what you are cooking in your very own clean and delicious kitchen.
Learn how to make super fluffy Coconut Flour Pancakes in just 15 minutes! This is a naturally gluten-free recipe that is higher in fiber and protein while being lower in carbohydrates compared to traditional pancakes. The perfect healthy breakfast for busy weeks that should keep you feeling satisfied for hours.
The secret to making super fluffy coconut flour pancakes is a full tablespoon of baking powder. I know this sounds like a lot, but this is the ingredient that will give your pancakes a light, tender texture when cooking (I use the same technique when making my super fluffy vegan pancakes!)
Coconut flour is rich in protein and fiber and is agreat choice for anyone wanting a low-carb, grain-free flour that is also nut-free.
It’s made from the pulp of the coconut that’s leftover after making coconut milk. The pulp is dried out and ground up into a fine, soft flour, which is great for making light, fluffy pancakes.
Because coconut flour is rich in protein, fiber, and fat; coconut flour pancakes tend to be super satisfying and keep us feeling satiated for longer periods.
It is important to note that because of its high fiber content, recipes using coconut flour tend to require less flour and more liquid (eggs and/or milk) than their traditional counterparts. Coconut flour can’t be substituted 1:1 in recipes that call for other types of flour (nor can you use other types of flour to make coconut flour pancakes).
Ingredients Needed:
These coconut pancakes are made with simple, wholesome ingredients that you probably already have in your kitchen. Here’s the lineup:
Coconut flour – The base of this pancake recipe. Do NOT try to make any different flour substitutions.
Baking staples – You’ll need some vanilla extract for flavor, a pinch of salt to pull the flavors together and a full tablespoon of baking powder to help the pancakes rise.
Almond milk – I like to use unsweetened vanilla almond milk, but you can use any milk you’d like.
Eggs – This pancake recipe calls for 2 eggs. Coconut flour really works best with real eggs, so I don’t recommend trying flax or chia eggs as a substitute.
Maple syrup – For a little added sweetness.
How to Make Pancakes with Coconut Flour
Making pancakes with coconut flour is just as easy as any other pancake recipe. Here’s the simple process:
For the full, printable recipe, reference the recipe card at the bottom of the page.
Combinedry ingredients. Stir together the coconut flour, baking powder and salt in a large bowl.
Mix wet ingredients. In a separate bowl, whisk almond milk, eggs, vanilla and maple syrup. Add the wet mixture to the dry ingredients and gently stir until everything has come together.
Cook. Measure out batter using a 1/4 cup measuring cup for each pancake and cook for about 2-3 minutes on each side, until the edges begin to puff and the bottom is golden brown. Repeat until you have worked through all the batter.
Serve. Enjoy with toppings of your choice!
Tips for Recipe Success
This recipe is pretty straightforward, but I do have a few pancake-making tips to give you the most perfect pancakes.
Thick batter. Coconut flour pancake batter is naturally thick, but if it’s TOO thick, simply add a bit more almond milk.
Small pancakes. Because the batter is more delicate than traditional pancake batter, it’s important to make smaller (1/4-cup) pancakes, so you can flip them easily.
Make extras. If you want to make a large batch for more hungry mouths or ready-to-go breakfasts later, you can easily double or triple this recipe.
Pancake Toppings
Feel free to change up your pancakes with fun, tasty pancake toppings. Here’s some options:
Can you Substitute the Coconut Flour for a Different Flour?
I do NOT recommend making substitutions with this recipe. Coconut flour is very unique and requires more liquid than other flours for structure. If you want a pancake recipe using a different flour, try one of the following options:
Coconut flour tastes a bit like unsweetened coconut. With the addition of vanilla, maple syrup and any toppings you add, coconut flour pancakes have a very subtle coconut flavor.
Is this Recipe Keto Friendly?
Coconut flour pancakes are great for anyone on a low-carb, grain-free and/or keto diet. There are just 4 grams of net carbs for every two tablespoons of coconut flour. You can omit the maple syrup in this recipe to further lower the carbs in these pancakes.
How to Keep Pancakes Warm
Place cooked pancakes on a baking sheet in a 200ºF oven to keep them warm while you finish cooking all of the batter.
Can you Freeze these Pancakes?
Yes! These naturally gluten-free, dairy-free pancakes are great to make ahead of time and freeze for a later date. Once pancakes have cooled, transfer them to a baking sheet, so they aren’t touching, place in the freezer for 30 minutes, and then place them in freezer-safe airtight containers; freeze for up to 3 months. No need to thaw when you’re ready to eat, just add the pancakes to a plate and microwave for 30-60 seconds or until warm.
Storing Leftovers
Store any leftover pancakes in an airtight container in the refrigerator for up to about 1 week.
More Coconut Flour Recipes
Looking for more recipes using coconut flour? Give these other favs a try:
Thanks so much for reading! You can watch the video down below and if you make this recipe I would love for you to give it a ★ rating below. And be sure to follow me on YouTube, Instagram, and Facebook for more healthy food inspiration.
Learn how to make super fluffy Coconut Flour Pancakes in just 15 minutes! This is a naturally gluten-free recipe that is higher in fiber and protein while being lower in carbohydrates compared to traditional pancakes. The perfect healthy breakfast for busy weeks that should keep you feeling satisfied for hours.
In a large bowl, combine coconut flour, baking powder and salt. Gently whisk all ingredients together with a fork.
In a separate bowl or spouted cup combine almond milk, eggs, maple syrup and vanilla extract.
Add the wet ingredients to the dry ingredients and gently stir until everything has come together.
Heat a medium non-stick skillet over a medium heat and coat with butter or coconut oil. Scoop 1/4 cup pancake batter and pour into the pan to form a small to medium-sized pancake. Cook for 2-3 minutes or until the edges begin to puff and the bottom is golden brown. Flip and cook for another two minutes or until cooked through. Repeat until you have worked through all the batter.
Serve pancakes with your favorite toppings and enjoy!
Video
Notes
This recipe makes 6 small to medium-sized pancakes. One serving is 3 pancakes or half of the recipe.
Nothing says good morning like a stack of healthy Almond Flour Pancakes made in just 15- minutes and served with your favorite toppings! This is an easy, low-carb, and keto-friendly breakfast recipe that uses a combination of almond flour and tapioca flour to create a light, sweet, fluffy pancake your whole family will love.
If you want your Almond flour pancakes to be super fluffy, this grain-free and gluten-free pancake recipe are for you! The naturally sweet flavor from the almonds creates a delicious base and the healthy fats help to keep you satiated for hours. My family loves eating these paleo-friendly pancakes topped with a pat of pastured butter and maple syrup.
Why you’ll love this recipe
Versatile: These pancakes are easily adaptable for a variety of diets. They are naturally gluten free, grain-free, dairy-free, paleo and keto-friendly.
Easy: Ready in minutes, these easy almond flour pancakes are ideal for whenever you’re wanting a simple and quick breakfast! Mix ingredients in bowls, combine and cook, that’s it!
Healthy: This pancake recipe is naturally sweetened, made with wholesome ingredients and packed with healthy fats and fiber to keep you full and satisfied.
Perfect for meal prep: These are great for prepping breakfast ahead of time! Just cook, cool, and store the pancakes in the refrigerator or freezer until you’re ready to enjoy!
Ingredients needed
This low-carb almond flour pancake recipe uses minimal ingredients that are super nutritious, yet these still taste amazing! And we’re using a combination of almond flour and tapioca flour to make them super light and fluffy. Here’s everything you’ll need:
Almond flour: Almond flour is made from blanched almonds that have been ground up into a fine meal. It’s a naturally gluten-free, low-carb flour which is why we often see it used in paleo recipes or grain-free baking. I really love Bob’s Super Fine Almond Flour as it creates a nice light texture. You can learn more about almond flour here.
Tapioca starch: Tapioca starch and tapioca flour are the same things. It’s a starchy, slightly sweet flour that comes from the cassava plant, and it works really well as a thickener. I love adding it to grain-free batters, like these pancakes.
Baking powder: To help these get nice and fluffy.
Salt: Just a pinch to bring the flavors together.
Milk: You can use any preferred milk. To keep these dairy free, we recommend using almond or cashew milk.
Egg: One egg will add structure and fluffiness.
Maple syrup: To add a natural sweetness. For a keto/low-carb option, swap the maple syrup for a sugar-free maple syrup like this one.
Vanilla extract: For a delicious, subtly sweet flavor.
How to make Almond Flour Pancakes
Pancakes made with almond flour are incredibly easy to make and come together in just a few minutes. Here’s the simple method:
For full, printable instructions, reference the recipe card at the bottom of the post.
Combine dry ingredients: Whisk together the almond flour, tapioca flour, baking powder and salt in a large bowl.
Mix wet ingredients: Stir together the almond milk, egg, maple syrup and vanilla extract in a separate bowl or spouted cup.
Combine liquid ingredients with dry ingredients: Add the wet ingredients to the dry ingredients and gently stir until everything has come together.
Cook pancakes: Heat a medium non-stick skillet over medium heat and coat with butter or coconut oil. Scoop 1/4 cup pancake batter and pour into the pan to form small to medium-sized pancakes. Cook until the edges begin to puff and the bottom is golden brown. Flip and cook the other side until cooked through.
Serve: Enjoy the flapjacks with your favorite pancake toppings! I love bananas and maple syrup with these.
Tips for recipe success
This recipe is simple and straightforward, but here are a few pancake-making tips for perfection every time.
Blanched almond flour: We recommend using super fine blanched almond flour to keep these pancakes super fluffy and light. You can use almond flour that is not blanched, but the end result will be a little more dense.
Don’t press down on the pancake: It’s best not to press down on the pancakes with the back of your flipper, while they’re cooking. This can cause the pancake to flatten and it won’t help them cook any faster.
Only flip once: Flipping the pancakes back and forth causes them to deflate and become dense, so when it’s time to check if they’re done on bottom, just barely lift them to take a peek.
Warm pancakes: If you’re cooking breakfast for a group, keep these warm until they’re ALL ready by placing them on a large baking sheet in a 200 degree oven.
Frequently asked questions
How healthy is almond flour?
Almond flour is incredibly nutritious and a great alternative for anyone on a gluten free diet. It’s chock full of vitamins and nutrients. It is rich in magnesium and Vitamin E, as well as manganese, copper, and phosphorus.
Why are my almond flour pancakes falling apart?
If your pancakes are falling apart, it’s probably because you didn’t let them cook long enough before flipping.
How many carbs are in almond pancakes?
If you use maple syrup to sweeten these pancakes they will 14 grams net carbs. However, if you use stevia or monk fruit that will lower the carbs to 10 net carbs.
Storage recommendations
Storing: Leftovers can be stored in an airtight container or bag in the refrigerator, for up to five days.
Freezing: Place the cooked and cooled pancakes in a freezer safe bag or container and store in the freezer for up to 6 months.
Reheating: To reheat from frozen, you can either heat them in a toaster oven, microwave, or a warm oven. You can also reheat without thawing them first.
If you make and enjoy this recipe, be sure to leave a comment and ★ rating below letting me know how they turned out. Your feedback is so helpful for me and our Clean & Delicious community (thank you!).
Nothing says good morning like a stack of fluffy Almond Flour Pancakes served with your favorite toppings! This healthy pancake recipe is so easy to mix up and yields light, fluffy pancakes with the most amazing flavor. Get ready for a delicious, satisfying breakfast that everyone in your family will love.
1cupalmond flourI like Bobs blanched super fine almond flour*
2tablespoonstapioca starch
1teaspoonbaking powder
Pinchof kosher salt
1/3cupunsweetened almond milk
1egg
1tablespoonsugar-free maple syrup
1teaspoonvanilla extract
Instructions
In a large bowl combine almond flour, tapioca flour, baking powder and salt. Gently whisk all ingredients together with a fork.
In a separate bowl or spouted cup whisk together the almond milk, egg, maple syrup and vanilla extract.
Add the wet ingredients to the dry ingredients and gently stir until everything has come together.
Heat a medium non-stick skillet over a medium heat and coat with butter or coconut oil. Scoop 1/4 cup pancake batter and pour into the pan to form a small to medium sized pancake.
Cook for 2-3 minutes or until the edges begin to puff and the bottom is golden brown. Flip and cook for another two minutes or until cooked through. Repeat until you have worked through all the batter. Serve + enjoy!
Video
Notes
*Blanched almond flour keeps these pancakes super light and fluffy. You can use almond flour that is not blanched, but the end result will be a little more dense.
Storing: Leftovers can be stored in an airtight container or bag in the refrigerator, for up to five days.
Freezing: Place the cooked and cooled pancakes in a freezer safe bag or container and store in the freezer for up to 6 months.
Reheating: To reheat from frozen, you can either heat them in a toaster oven, microwave, or a warm oven. You can also reheat without thawing them first.
Avocado egg salad uses creamy avocado in place of mayonnaise to put a delicious and nutritious twist on your classic egg salad.
This avocado egg salad recipe uses just a few simple ingredients; hardboiled eggs, avocado, finely diced veggies, fresh dill, lemon and some salt and pepper to taste.
It’s very similar to my classic egg salad, but instead of the mayonnaise, I use rich and creamy avocado.
How To Make Avocado Egg Salad
Scoop the flesh of one large avocado into a bowl along with a squish of lemon and pinch of salt.
Mash the avocado along the side of the bowl, using a fork, until creamy.
Add hard boiled eggs and hardboiled egg whites into the bowl.
Toss in diced vegetables, fresh dill, salt and pepper.
Stir everything together until well combined.
Serve in a lettuce cup, on your favorite bread or on top of a big fat salad.
How To Make Perfect Hard Boiled Eggs
Place eggs in the bottom of a stainless steel pot, add enough water to come one inch above the eggs.
Bring eggs to a boil, shut off the heat, pop on the lid and set your timer for 10 minutes*.
In the mean while, set up an ice bath by filling a large bowl with ice cubes and cold water.
After the timer goes off, use a slotted spoon to remove the eggs from the pot and place into the ice bath.
Once the eggs are cool enough to handle, peel off the shells.
*Note: if you prefer a creamier yolk, set your timer for 8 minutes instead of 10
How To Meal Prep Avocado Egg Salad
Avocado Egg salad is a healthy, delicious meal to add to your weekend meal prep, but because avocados will oxidize and turn brown, so it’s best to enjoy this salad within two days of making it.
Once it’s prepped, transfer into an airtight container and store it in the fridge.
If you wanted to make it last longer, prep all of the ingredients except the avocado. Then when it’s time to eat your salad, you can prep the avocado on the spot. This will allow the salad to last up to 5 days in the fridge.
5 Ways To Eat Avocado Egg Salad
Piled on your favorite bread with lettuce and pickles
Layer baby spinach on a rice thin and top with avocado egg salad
This classic egg salad recipe can be enjoyed for breakfast, lunch, or dinner. I love it on an open faced sandwich, wrapped in a lettuce cup or scooped onto a big fat salad.
Egg salad is a recipe that I like to make all year round, but I especially in the spring time when I have Easter on the brain.
This classic egg salad recipe uses just a handful of ingredients; hardboiled eggs, mayonnaise, finely diced veggies, fresh dill and some salt and pepper to taste. I like to use both hardboiled eggs and egg whites to add a little extra protein to the dish.
How To Make Classic Egg Salad
Start by chopping four hard boiled eggs and four hardboiled egg whites into bite sized pieces. If you prefer to use all eggs and no whites, sub in two eggs for the four whites (you will have 6 eggs in total).
Place eggs in to a big bowl and add in diced vegetables, mayonnaise, fresh dill, salt and pepper. If you want to lighten the dish up a bit, you can sub half to all of the mayonnaise for greek yogurt. This will reduce the fat and increase the protein as well.
Serve in a lettuce cup, on your favorite bread or on top of a big fat salad.
How To Make Perfect Hard Boiled Eggs
Place eggs in the bottom of a stainless steel pot, add enough water to come one inch above the eggs.
Bring eggs to a boil, shut off the heat, pop on the lid and set your timer for 10 minutes*.
In the mean while, set up an ice bath by filling a large bowl with ice cubes and cold water.
After the timer goes off, use a slotted spoon to remove the eggs from the pot and place into the ice bath.
Once the eggs are cool enough to handle, peel off the shells.
*Note: if you prefer a creamier yolk, set your timer for 8 minutes instead of 10.
How To Meal Prep Egg Salad
Egg salad is a healthy, delicious meal to add to your weekend meal prep and will happily last for 3 to 5 days in your refrigerator.
Once you are finished preparing your egg salad, transfer it into an airtight container and store it in your fridge.
If you pack your egg salad for lunch, be sure to include an ice pack. Egg salad is safe to eat for up to two hours at room temperature, but any time after that, is not recommended.
How To Tweak Egg Salad For Your Diet
Egg salad is naturally a very healthy, nutritious meal but for those of you with specific dietary needs, here are some easy tweaks.
Keto egg salad, skip the egg whites and use all whole eggs
Braised red cabbage with apples and onions is sweet, sour, buttery and tender. I love serving it along side roasted chicken or baked salmon.
Braised Red Cabbage with Apples and Onions
The first time I ate braised red cabbage was at Houston’s (a very delicious restaurant) over ten years ago. I immediately fell in love with this tender, flavorful side dish and have been making it at home ever since.
It’s simple to cook, delicious, nutritious and CHEAP!
I also love that braised red cabbage gets better with time. It’s a great recipe to add to your weekend meal prep.
The Health Benefits of Red Cabbage
Red cabbage, also known as purple cabbage, is a cruciferous vegetable that’s delicious both raw and cooked. Think coleslaw in the summer and braised cabbage in the winter.
Rich in Vitamins K, A and C; red cabbage is a powerful immunity booster that has also been said to fight inflammation and arthritis.
And the color! Did you know that antioxidants are concentrated in brightly colored foods? So the bright, beautiful magenta color of your red cabbage is also fighting free radicals in your body.
How To Prepare Braised Red Cabbage
Red cabbage is very easy to work with.
Start by rinsing under cold water. Next remove any outer leaves that look bruised or torn. Then, trim the stem off of the cabbage, stand it up straight and cut in half.
Next, use a sharp knife to cut down on an angle on each side of the core. The core is tough and will pop right out.
Finally lay your cabbage flat side down and cut into thin ribbons. Easy peasy!
How to Cook Braised Red Cabbage
The secret to cooking tender braised red cabbage, is to cook it low and slow.
Melt one tablespoon of butter in a cast iron skillet
Add onions and a pinch of salt and saute for 6-8 minutes
Toss in apples and garlic, season with salt and pepper, stir and cook for 2 minutes
Next, add in the red cabbage, balsamic vinegar, honey and a splash of water
Slowly simmer the cabbage for 30 minutes, stirring every so often.
Turn off the heat, adjust seasonings and top with goat cheese and fresh parsely to a serving dish and top with dollops of goat cheese and fresh chopped parsley. Enjoy!
An easy-baked chicken breast recipe is a great kitchen basic to have in your back pocket. Deliciously seasoned baked chicken breast is satisfying and tasty served with your favorite side dish (think popcorn broccoli or creamy garlic mushrooms) and it’s the perfect protein to add to your weekend meal prep.
Baked Chicken Breast
Boneless, skinless baked chicken breast tends to get a bad wrap. Often times it’s overcooked, leaving the chicken dry and flavorless.
But, I promise you, this does not need to be the case and I would never encourage someone to choose health over flavor when we can have them both!
The good news is, making juicy baked chicken breast is very easy to do, once you know these simple chicken-baking techniques.
Let’s bake up some flavorful, juicy chicken!
What You Will Need
To make this baked chicken breast recipe, you will need:
Boneless, skinless chicken breasts: You can buy them fresh or frozen, just be sure to let them defrost and come to room temperature before baking. I like to look for organic pastured chicken, and often use chicken that comes in my monthly delivery from Butcher Box.
Avocado or olive oil: I prefer to use avocado oil when baking at high temperatures because it’s a very stable oil, but olive oil (or even butter) would certainly work.
Seasonings: I went with a simple blend of salt, pepper, garlic powder, and smoked paprika because it’s easy and delicious. Feel free to use any dry seasoning blend you prefer. This is where you get to play and have some fun!
If you make baked chicken regularly in the oven, I recommend having a heavy, sturdy rimmed baking sheet and a cooking thermometer on hand.
A rimmed baking sheet is one of my most used kitchen essentials and a thermometer is the easiest way to ensure that your chicken is not over or undercooked.
These are the tools that I use and recommend:
Rimmed baking sheet: I use these pans for so many things in my kitchen and definitely consider them a kitchen staple.
Instant-read cooking thermometer: I just ordered this one on Amazon. It has excellent reviews and is reasonably priced at $12.99.
How Do You Make Baked Chicken Breast?
Baked chicken breasts are super simple to make! Follow these easy steps and have tender and juicy chicken breasts each and every time.
Pull chicken out of the fridge 20-30 minutes before baking. The closer the chicken is to room temperature, the more tender and juicy your chicken will be.
Gently pound the chicken to create a uniform thickness all around. This step will help to ensure that the chicken cooks evenly. And you don’t end up with any areas that are over or undercooked.
Brush both sides of the chicken with oil. You can use avocado oil or olive oil (you can even use butter) to coat the chicken. Be sure to brush the breasts liberally on both sides to prevent the chicken from sticking to the pan. This will also help the seasonings stick.
Season with your favorite seasonings. You can never go wrong with the simple combo of salt, pepper, and garlic powder; it’s a great base. But of course, have some fun here and experiment with your favorite dried herbs and spices.
Bake at 450ºF for 12-18 minutes, depending on the thickness of your chicken breasts. If you are new to baking chicken, I highly recommend using your thermometer to make sure that you do not overcook the chicken. Pull the chicken out of the oven when the internal temperature of the meat reaches 160ºF (as the chicken rests, the residual heat from the chicken will raise the internal temperature to 165ºF, which is where you want the final temperature of your baked chicken to be).
Rest your chicken once it comes out of the oven. This will give the juices an opportunity to redistribute and allow the chicken to come to 165ºF without overcooking the chicken. If you cut it right away, you will lose all of the delicious juices and some of the tenderness that we’re going for.
How To Store Baked Chicken Breast
I like to bake chicken breast on the weekend when I am doing my meal prep. This gives me a quick and convenient protein option during the week.
Store baked chicken in an airtight container in the fridge. It will keep well for up to 5 days.
Side Dish Ideas
Looking for some side dishes to serve with your baked chicken? Here are some of my faves:
Thanks so much for reading! You can watch the video down below and if you make this recipe I would love for you to give it a ★ rating below. And be sure to follow me on YouTube, Pinterest, Instagram, and Facebook for more healthy food inspiration!
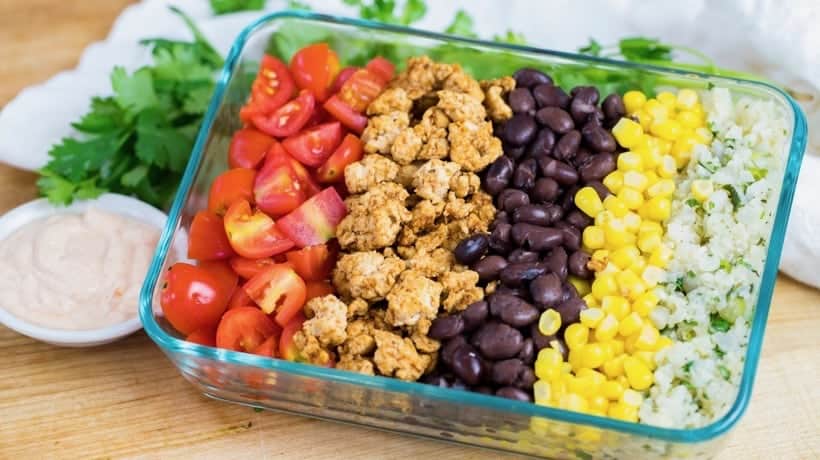

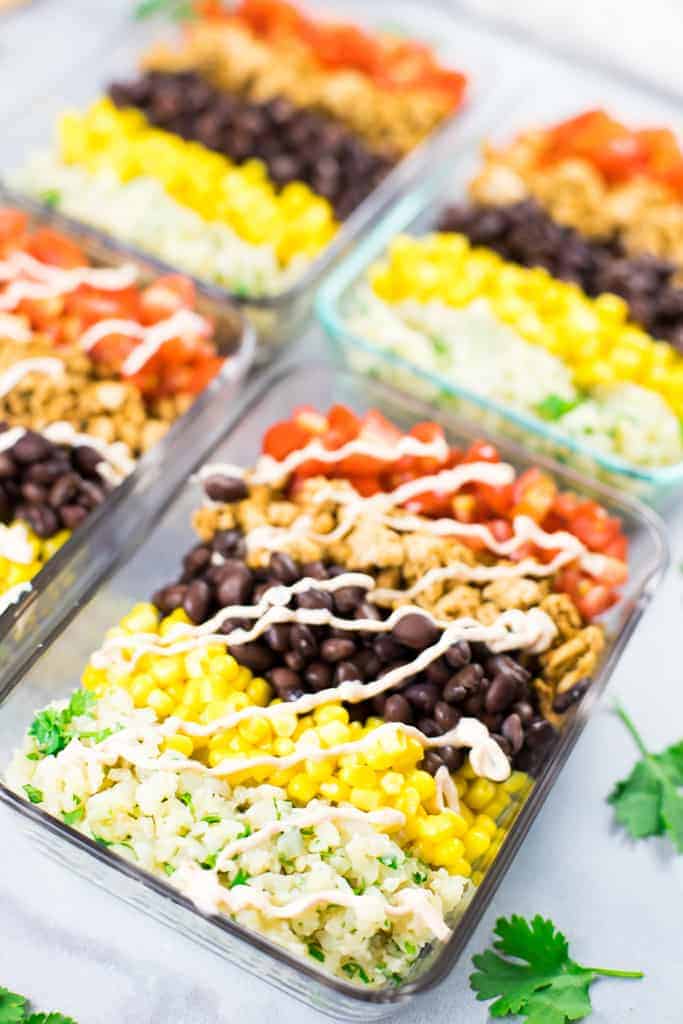

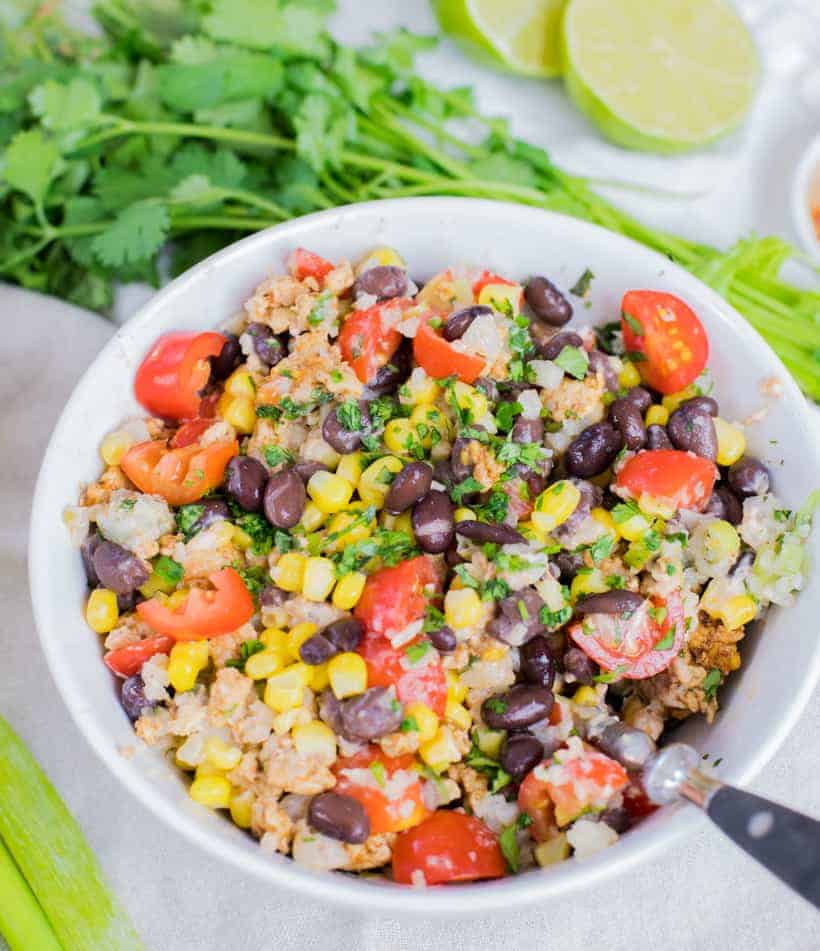


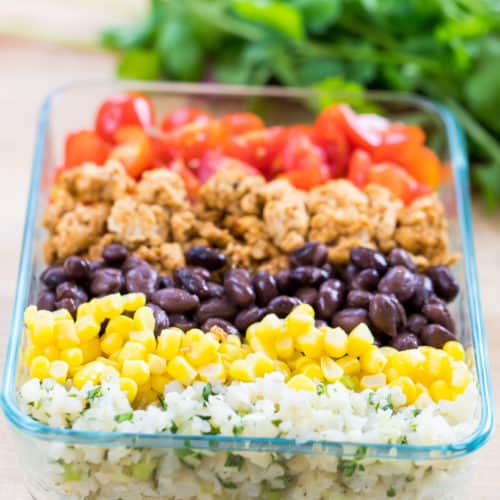
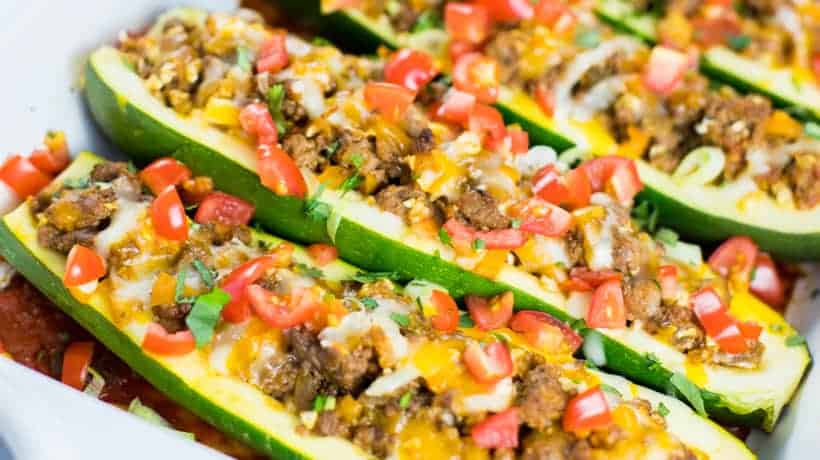
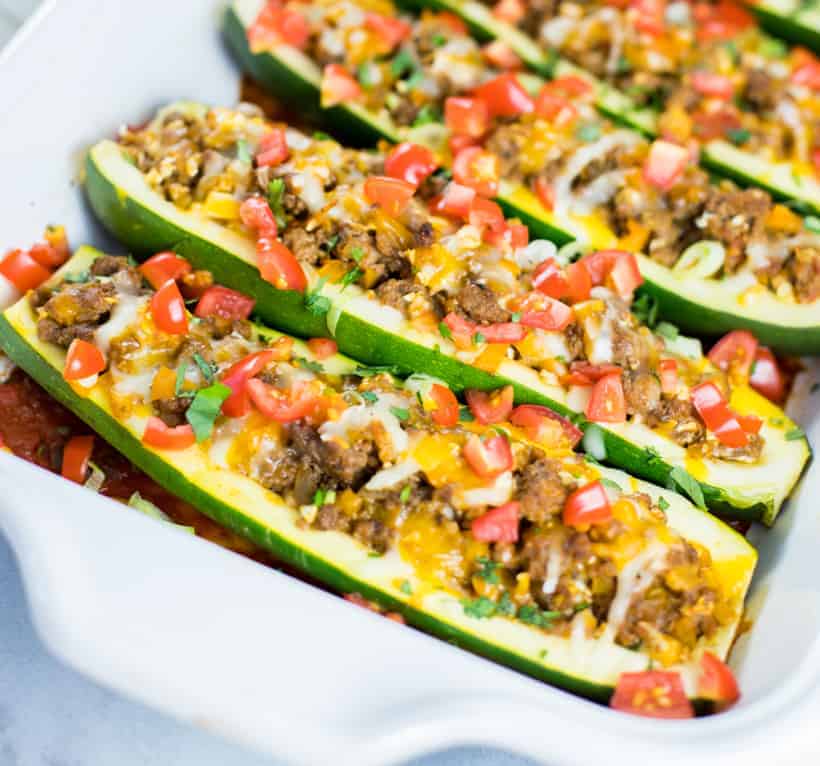
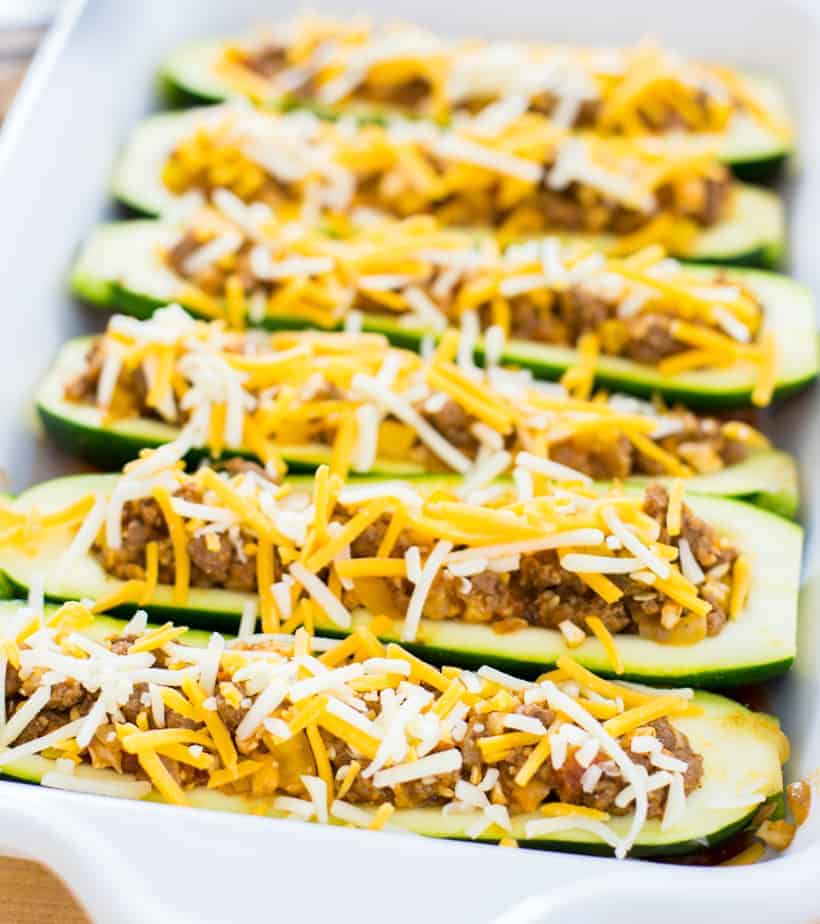
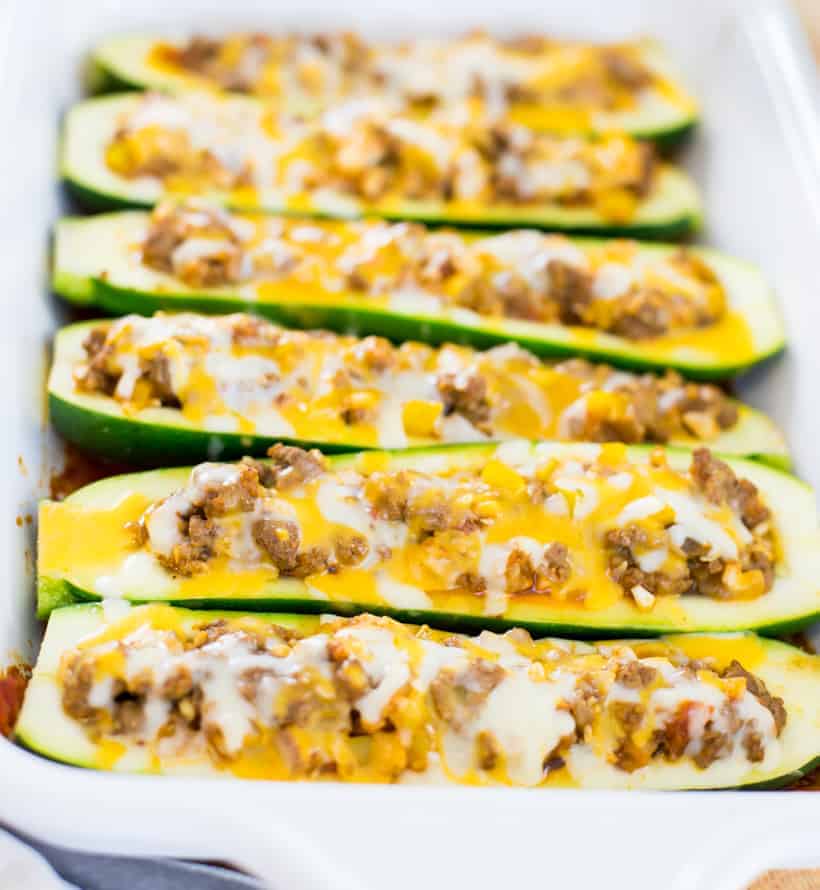

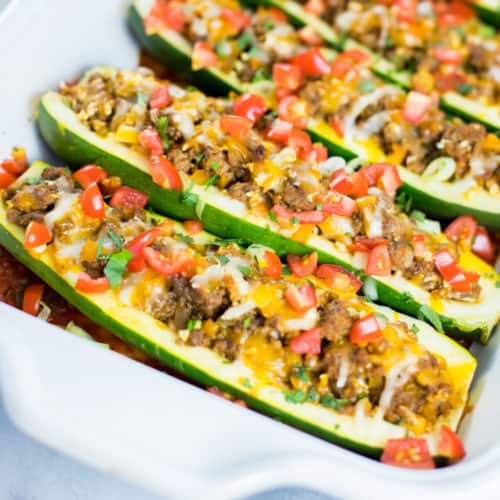
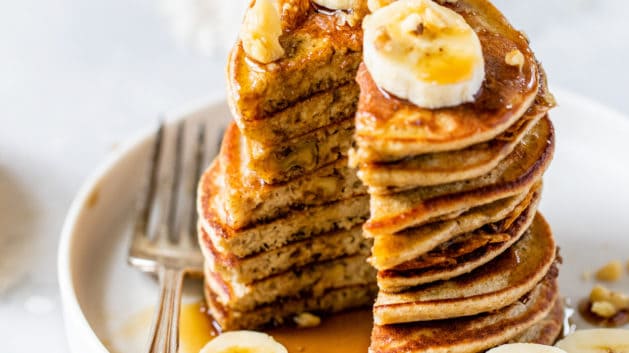
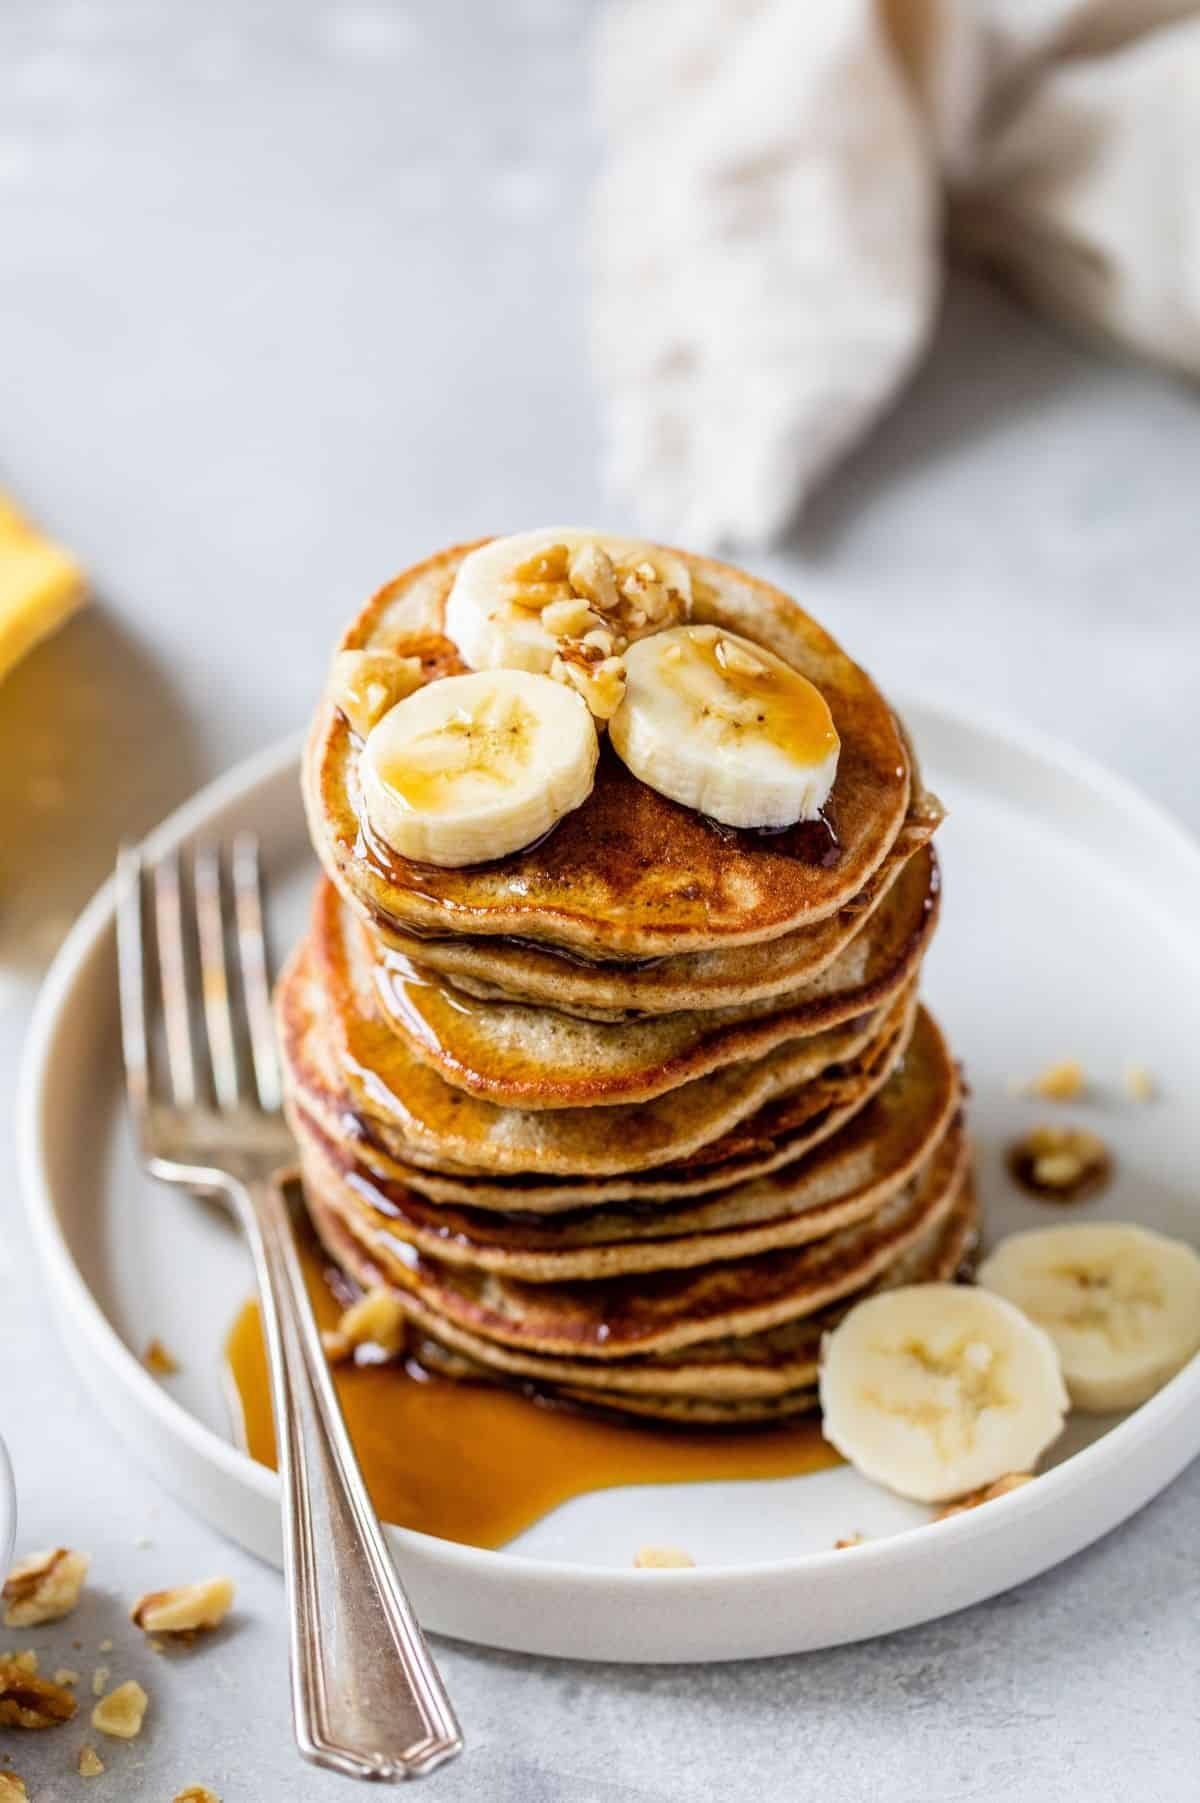
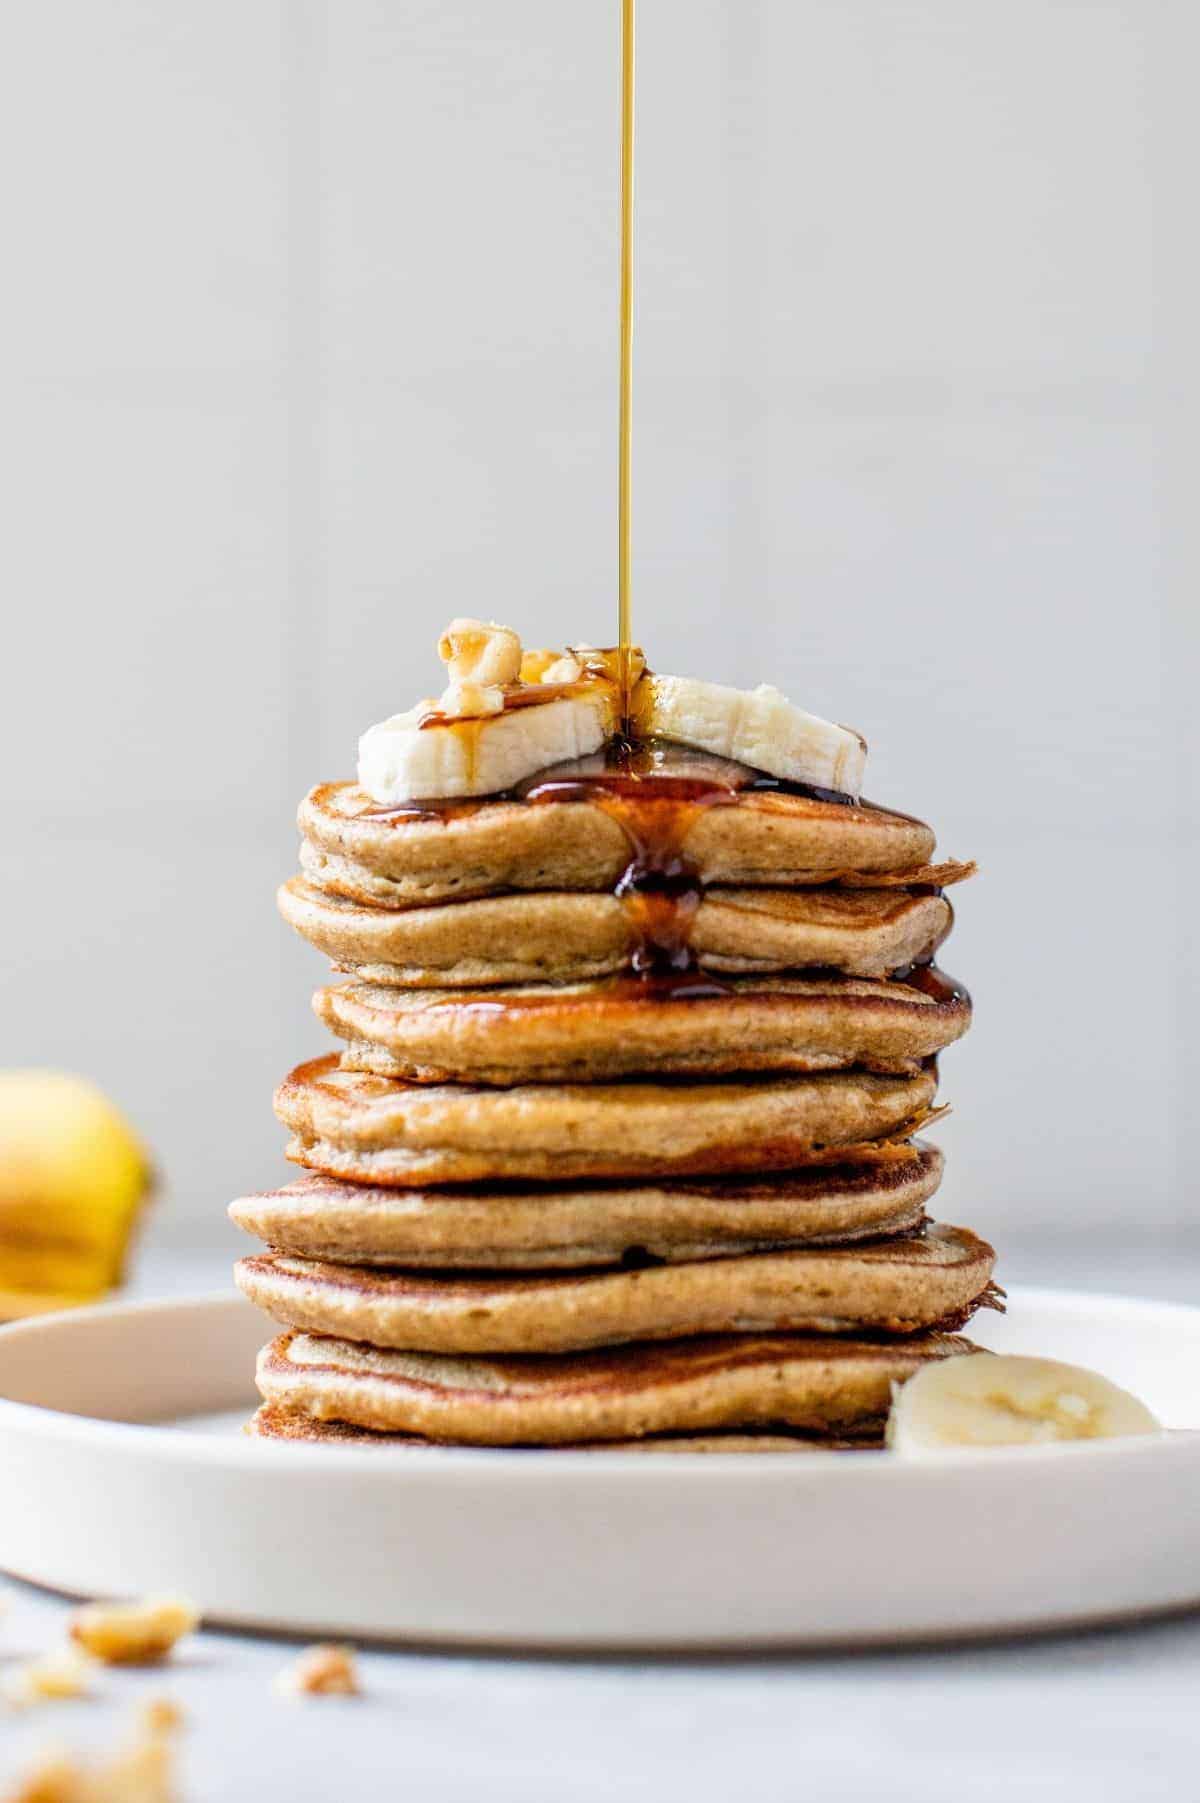
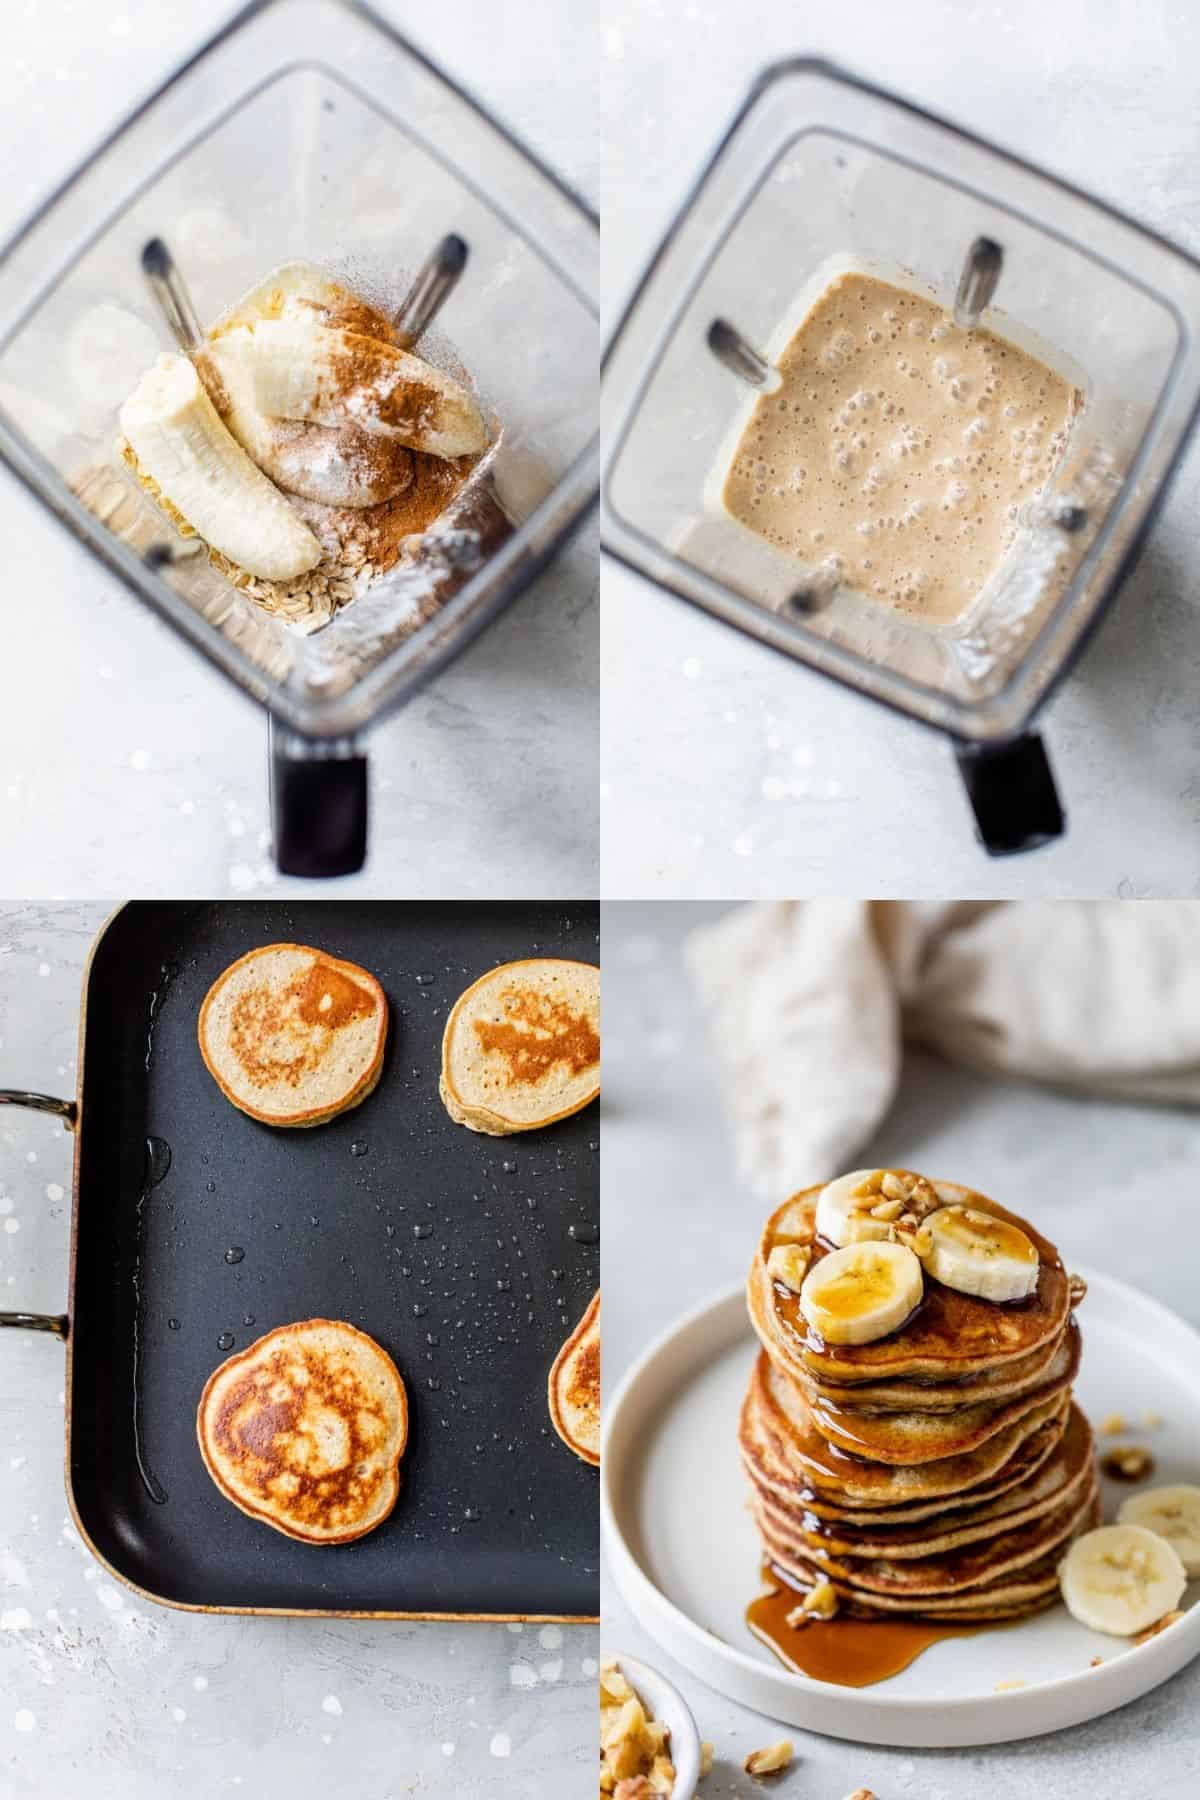
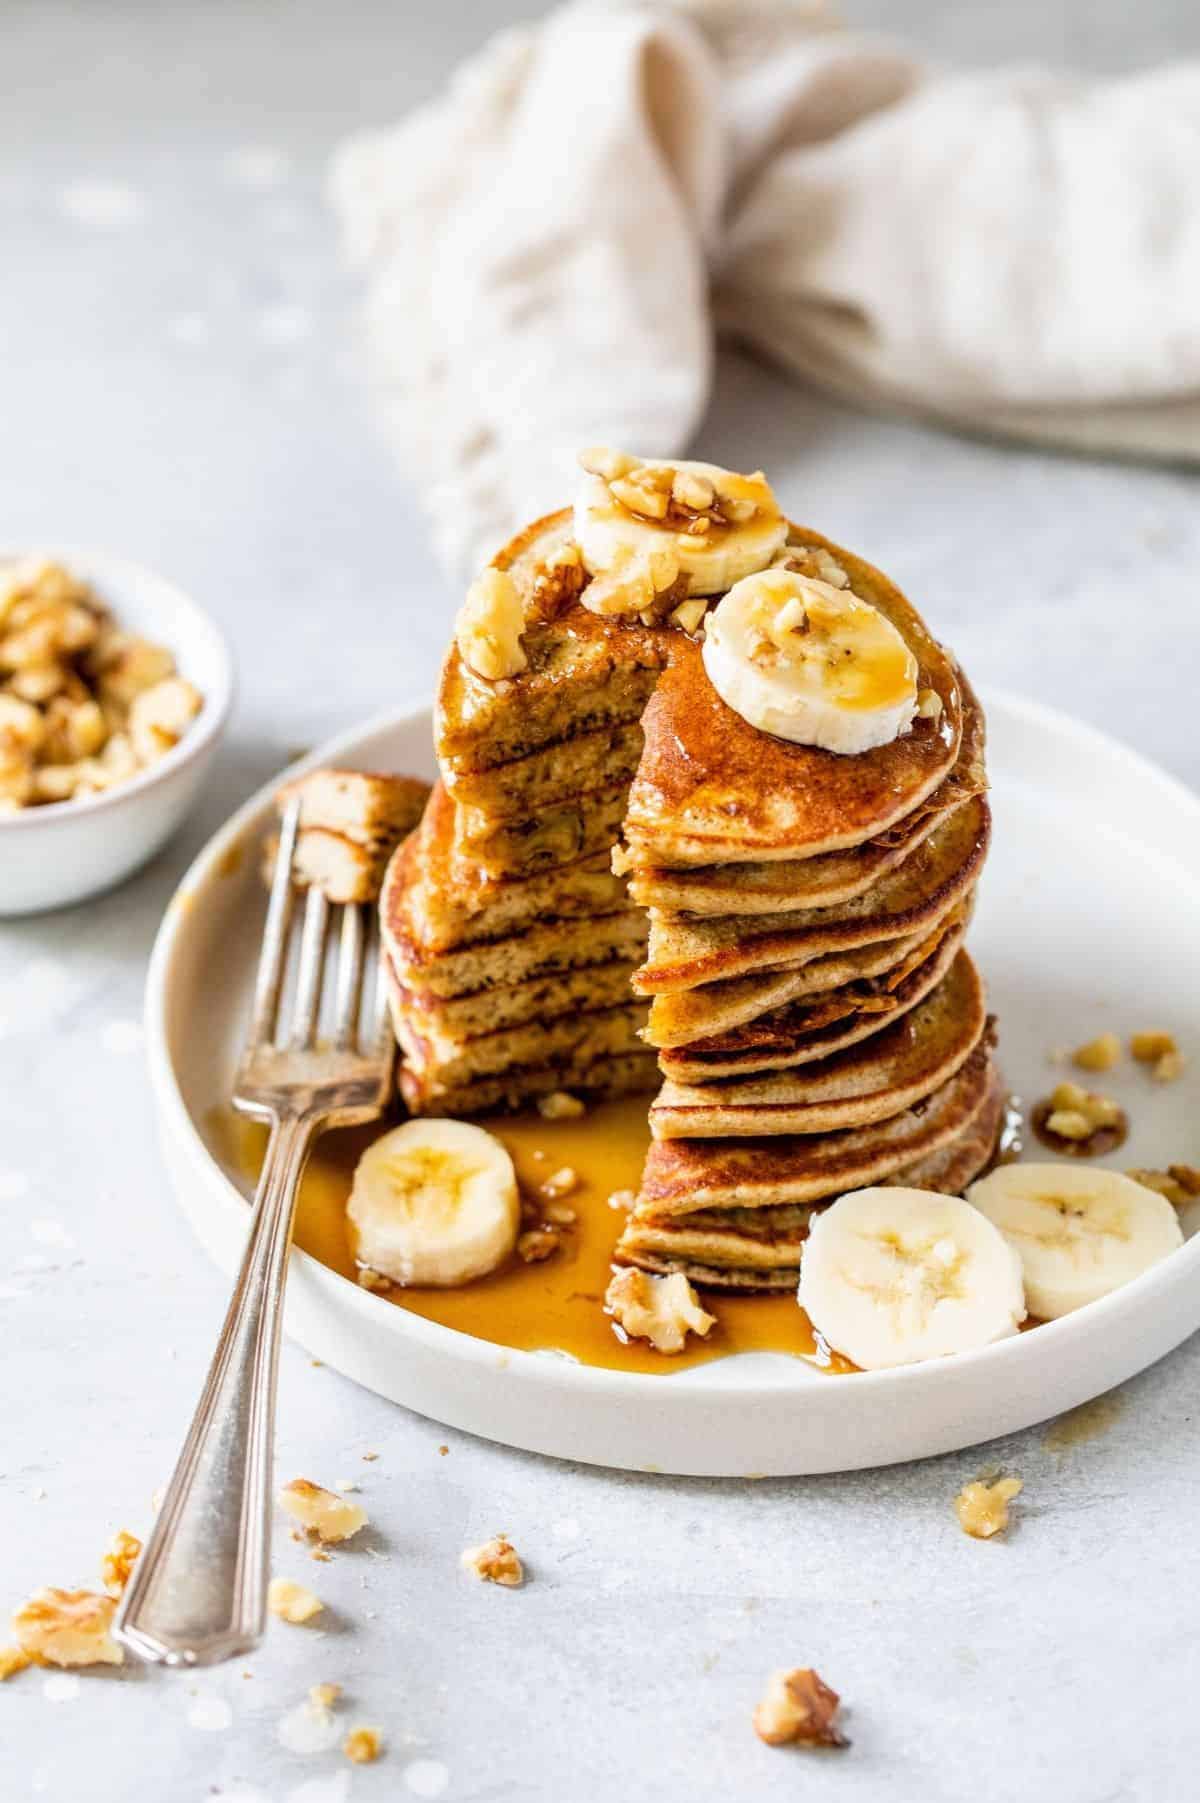


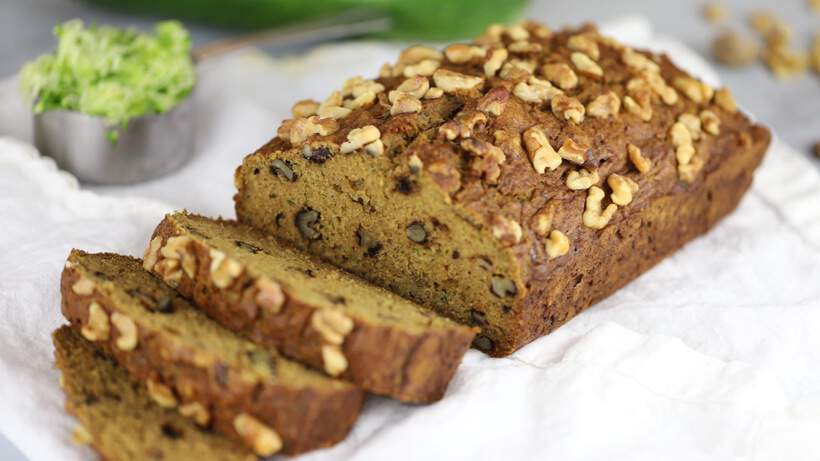
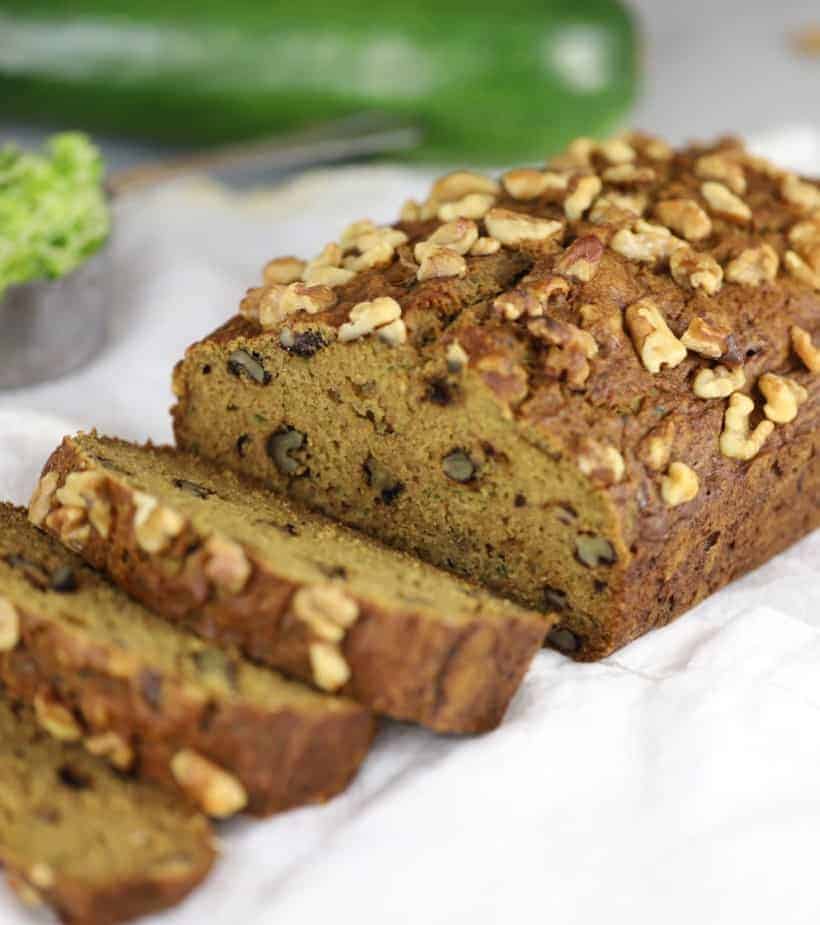
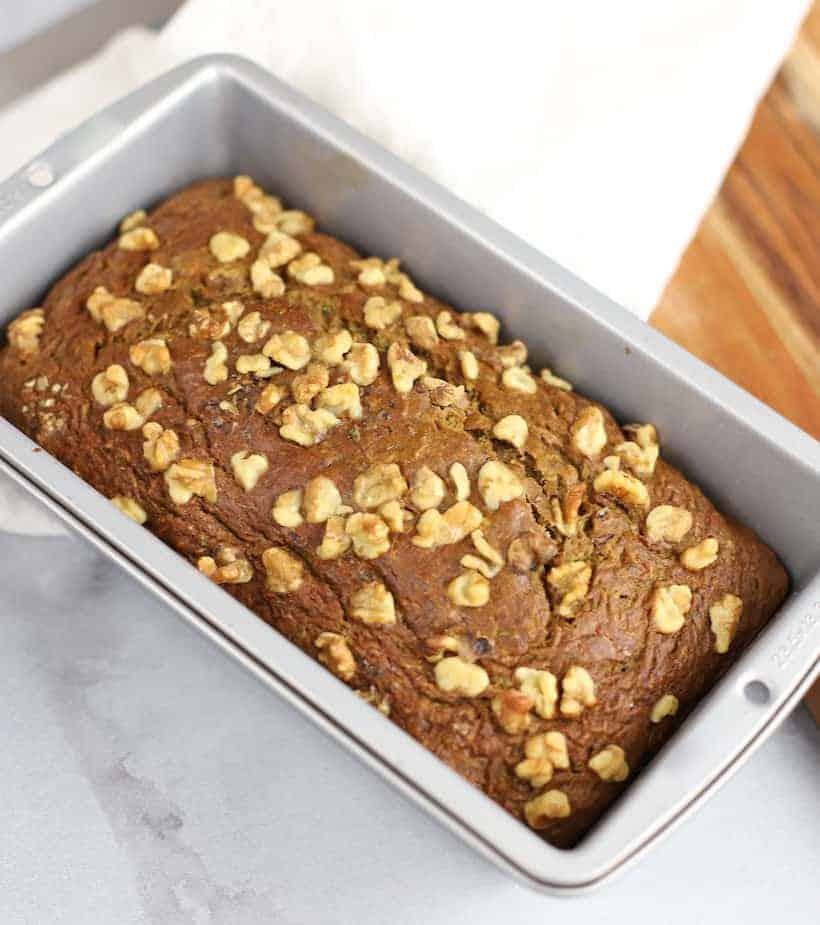
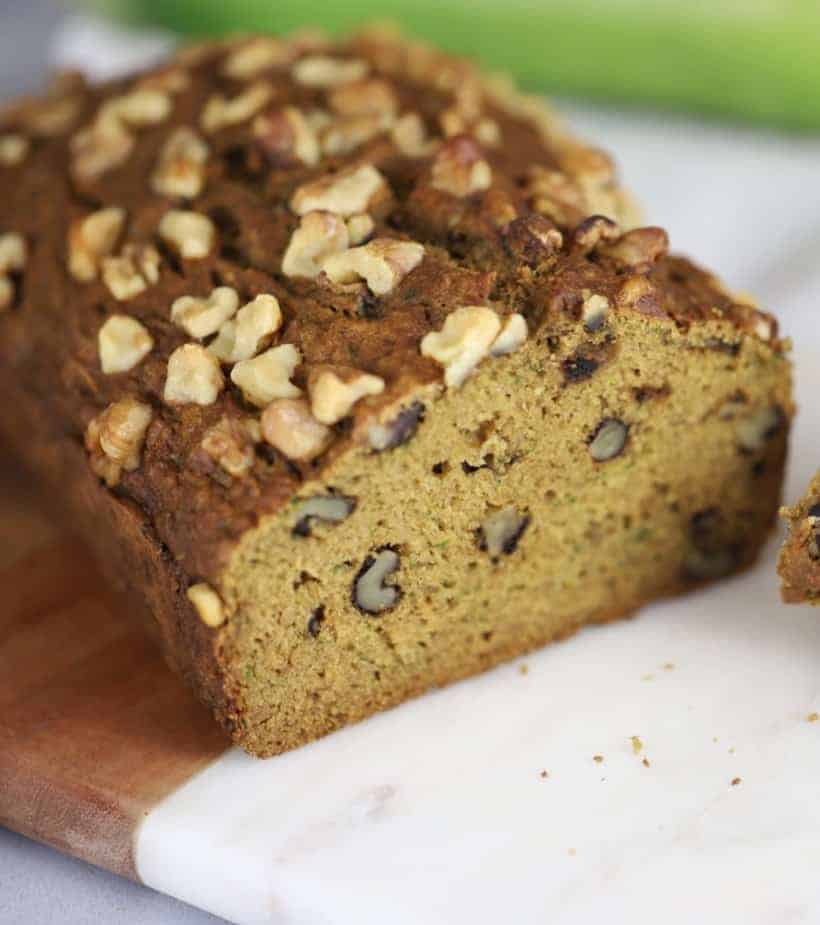
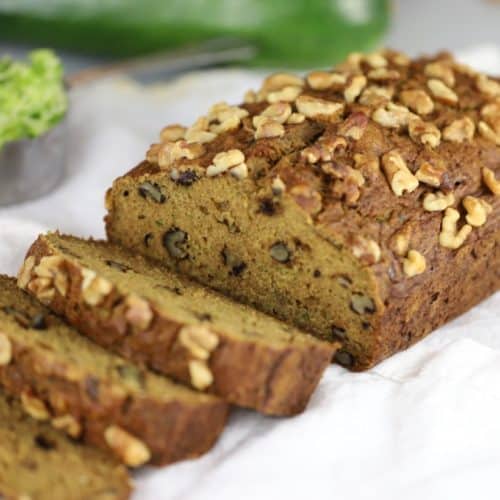


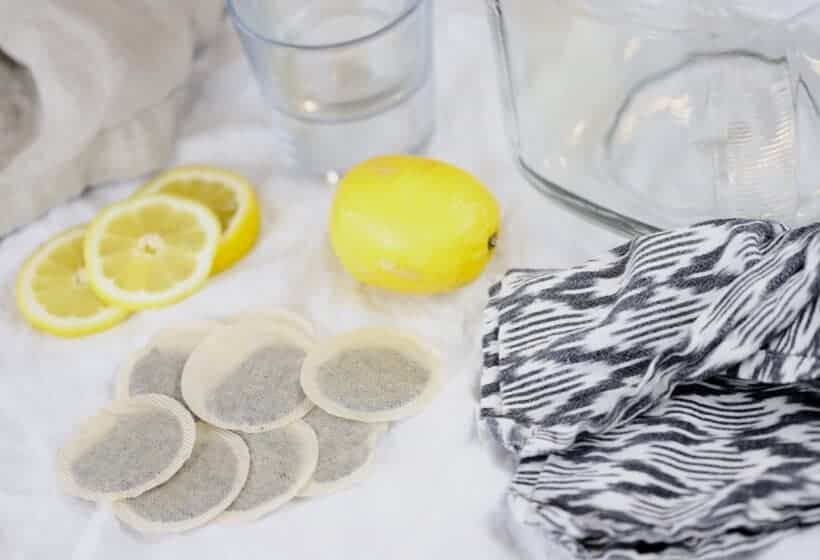
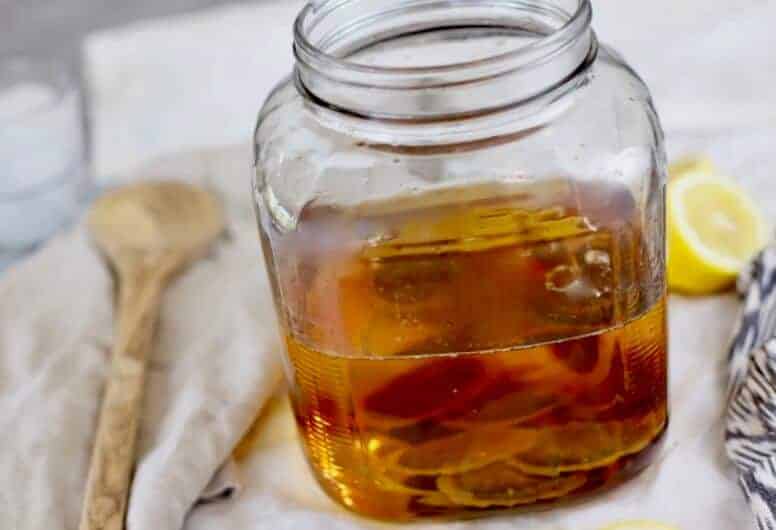


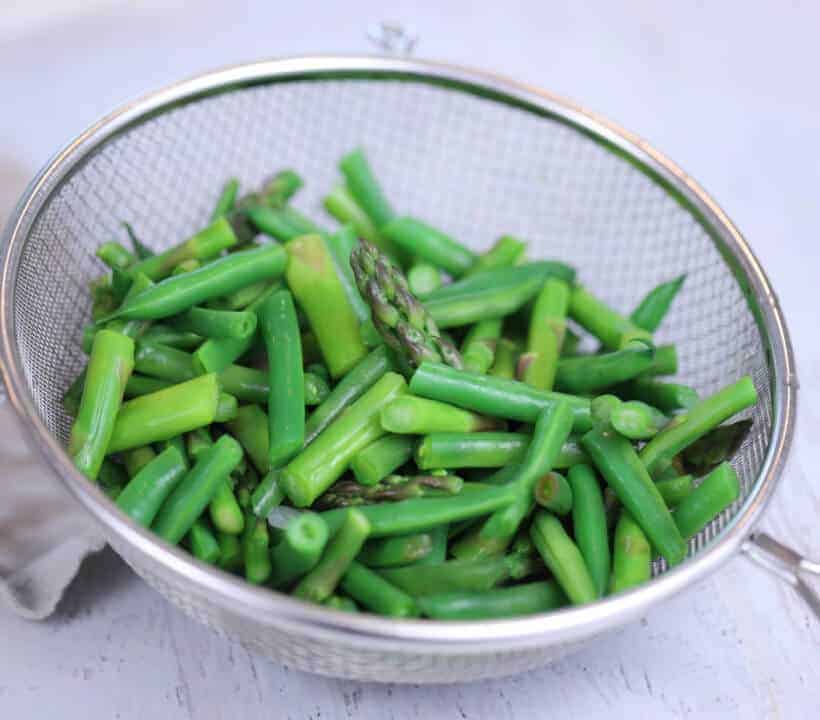
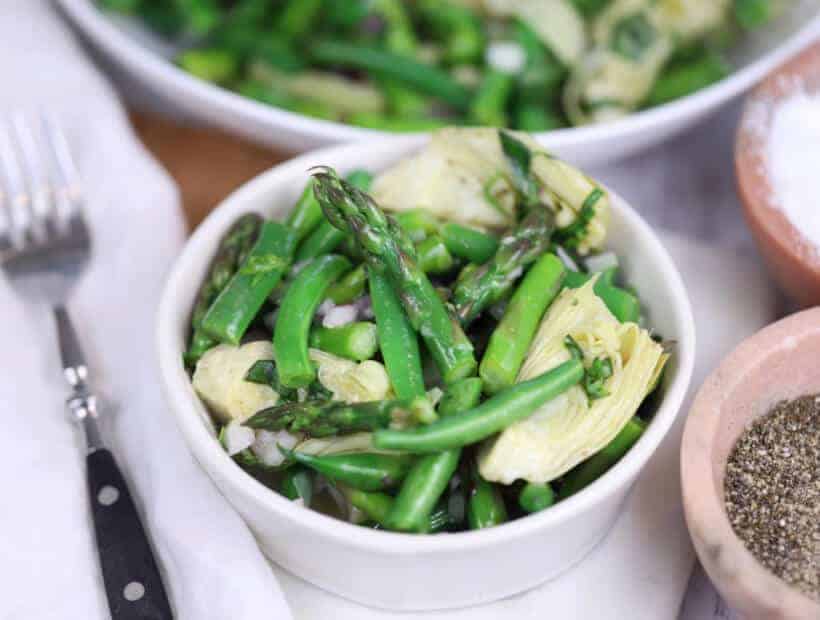
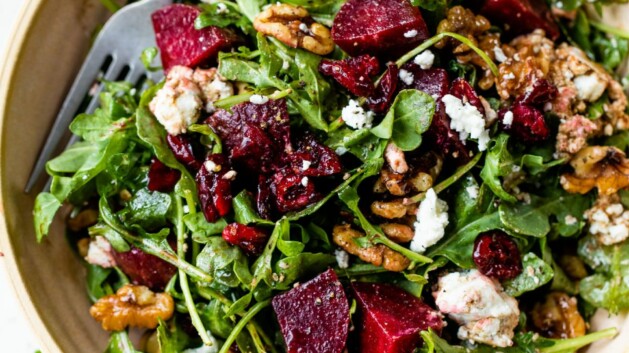
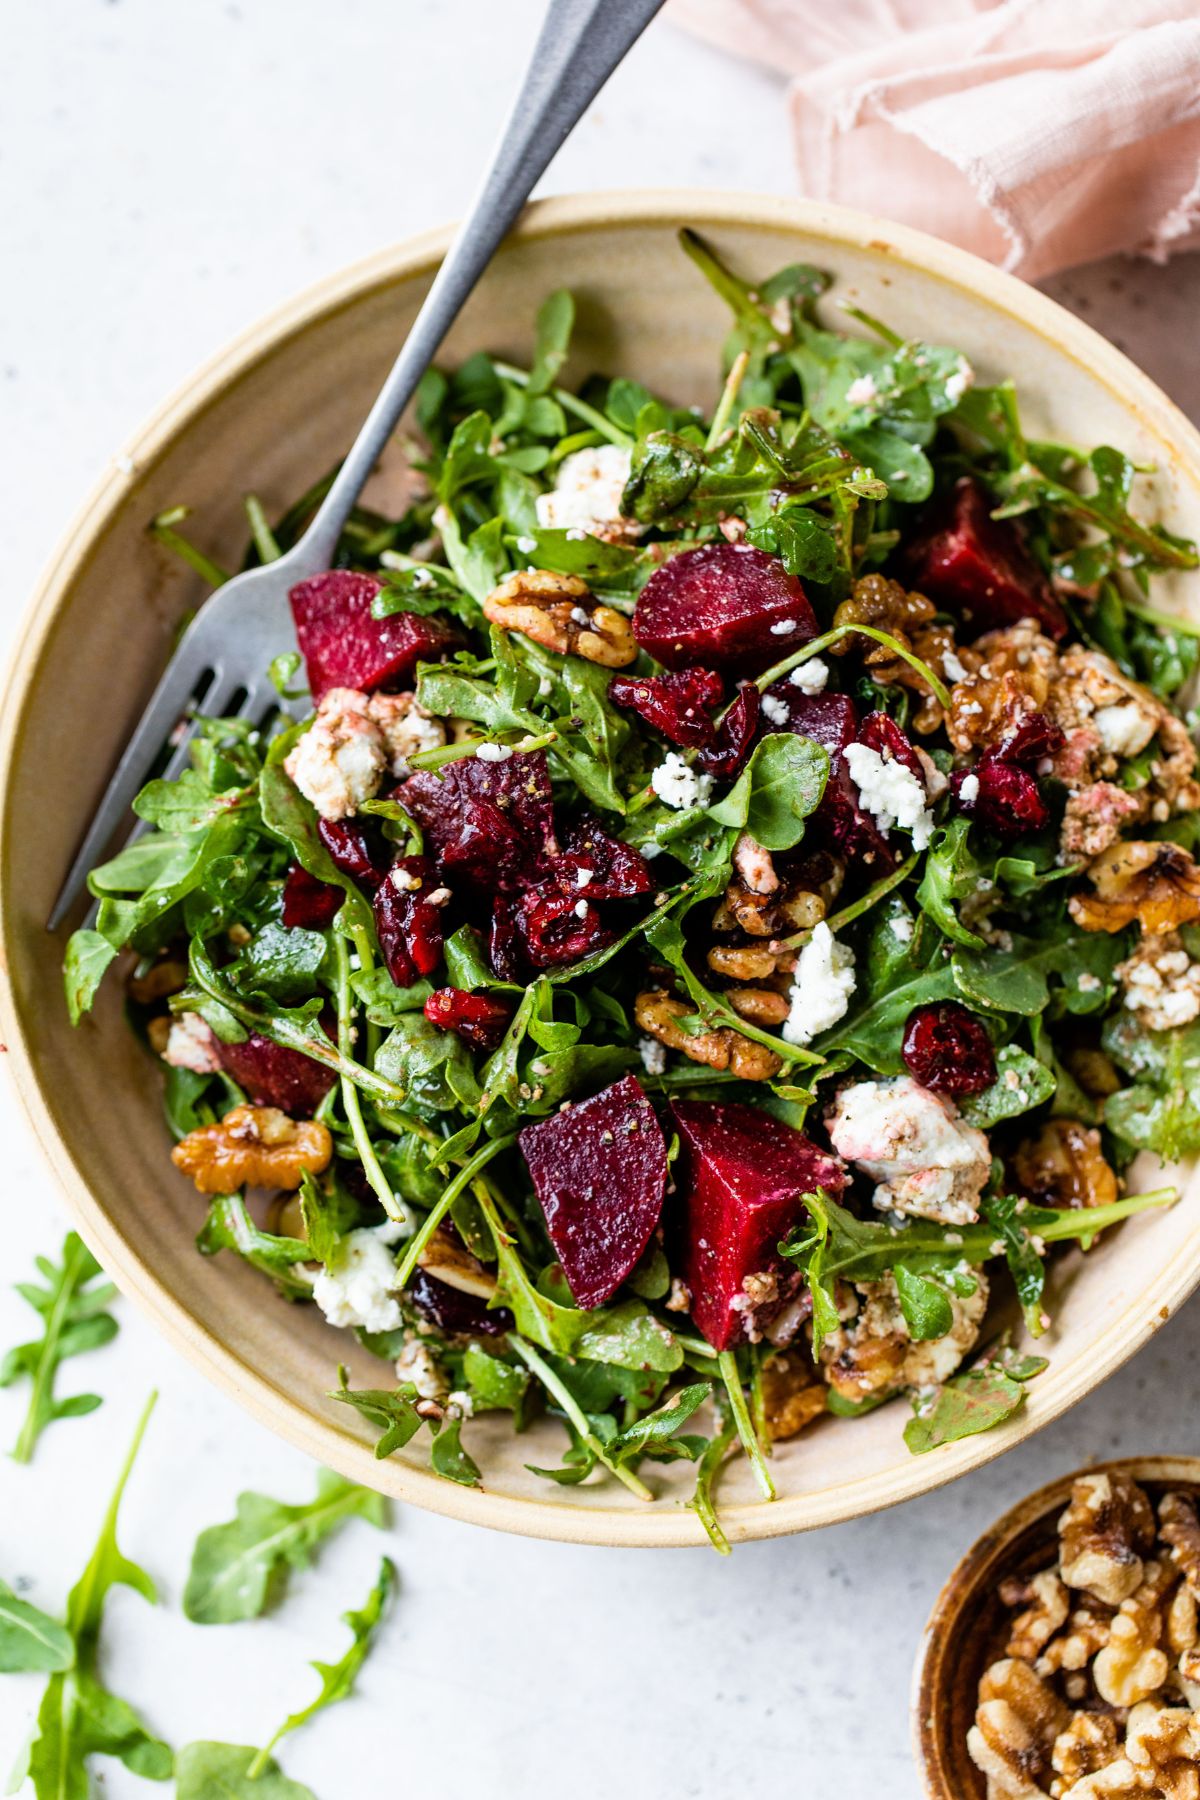
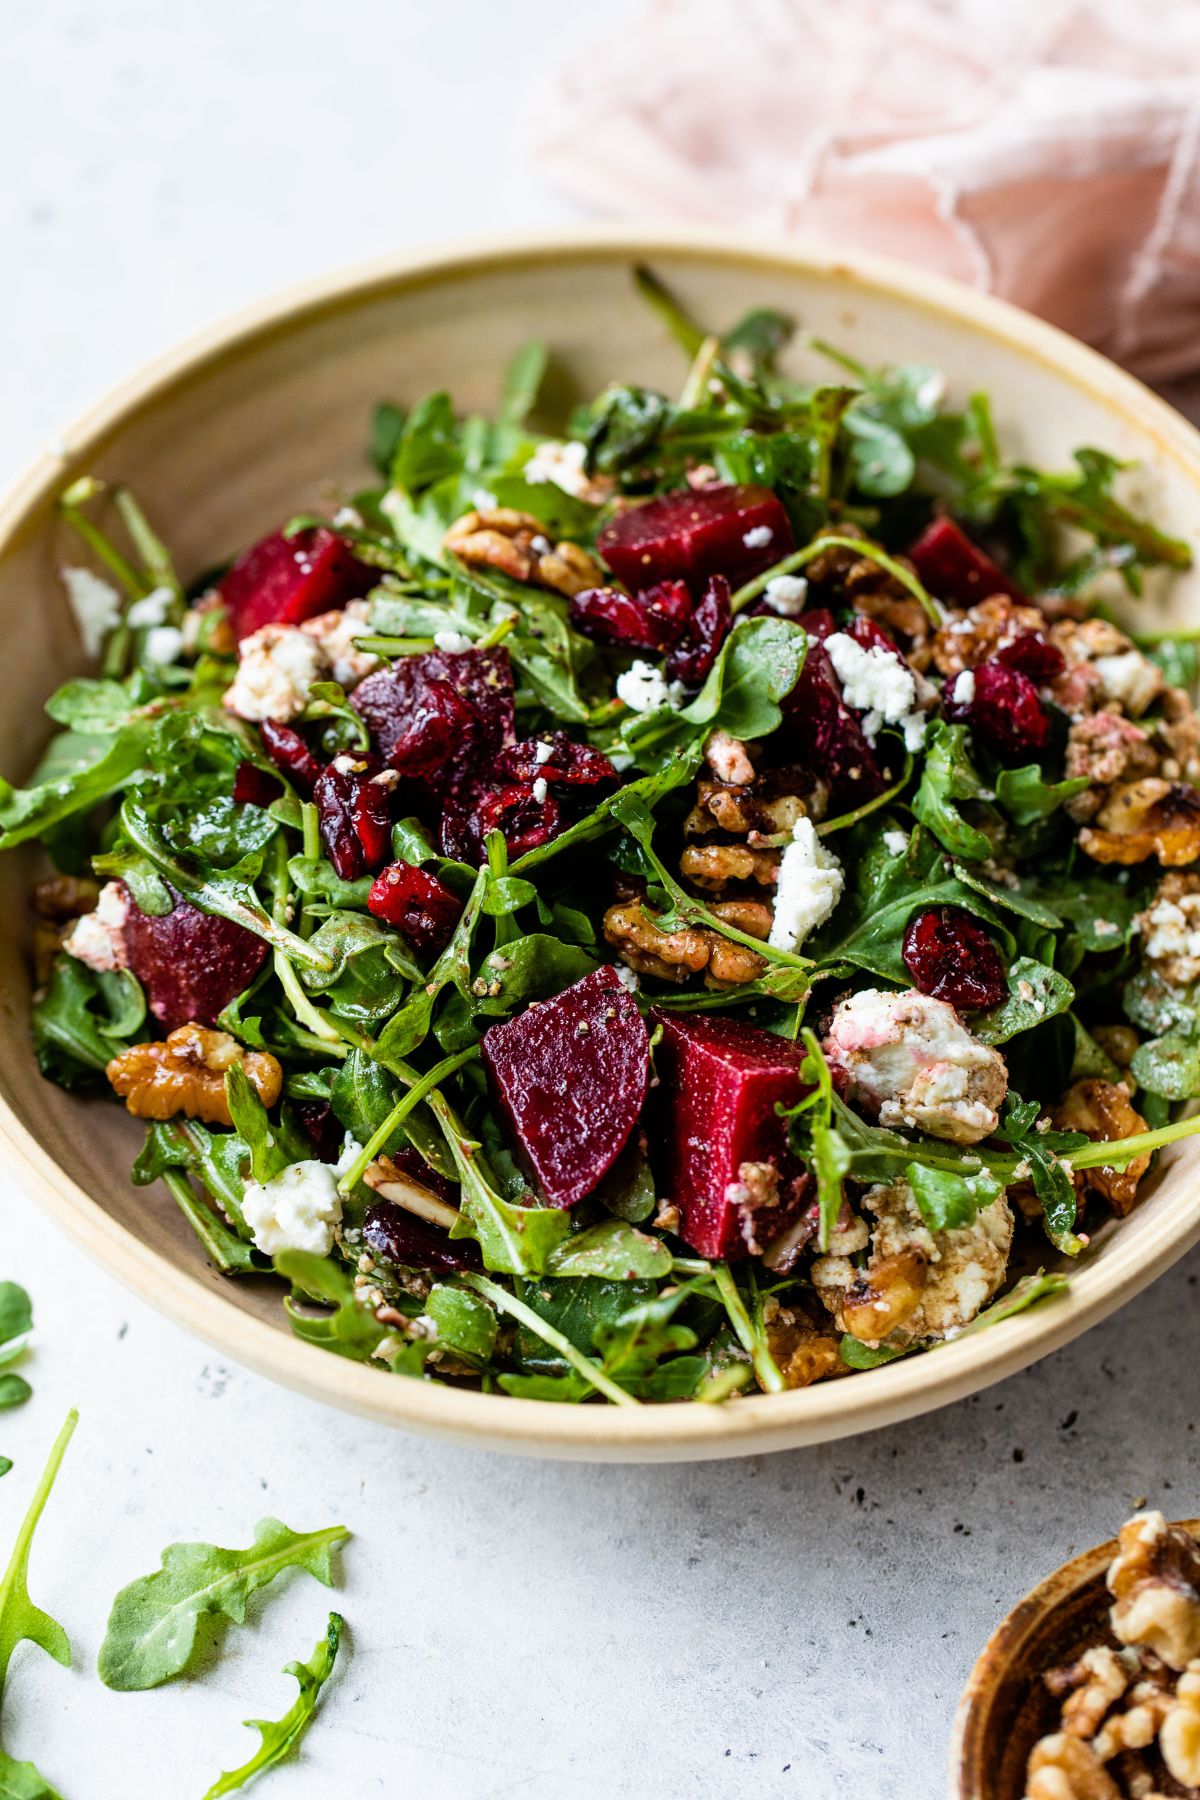
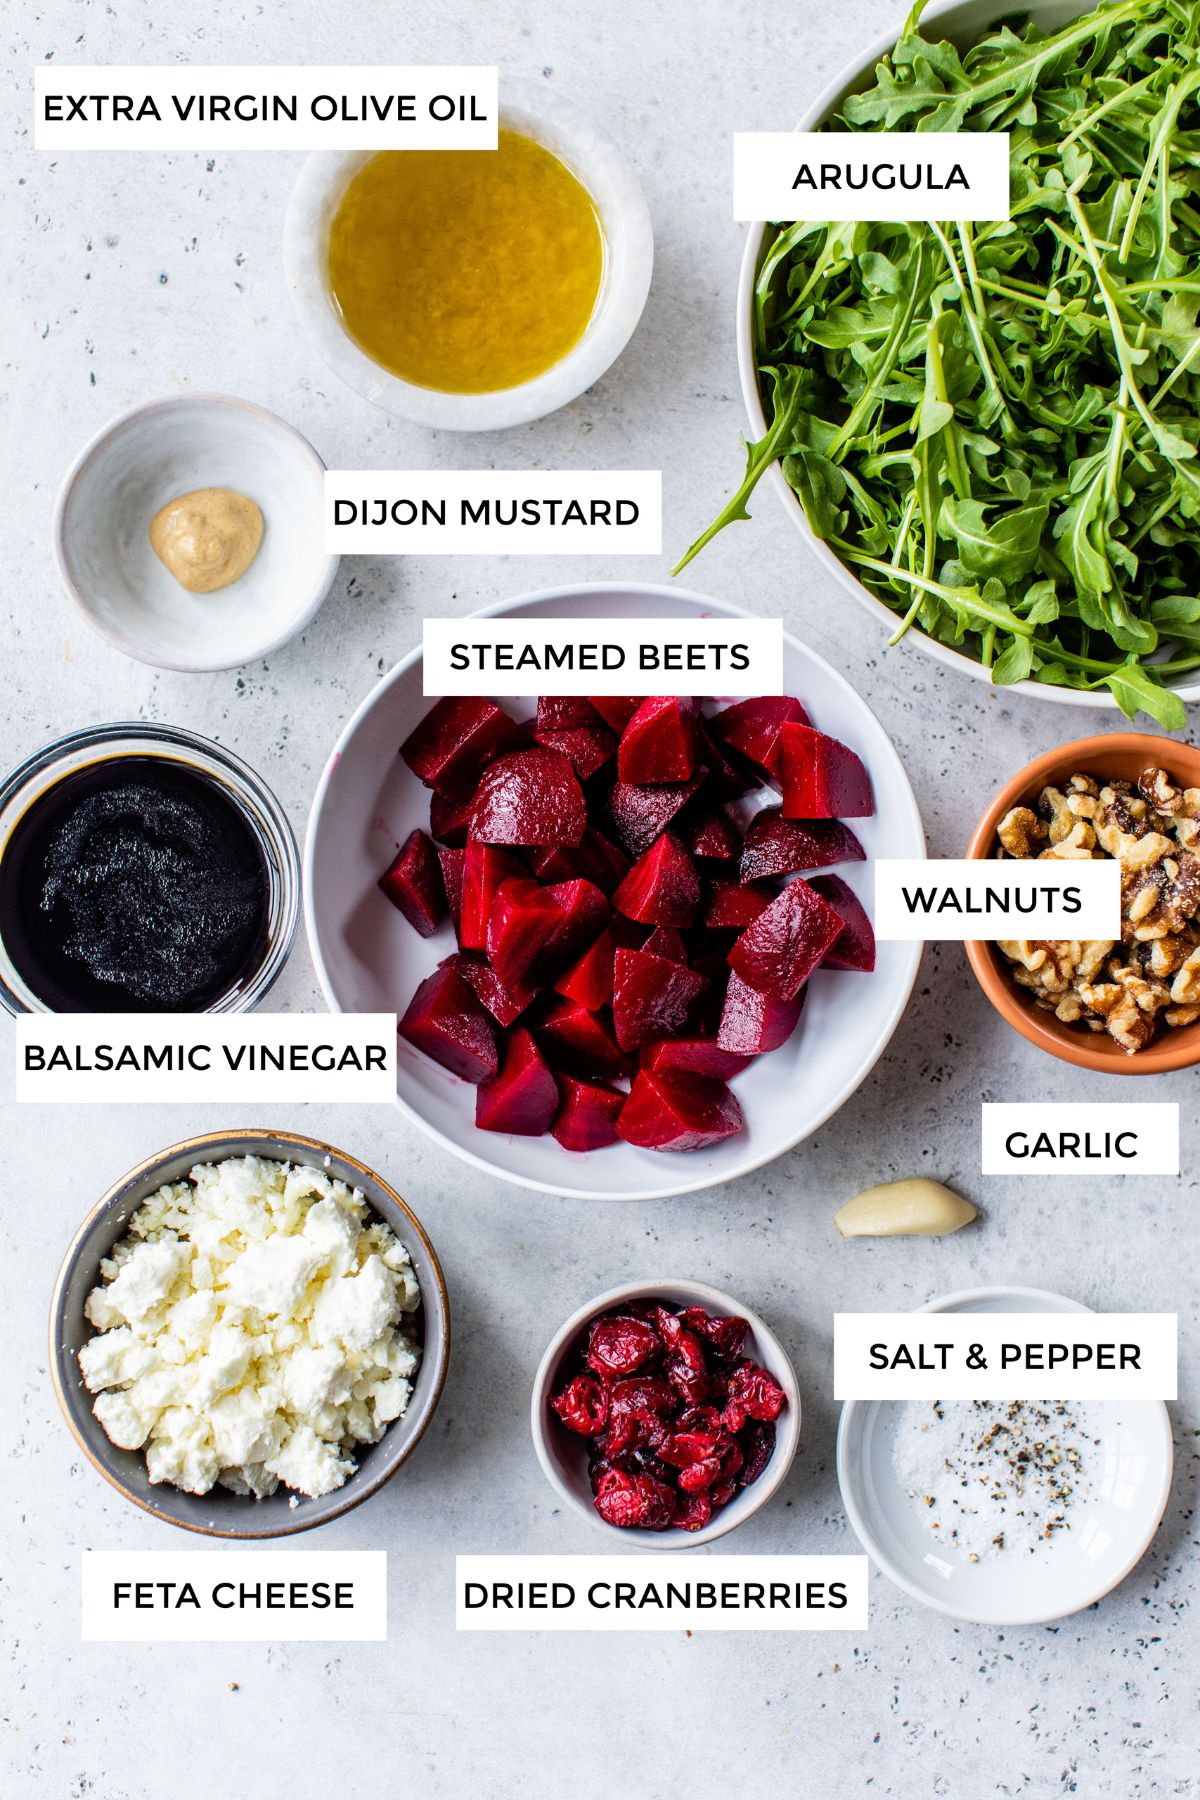
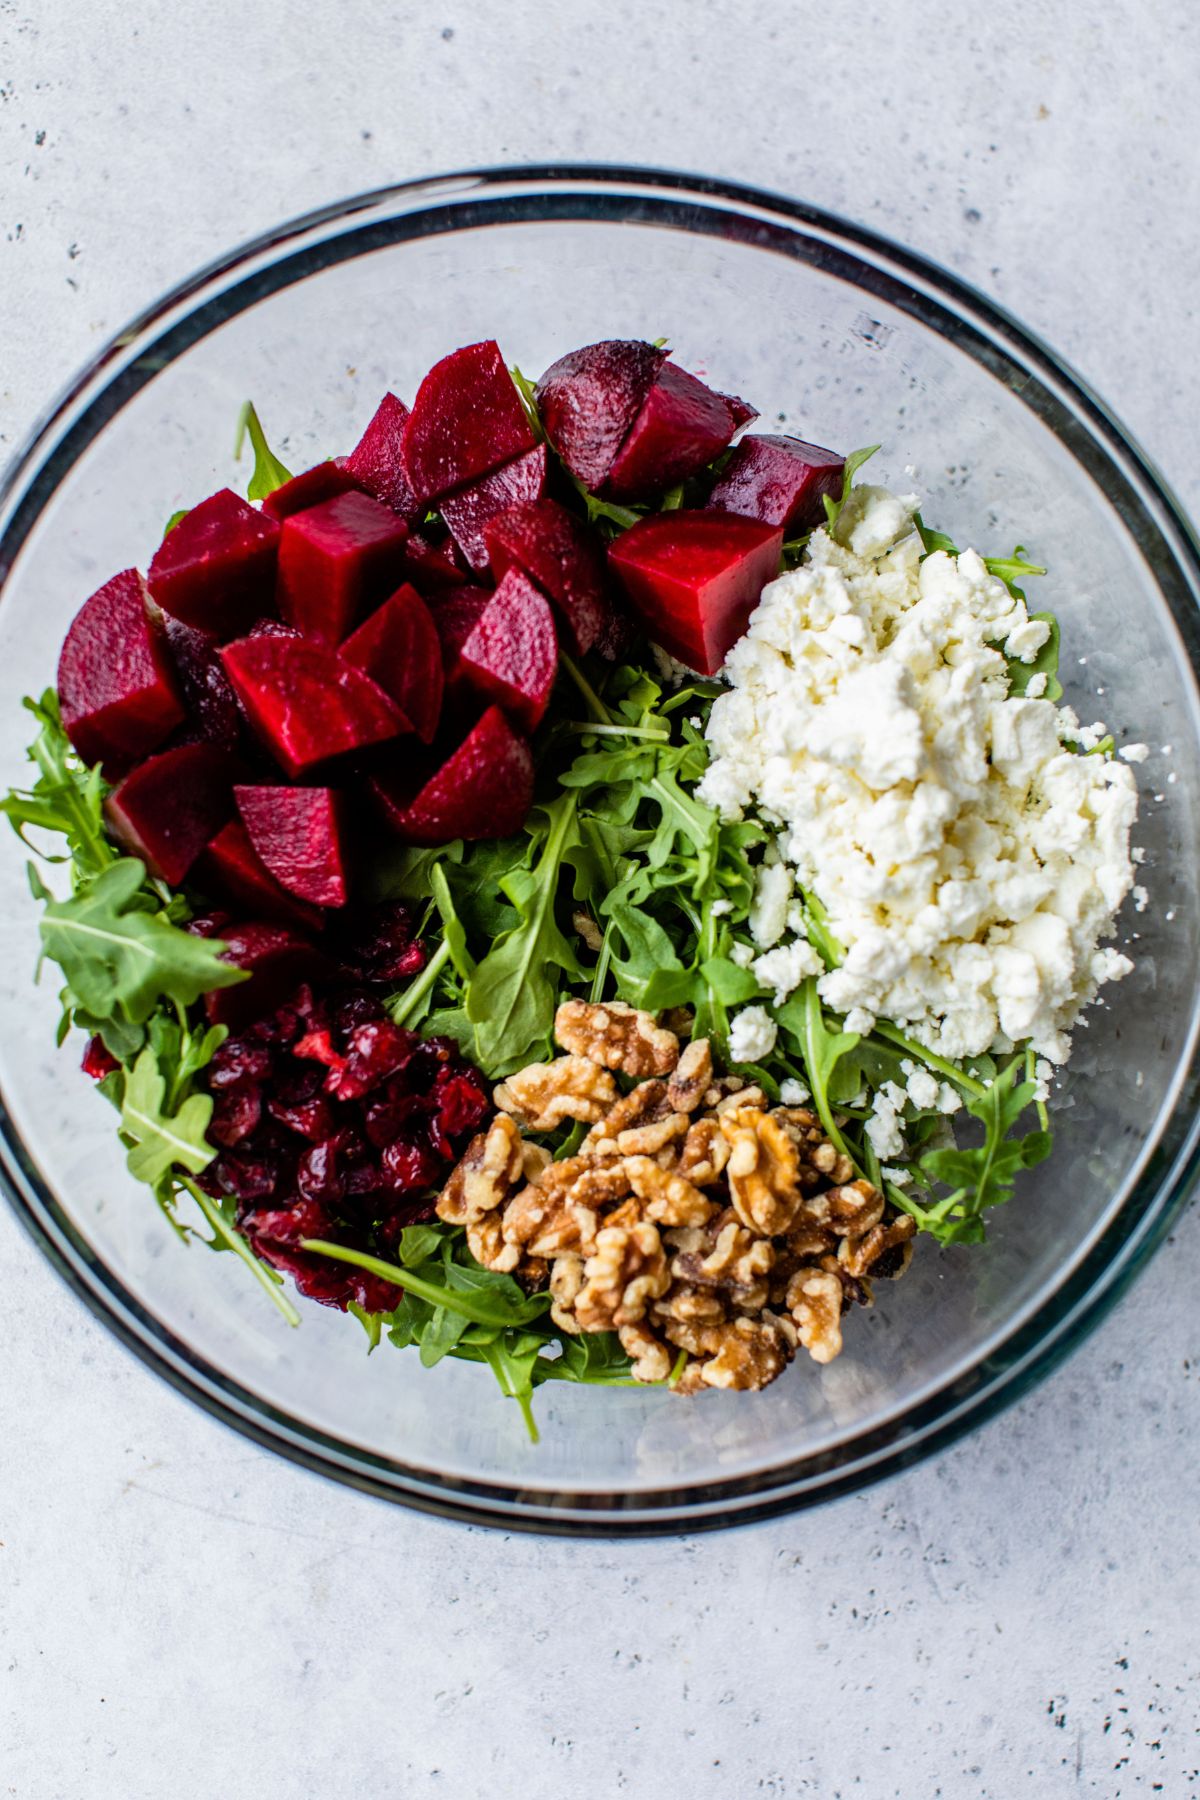
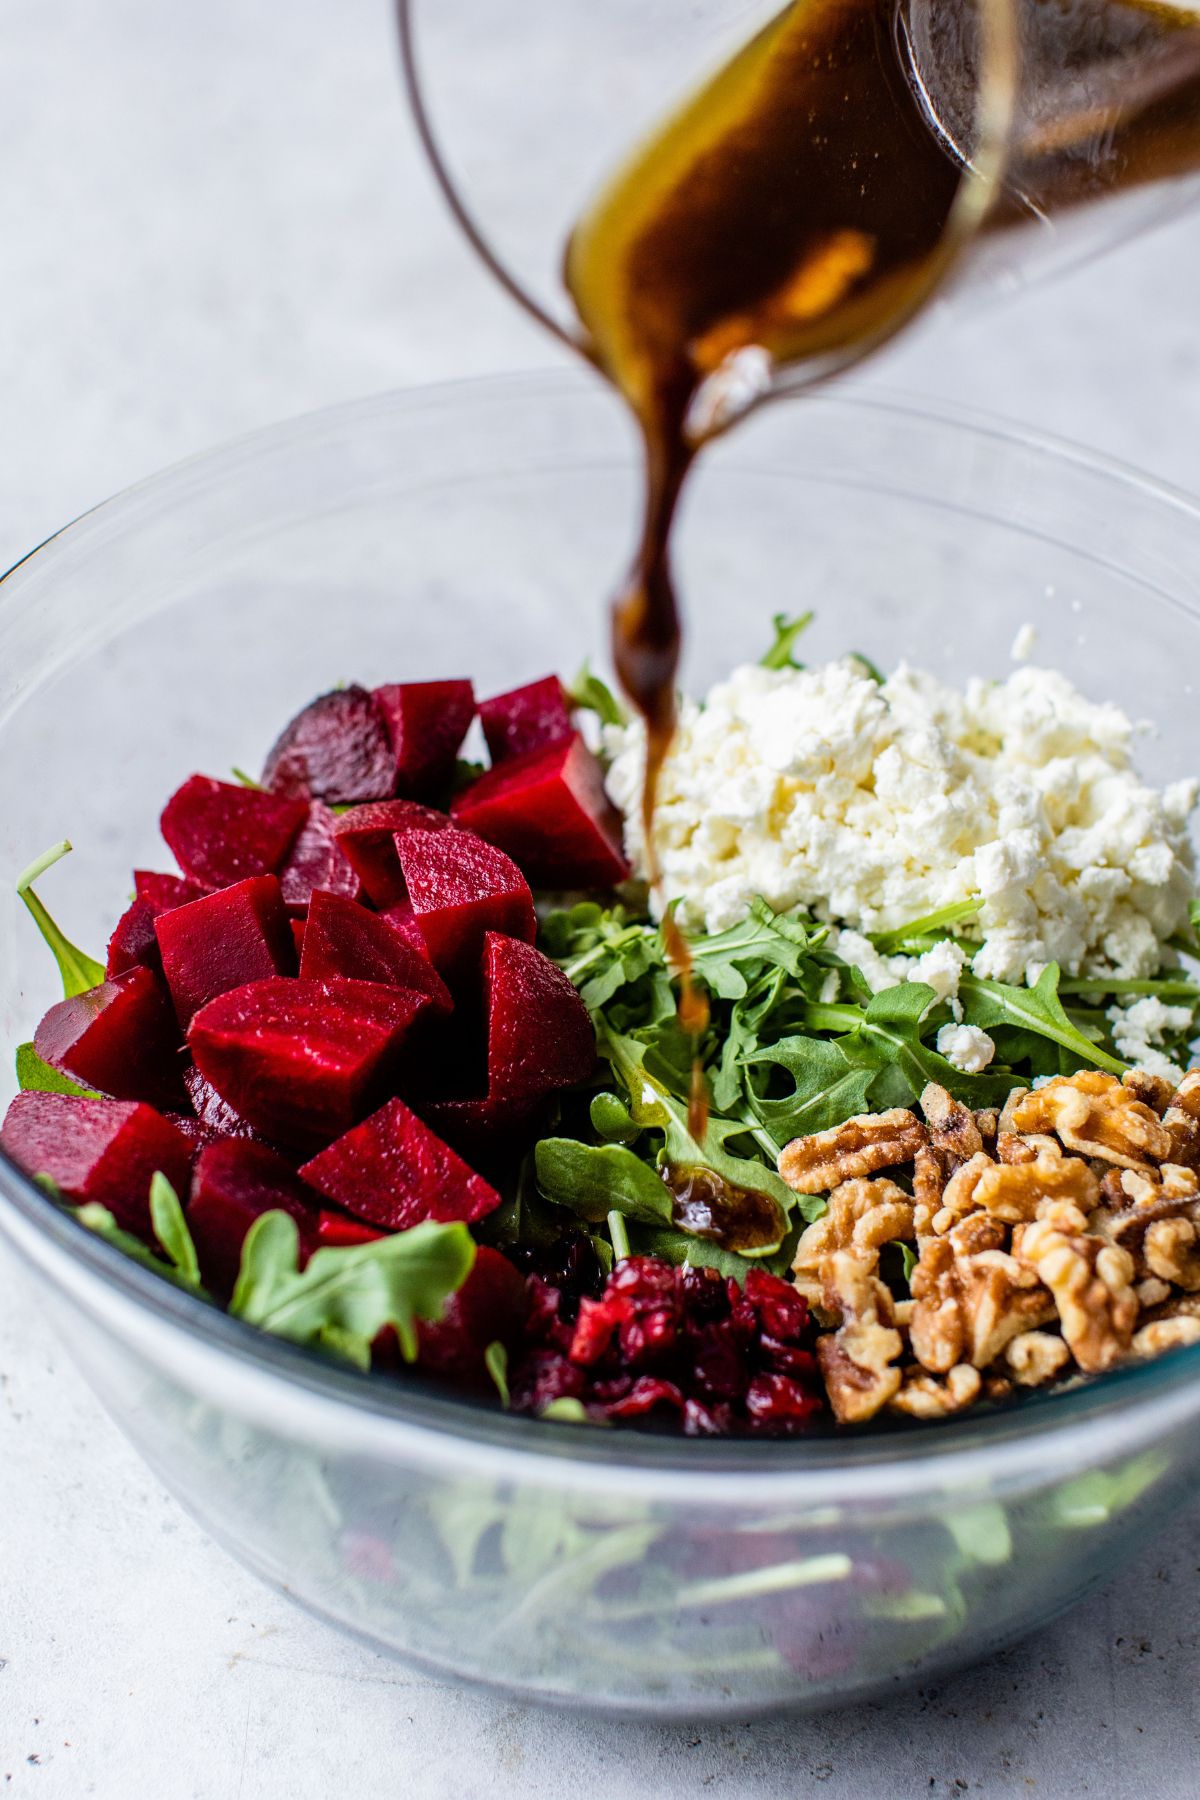
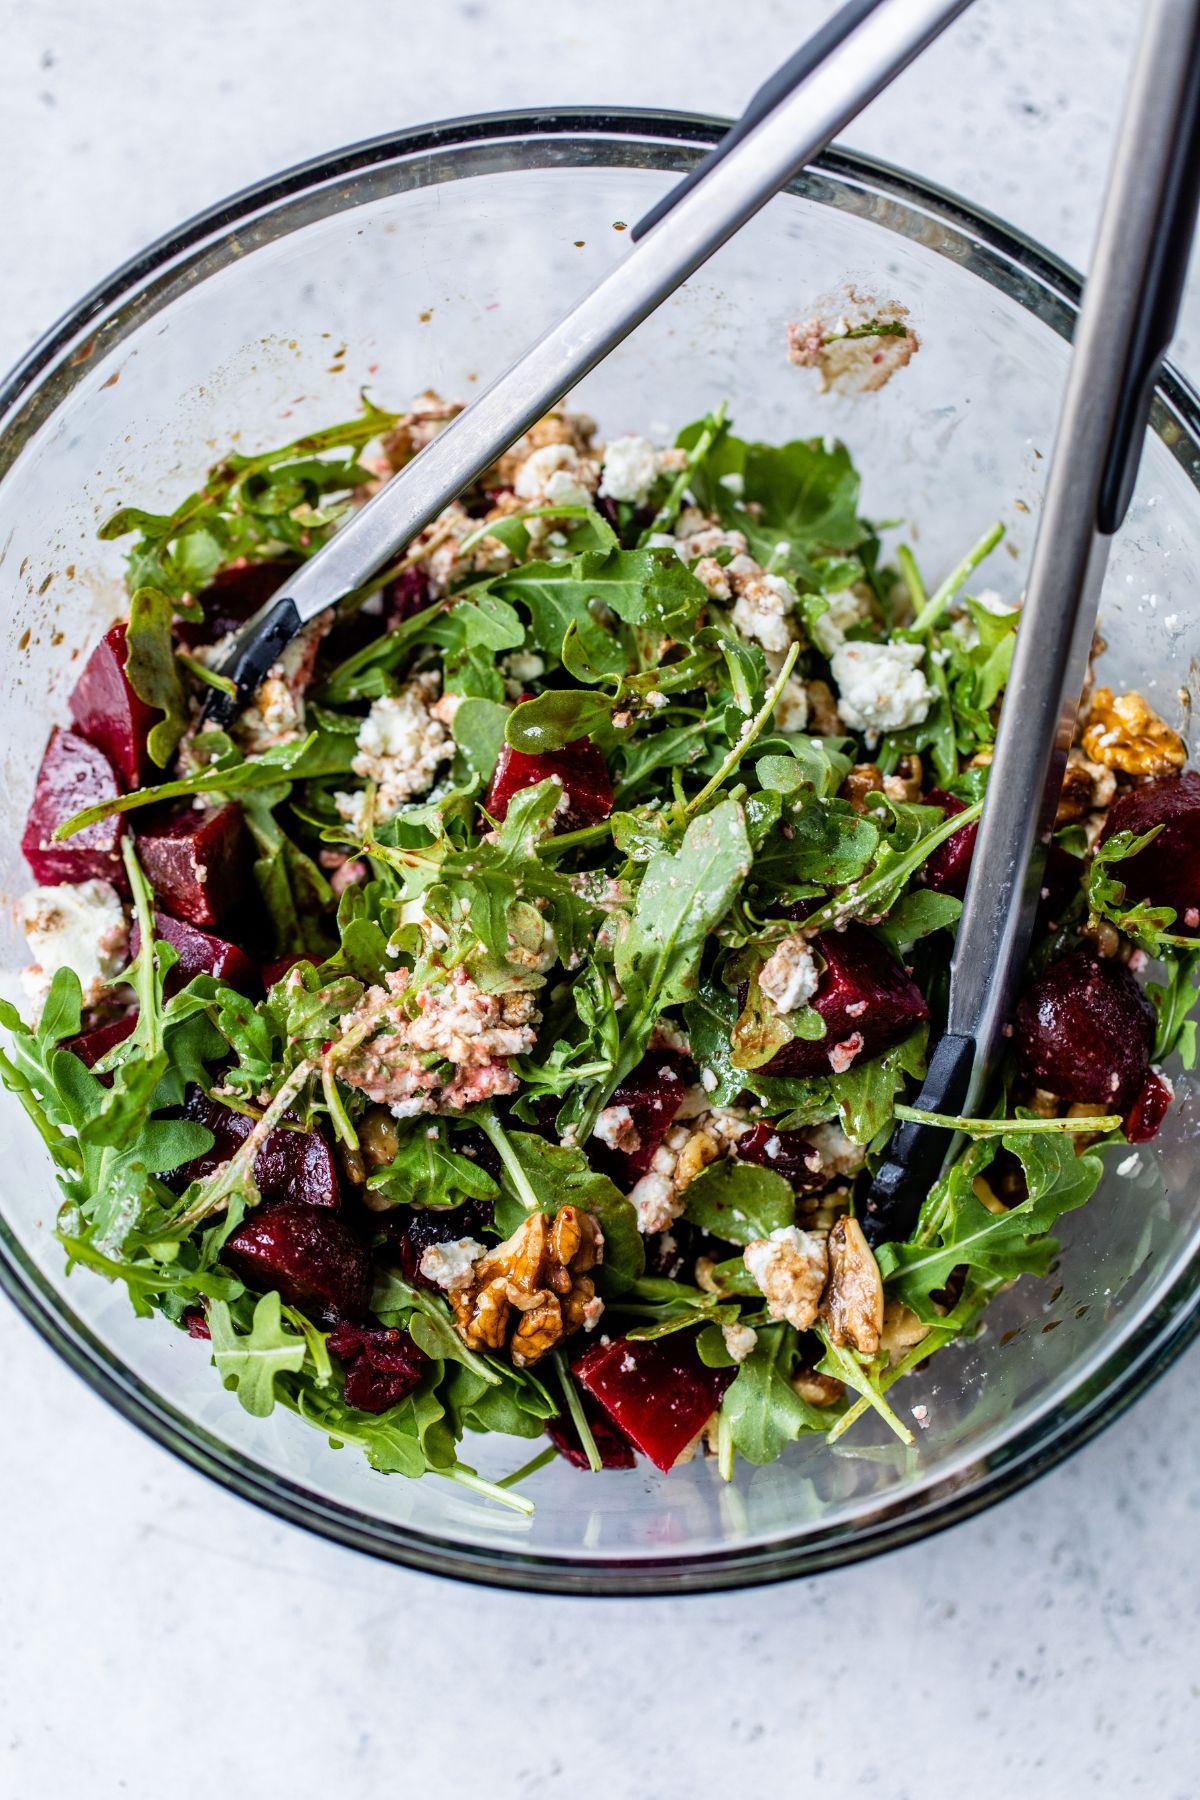
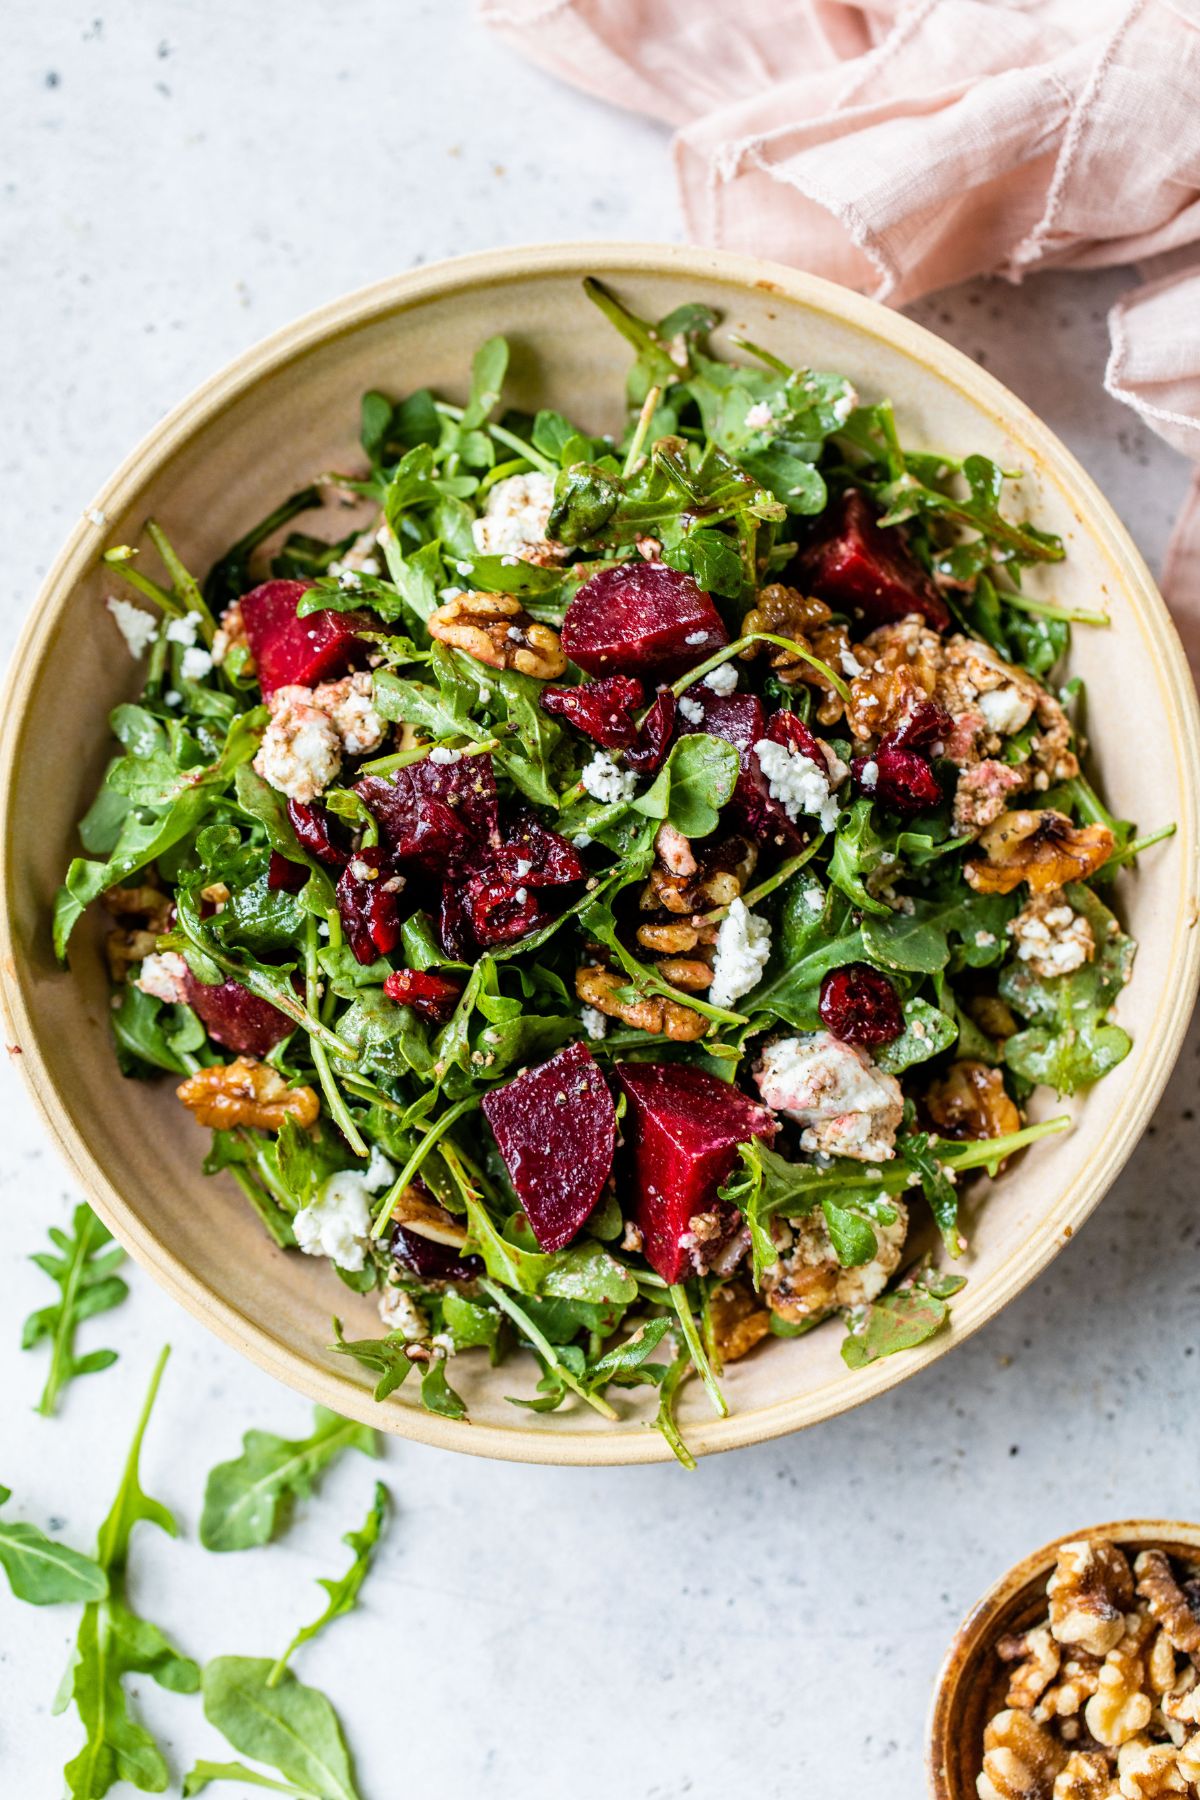
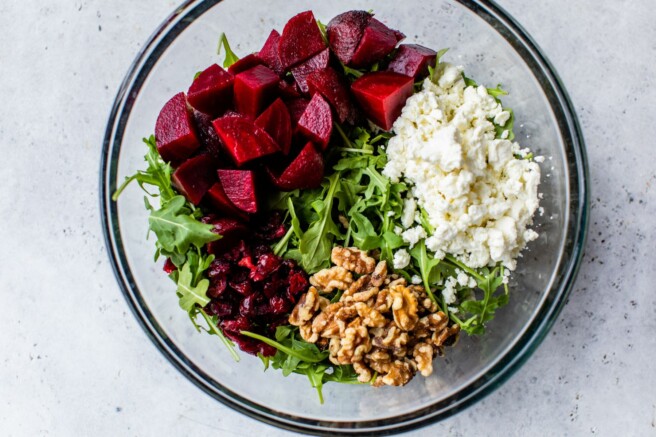
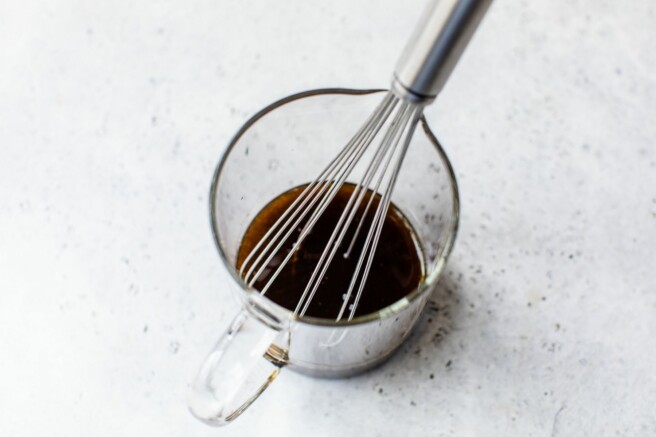
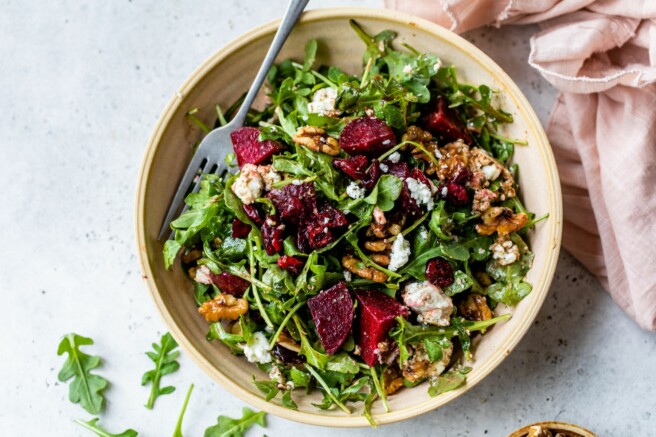
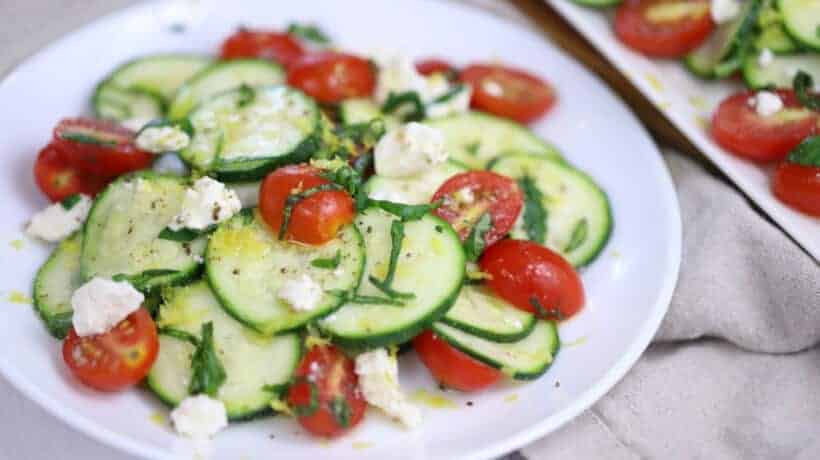
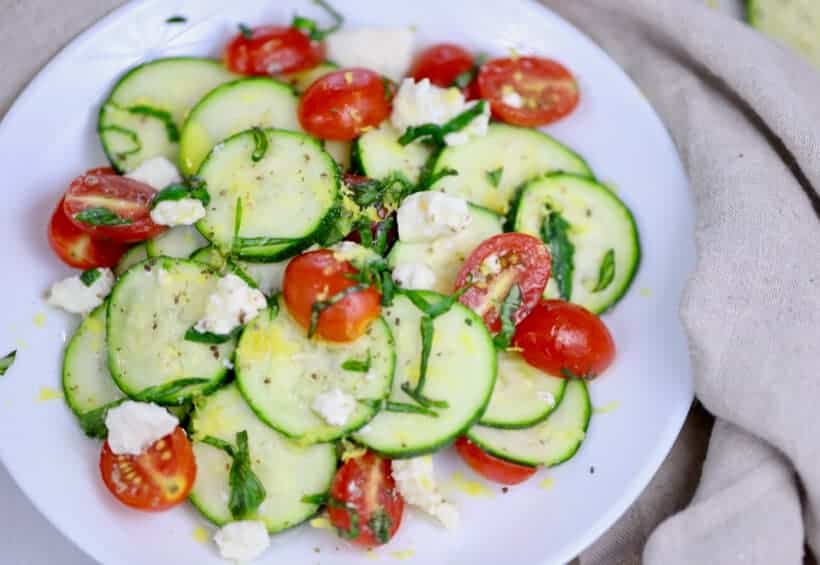
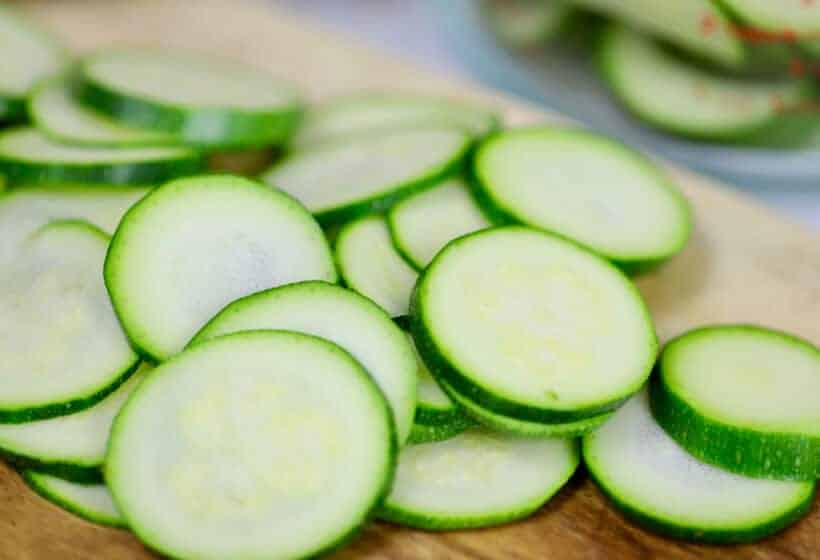
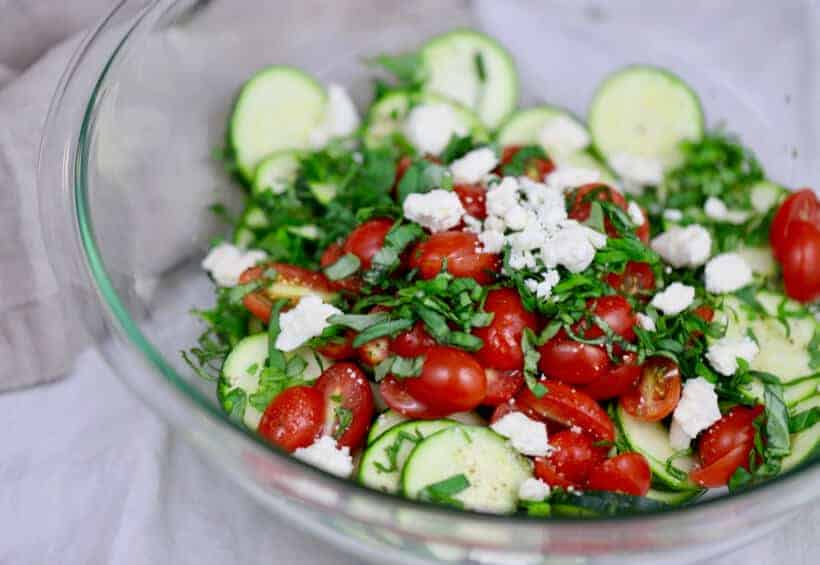
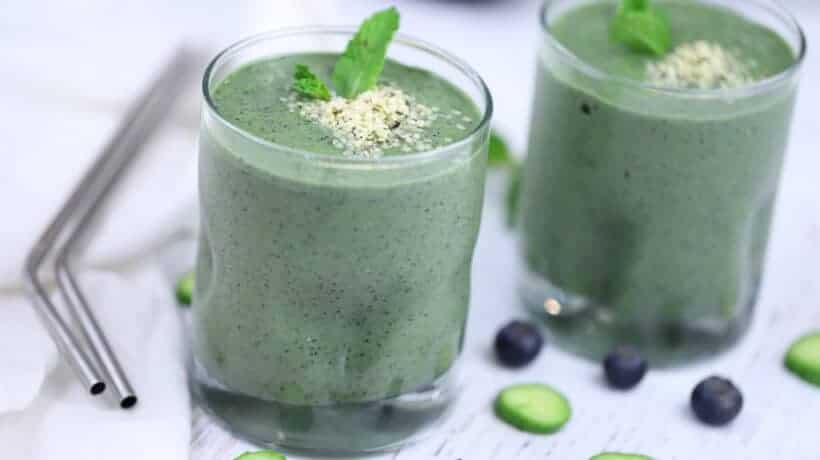
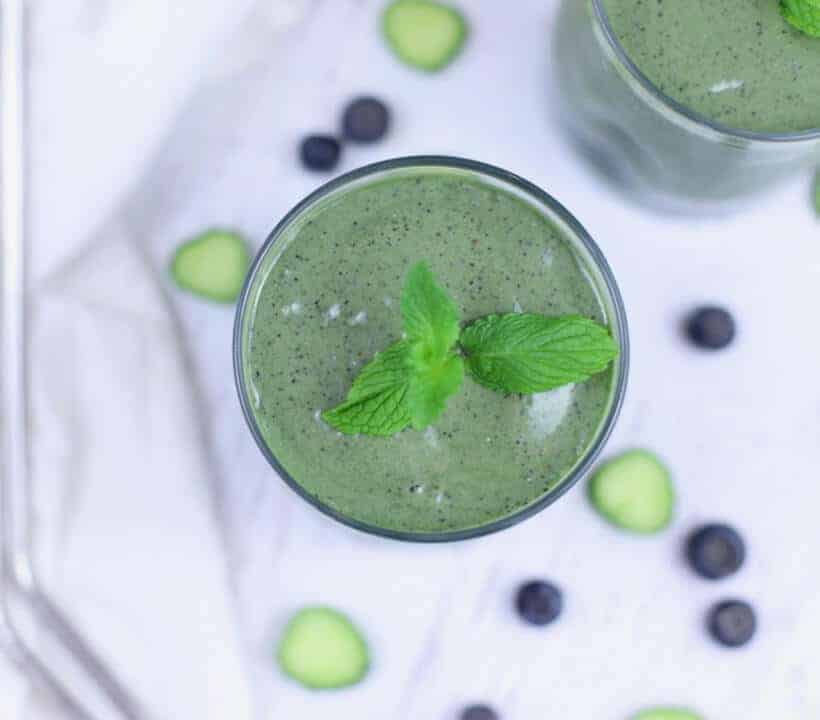
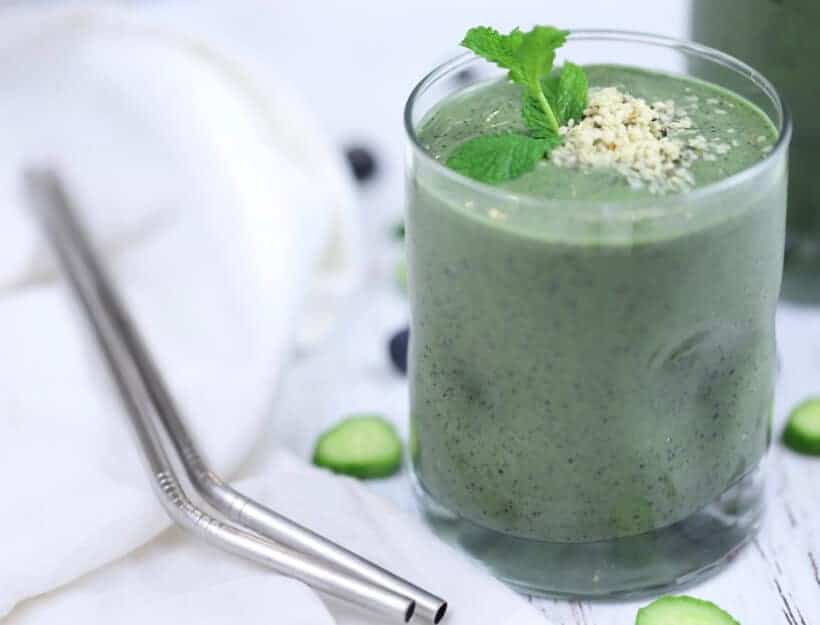
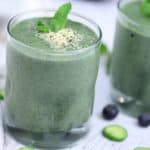
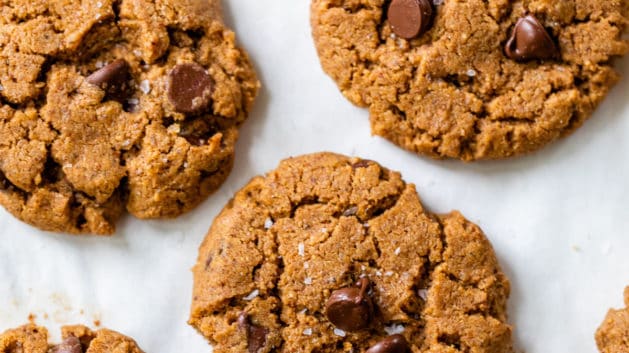
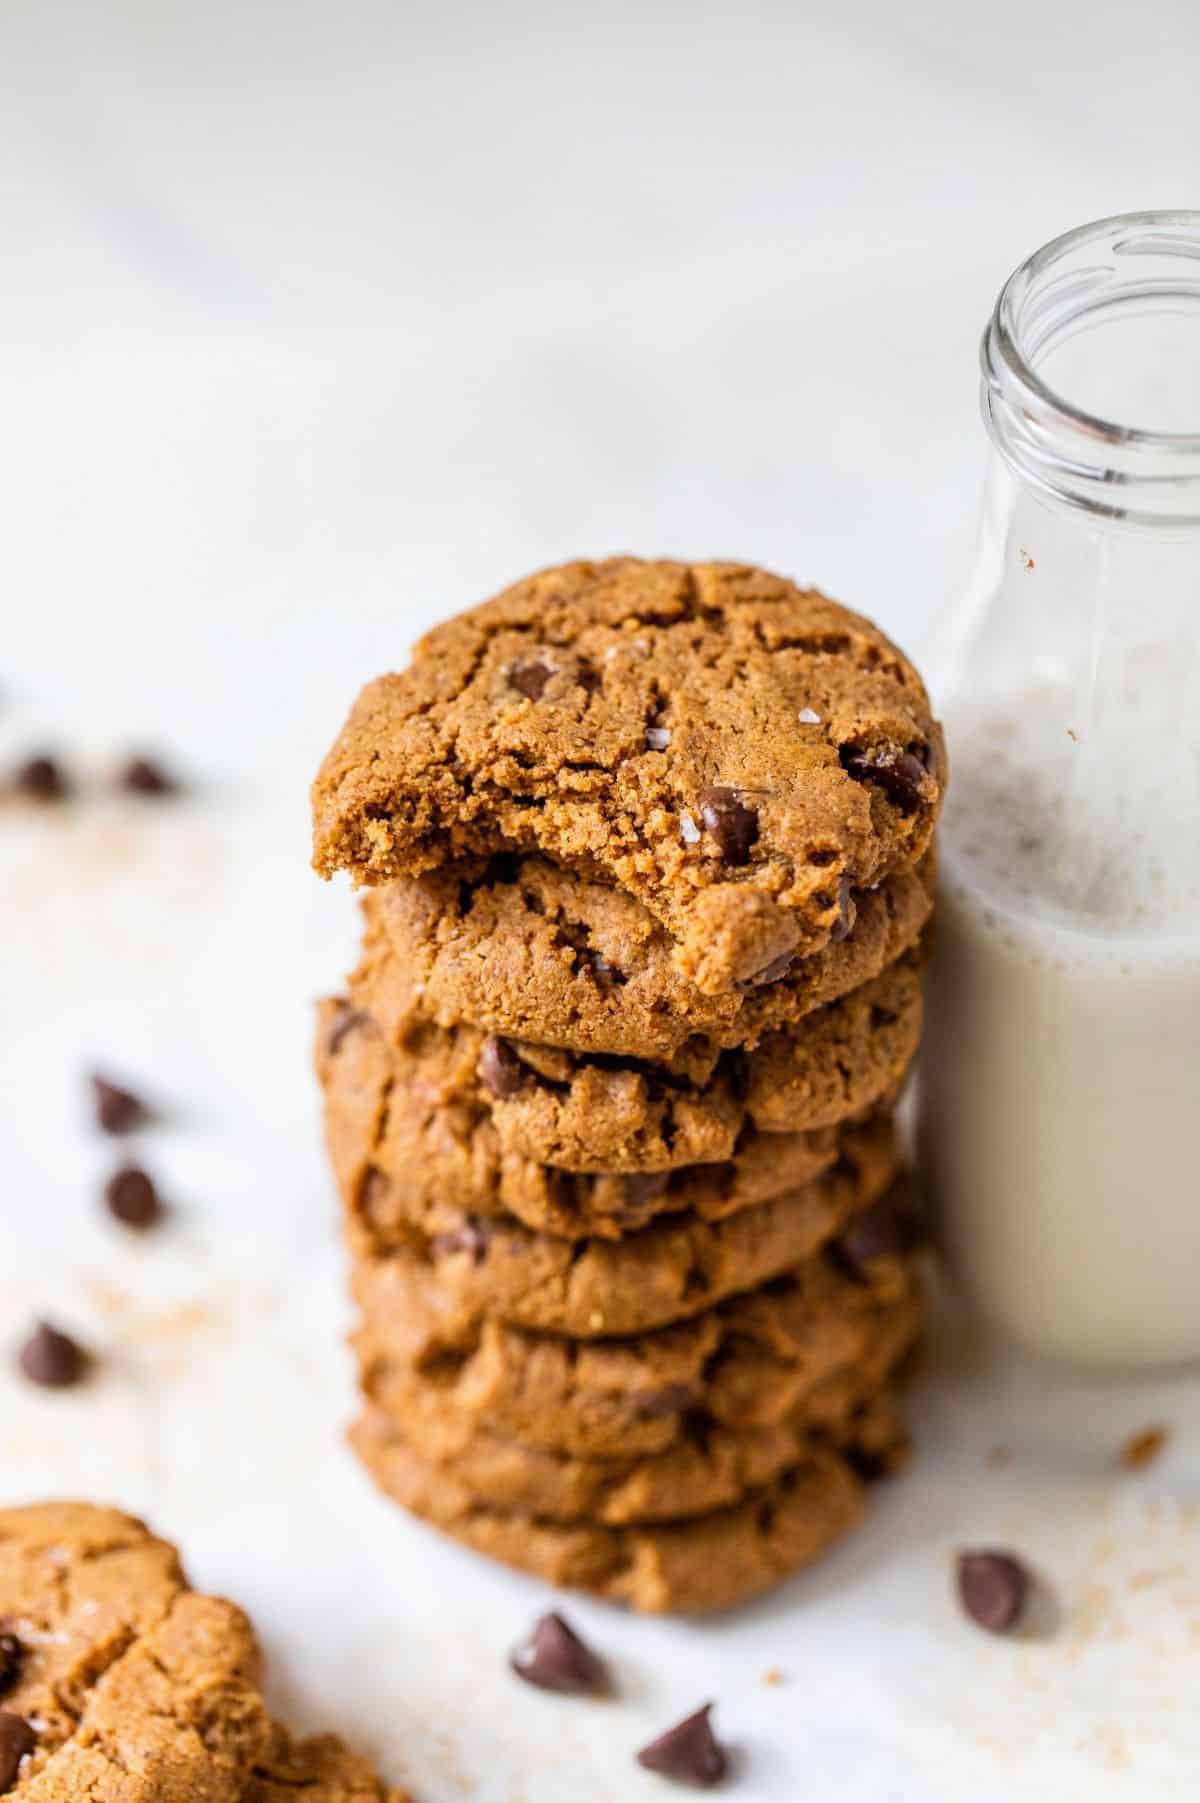
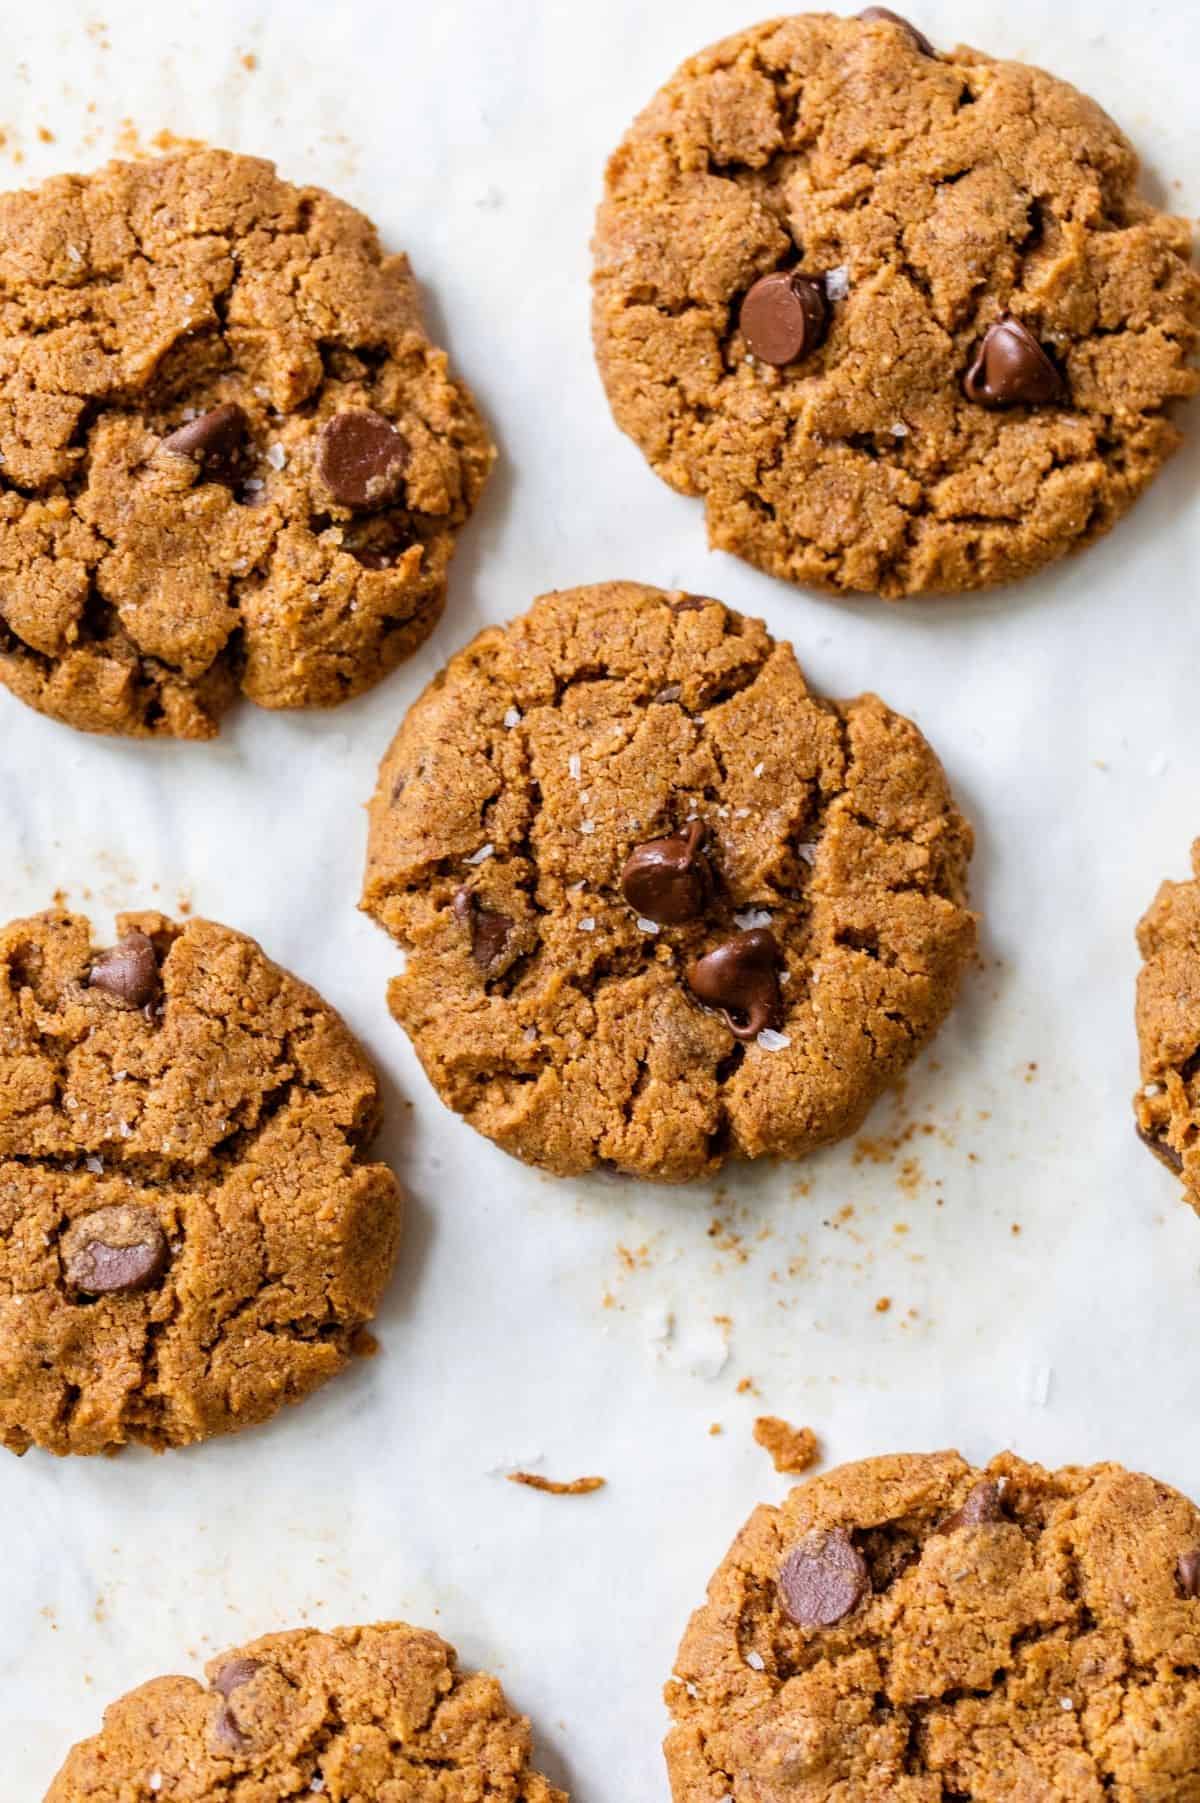
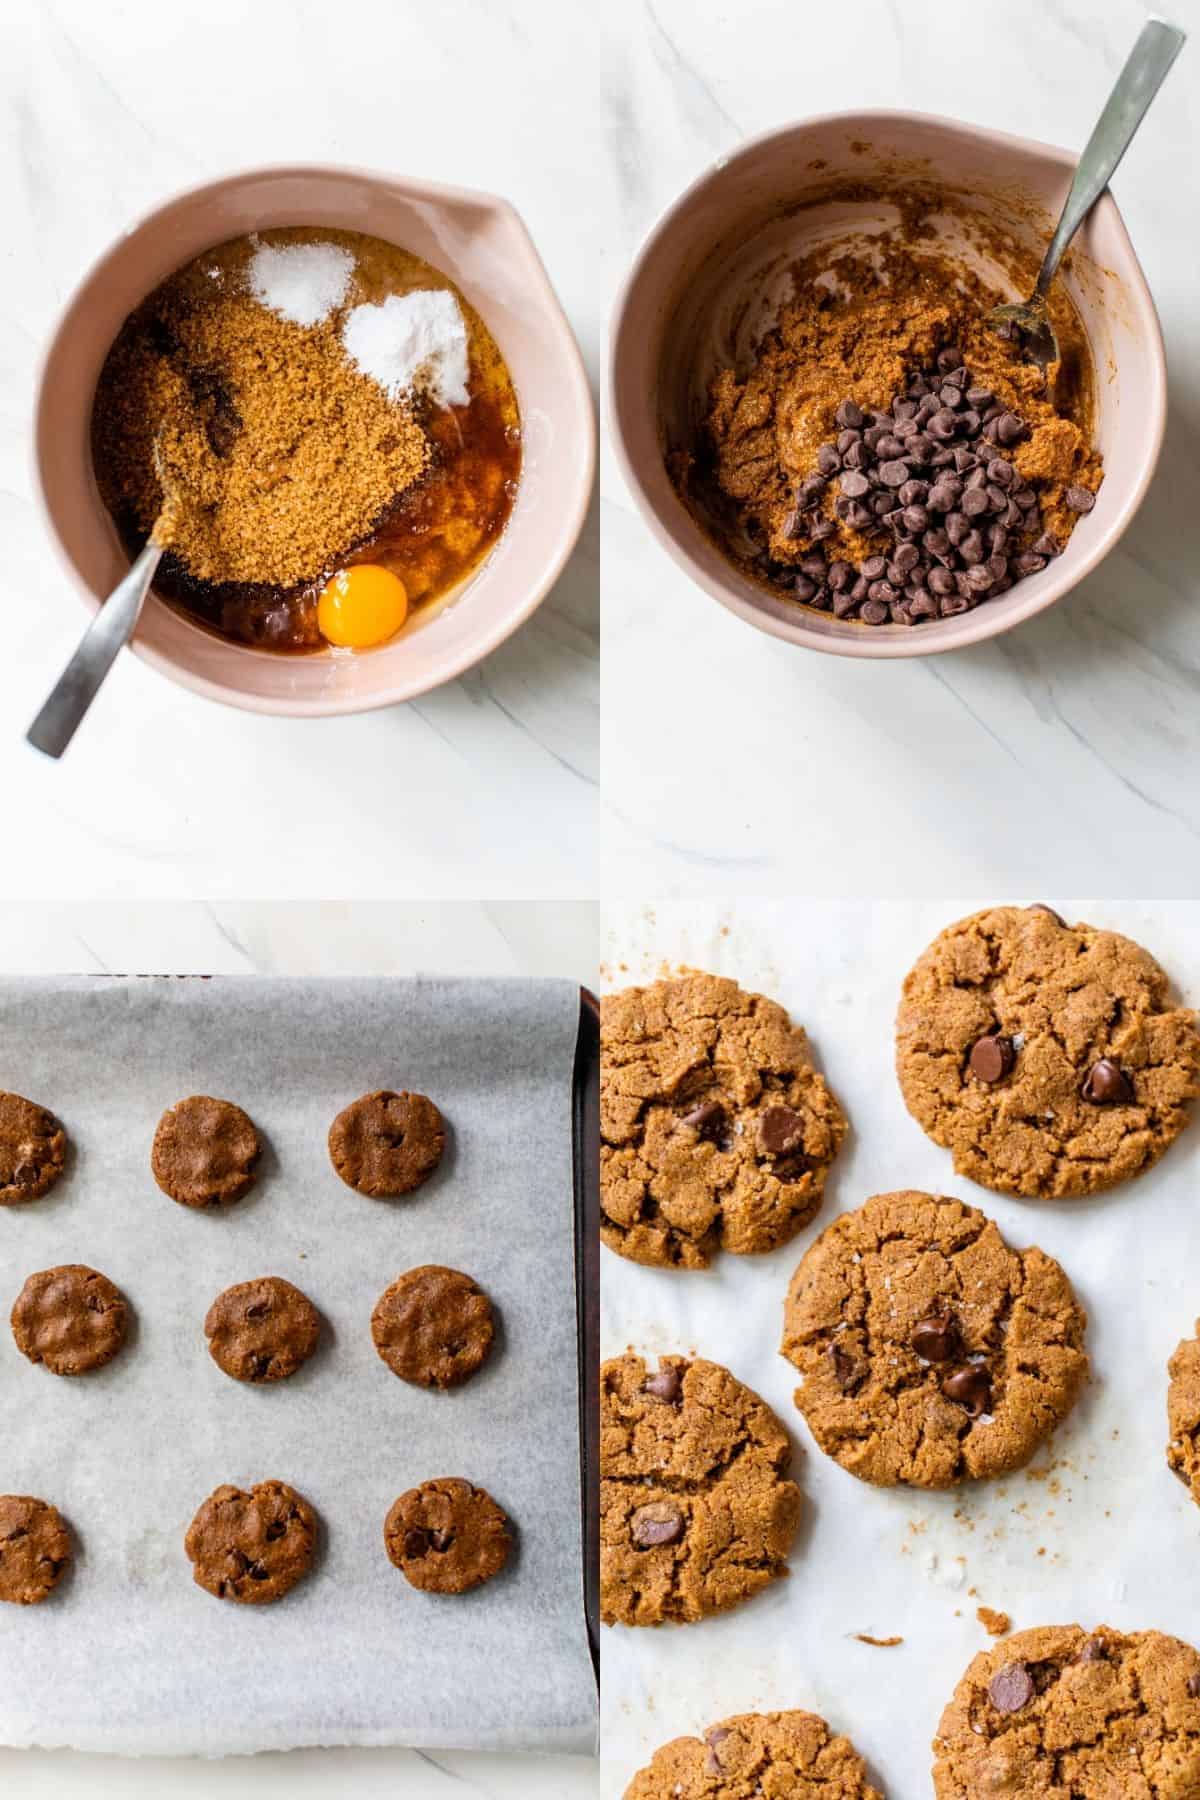
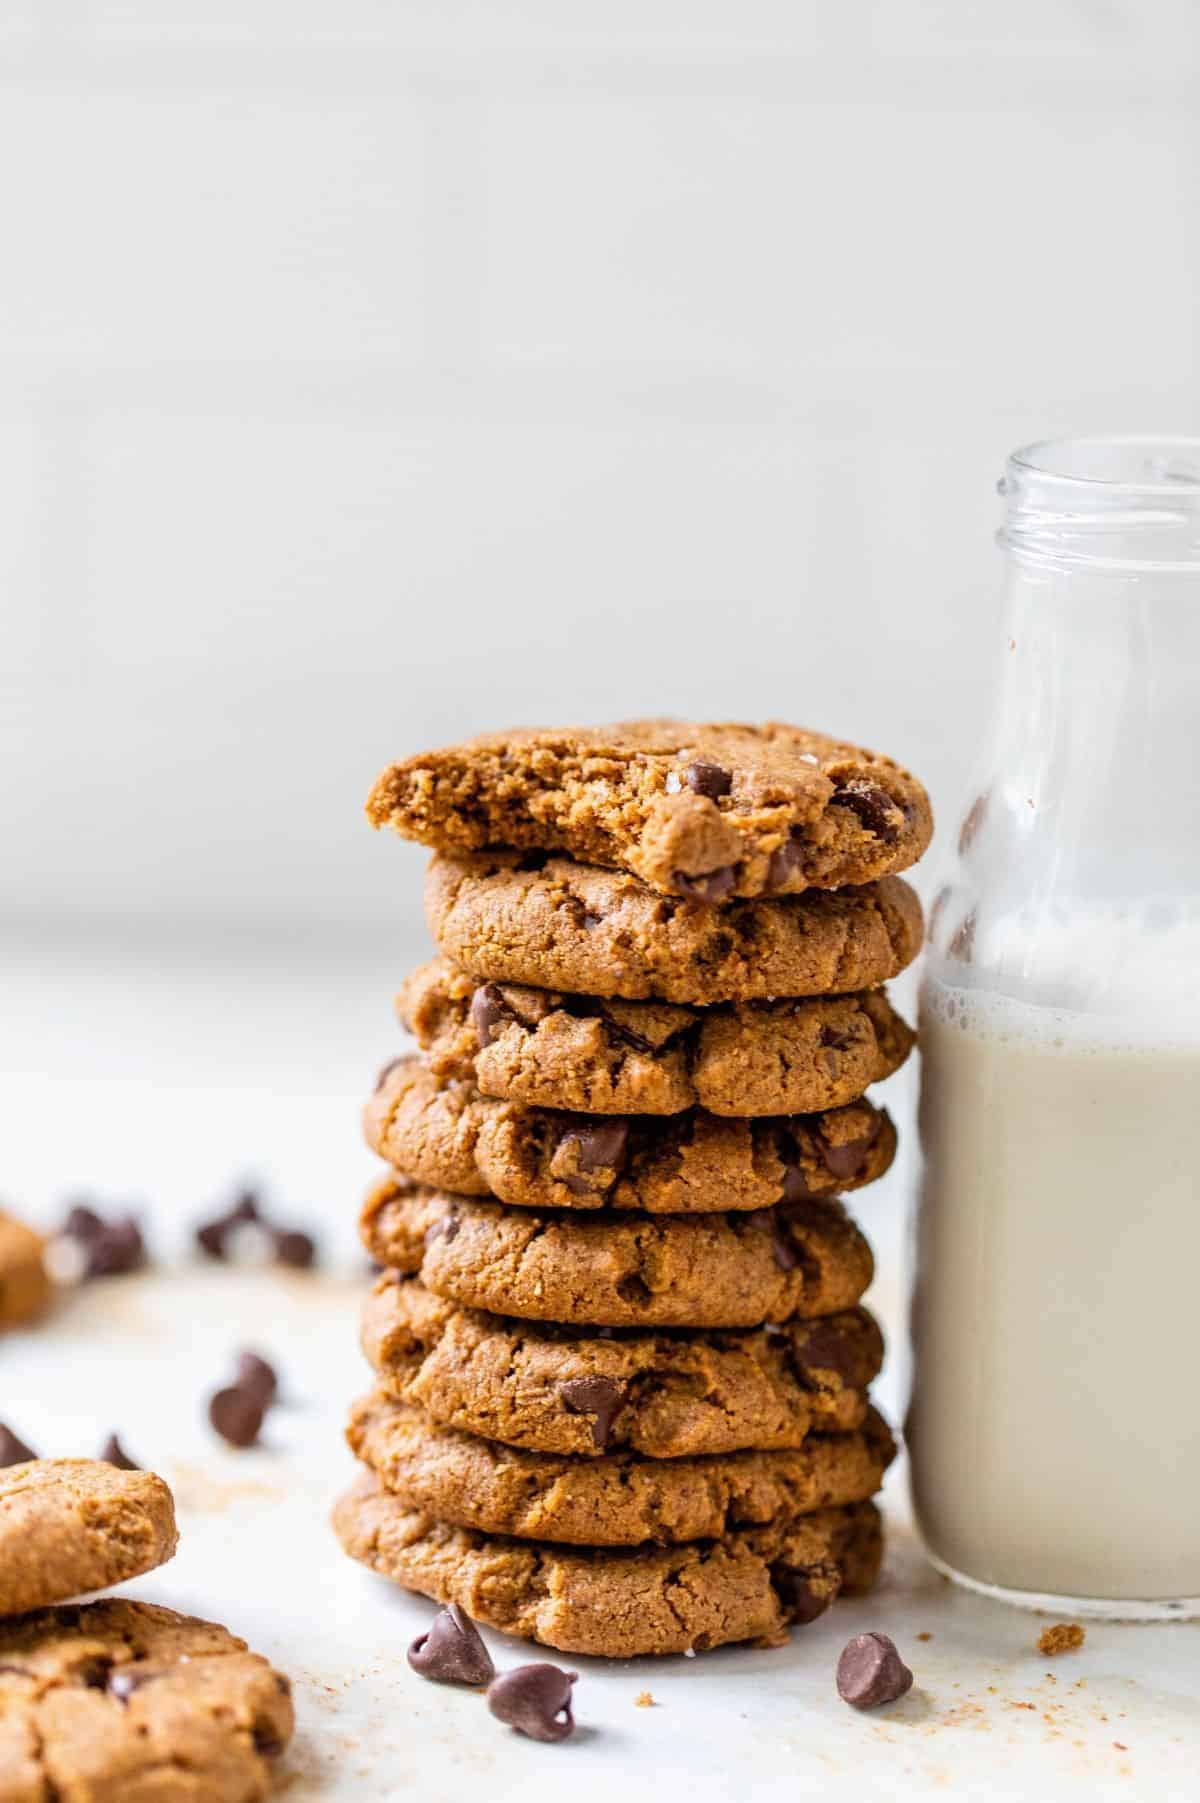


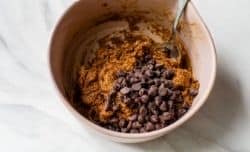


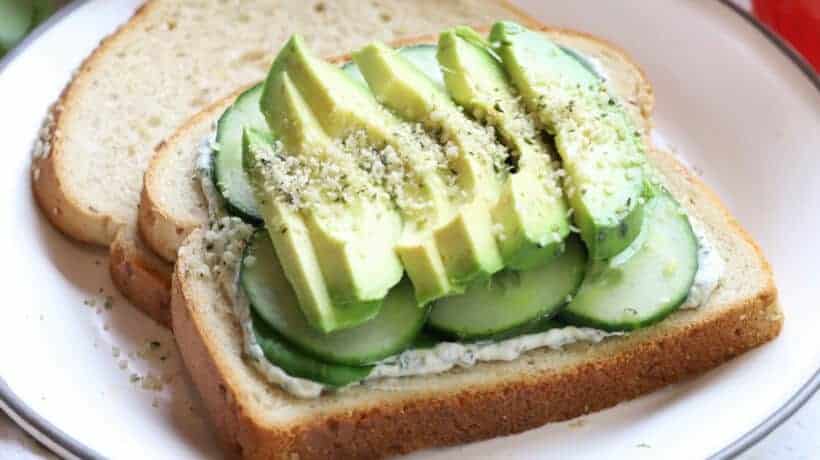
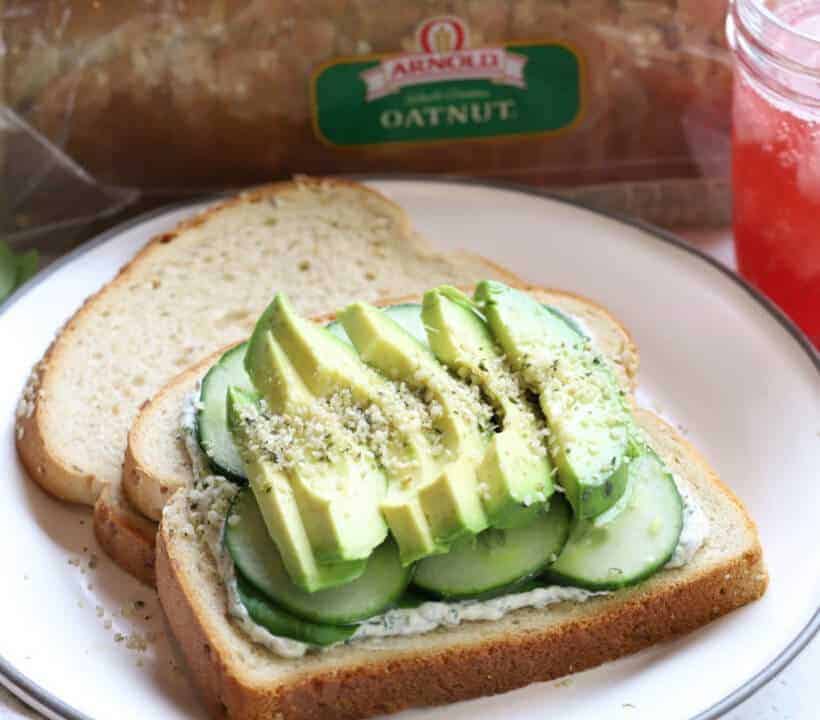
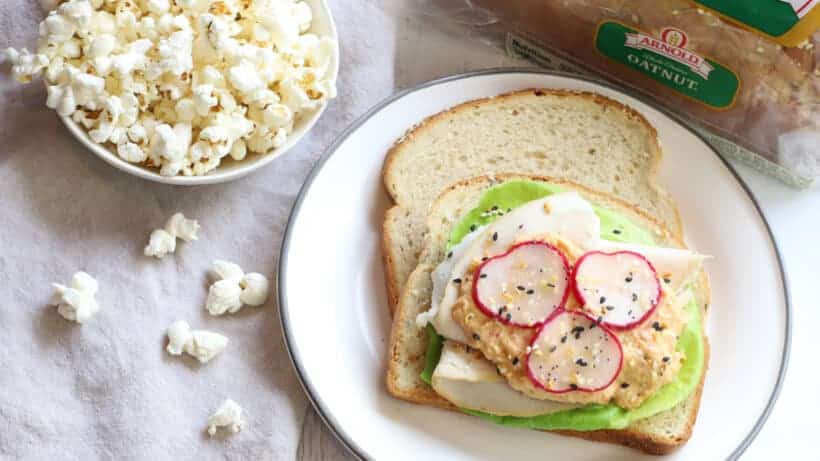
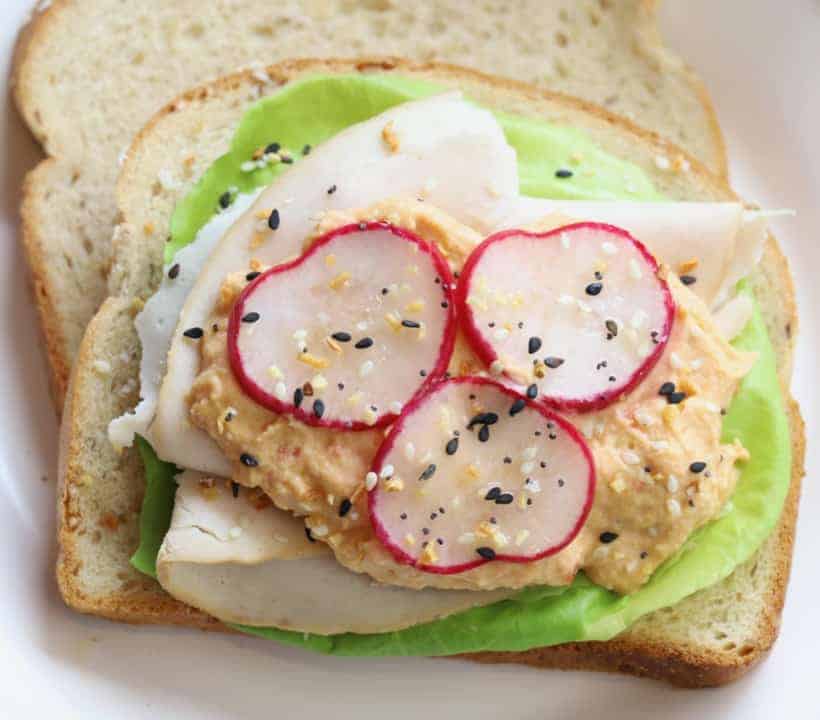

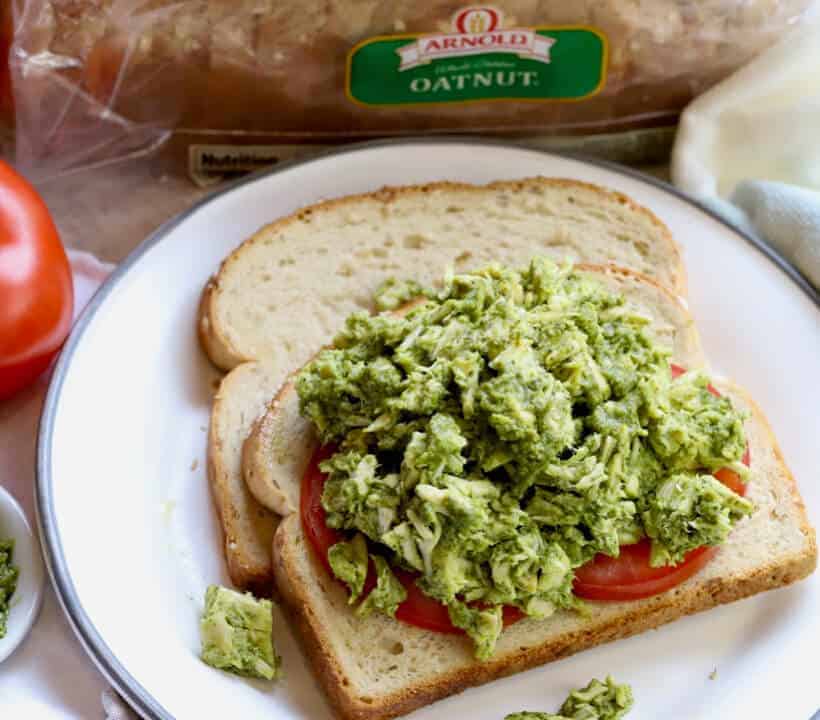
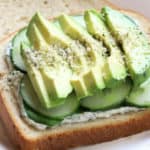
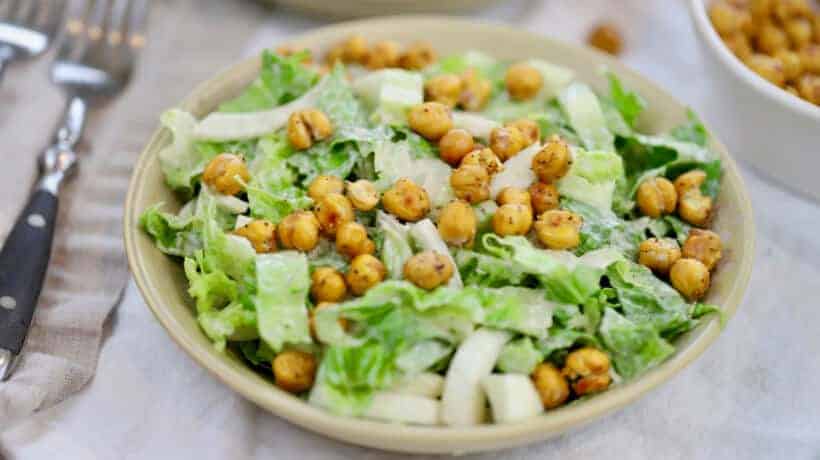
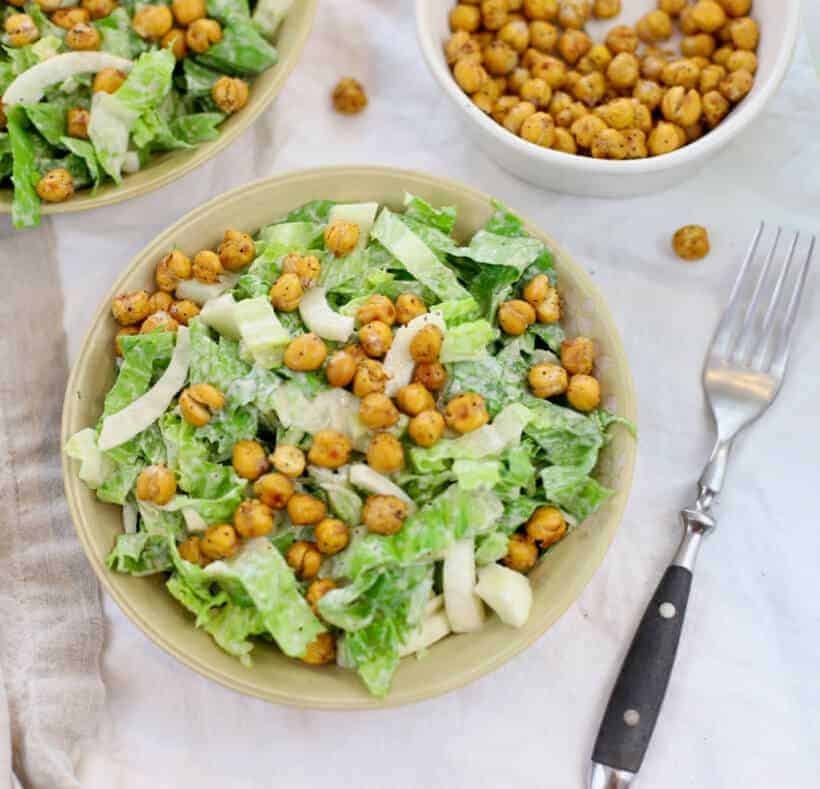
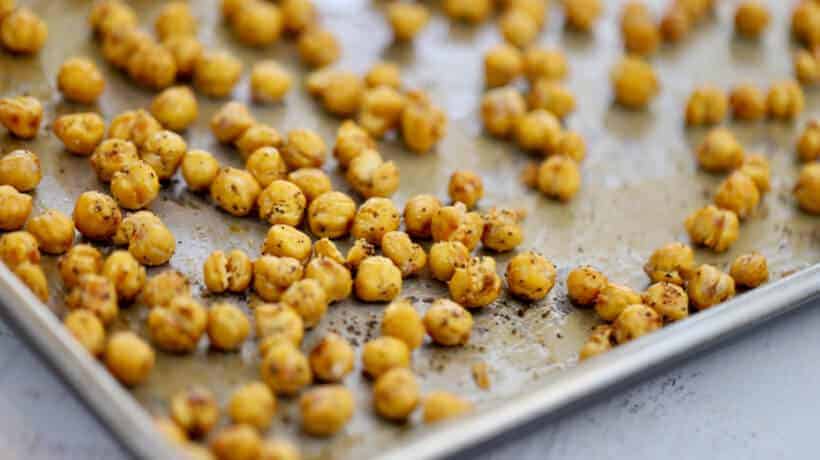
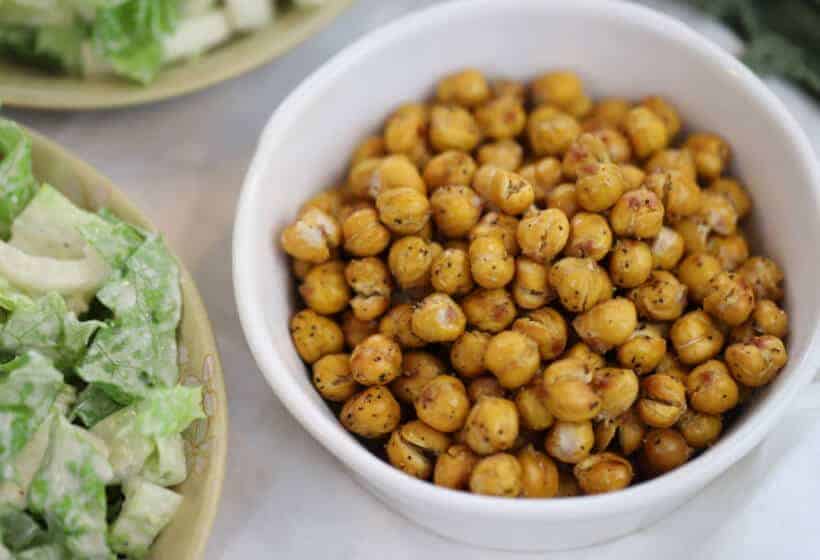
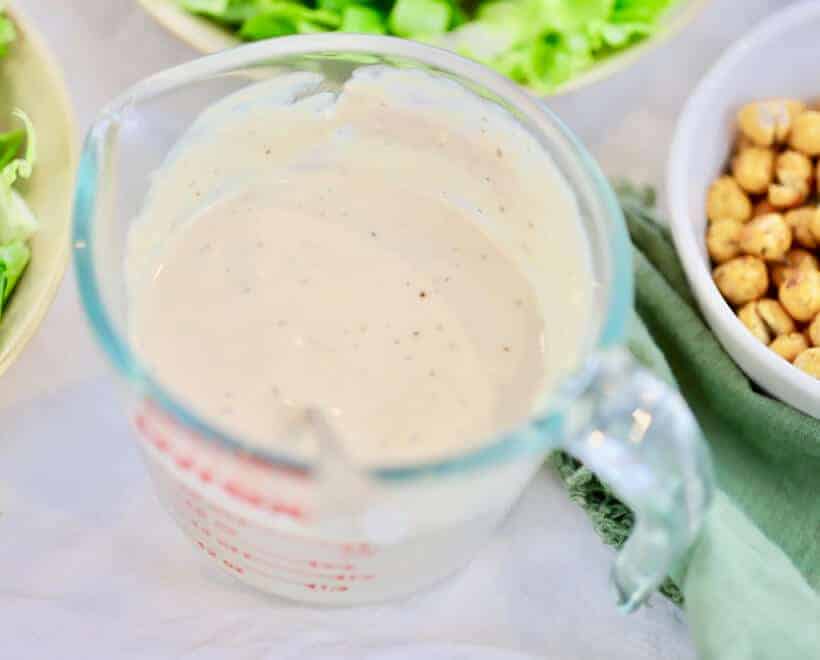
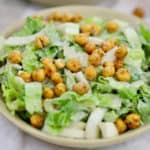
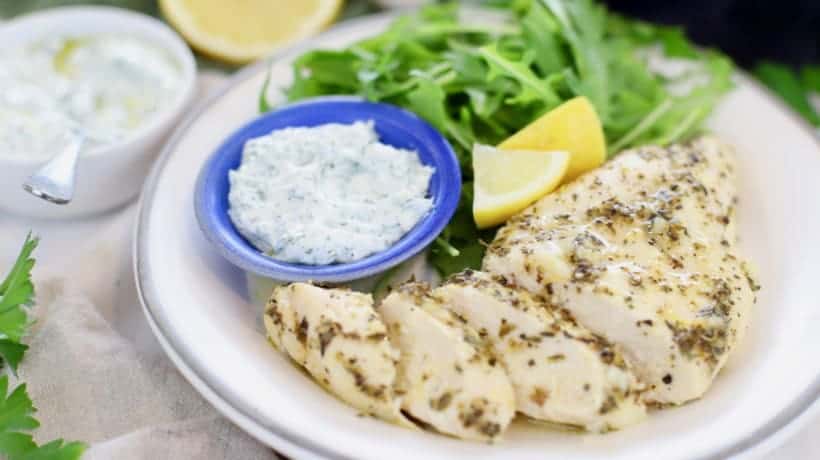
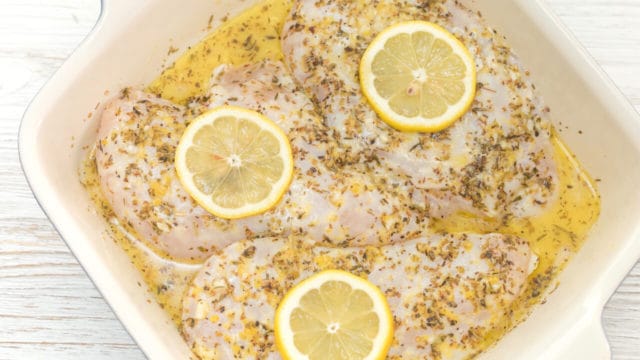
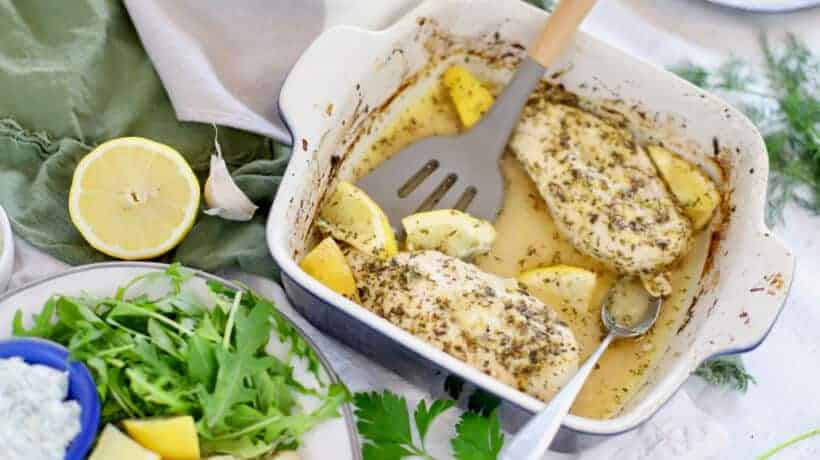
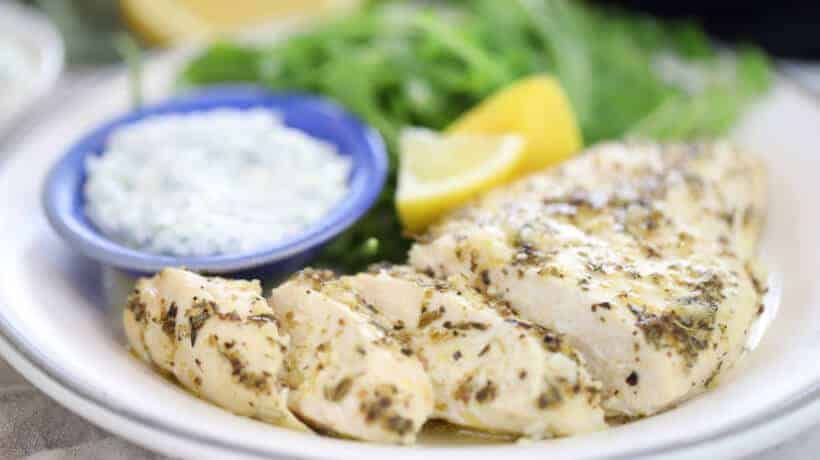
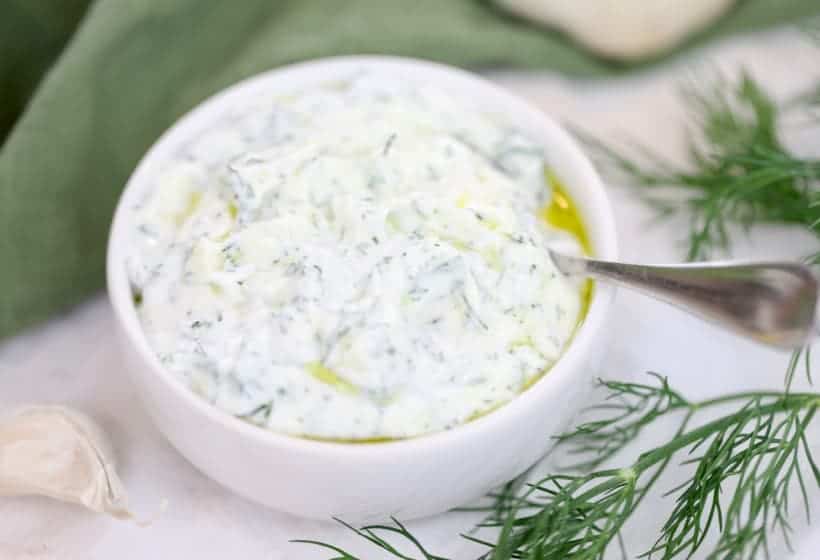
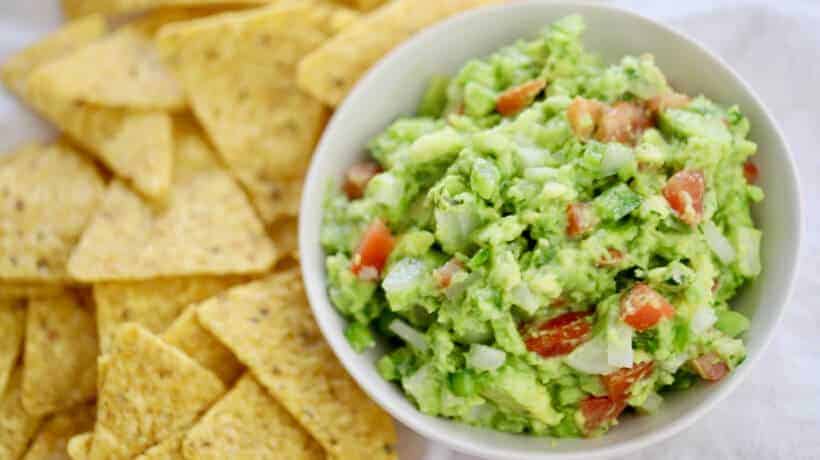
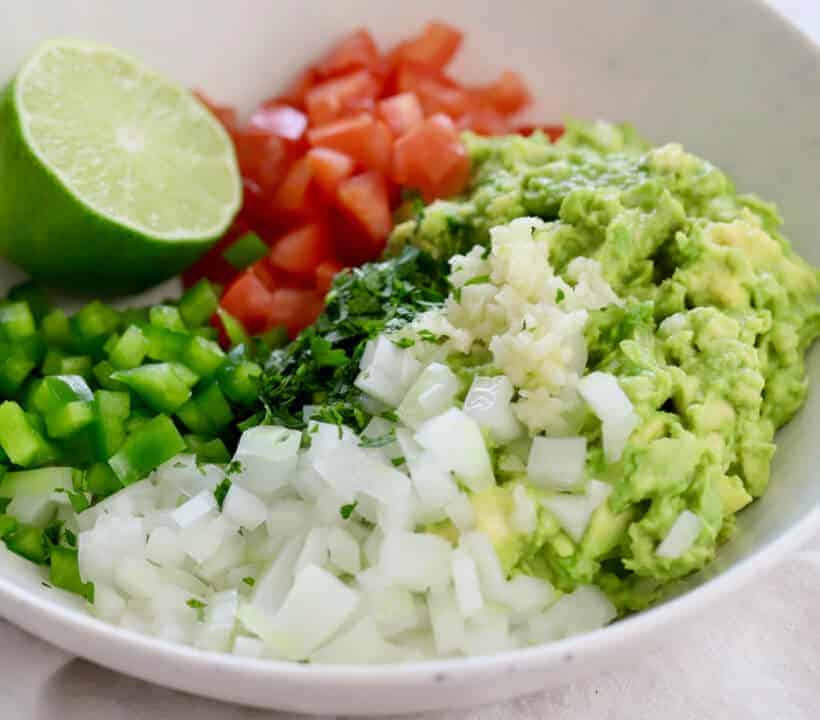
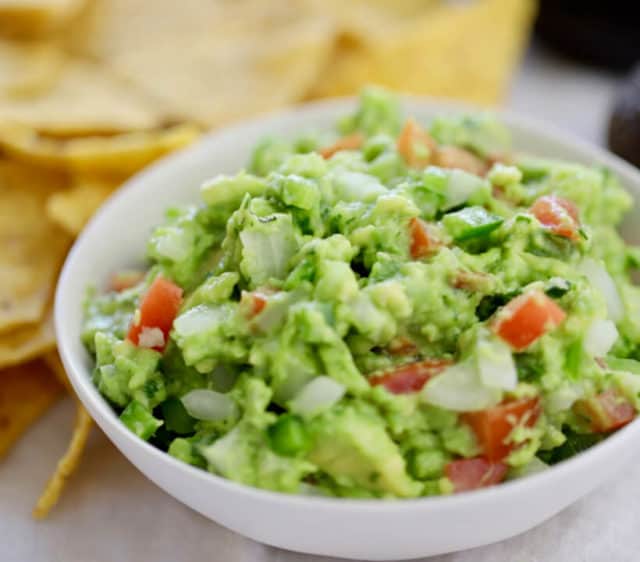
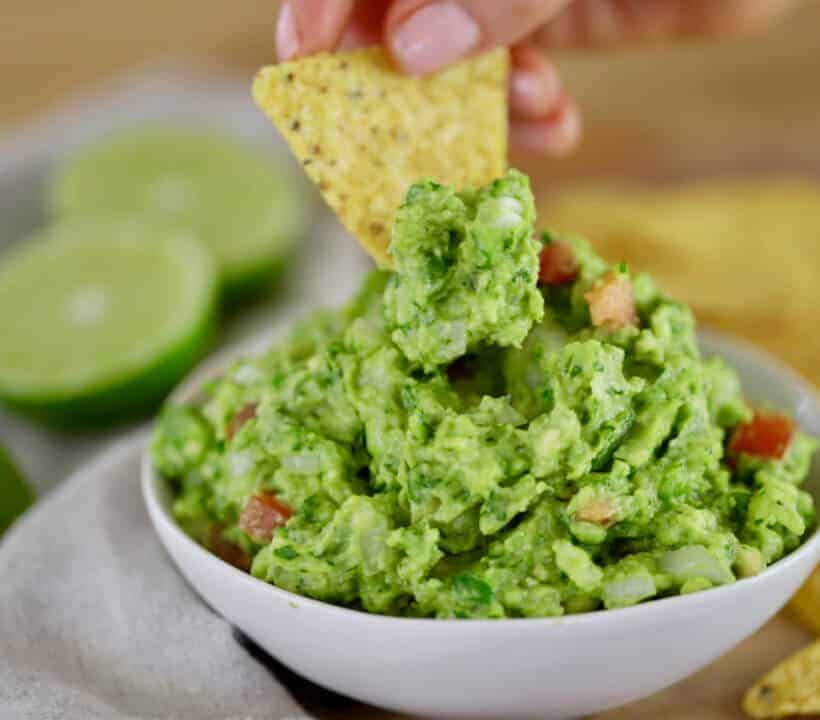

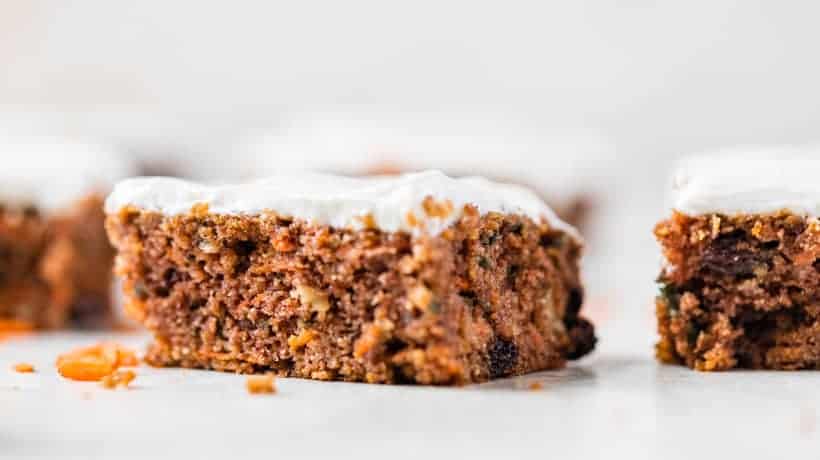
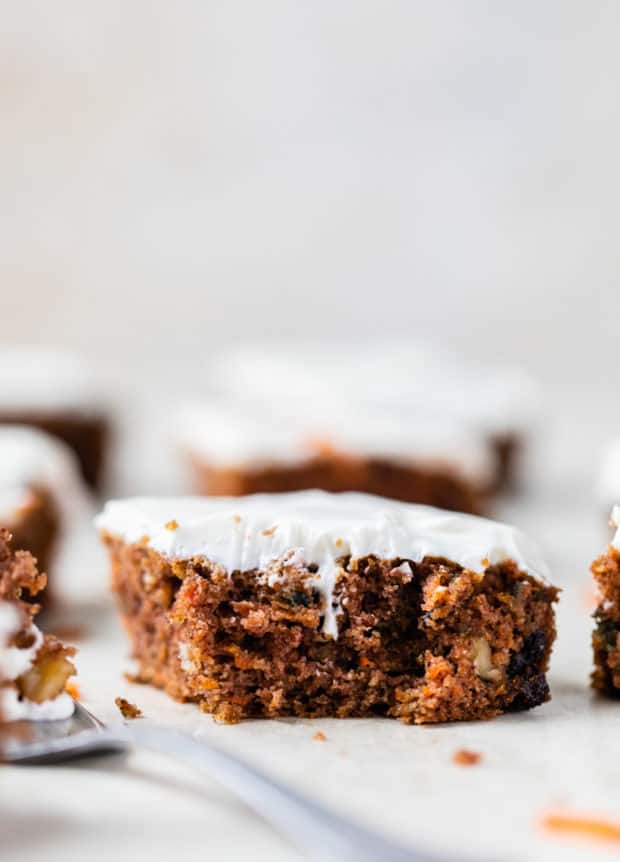
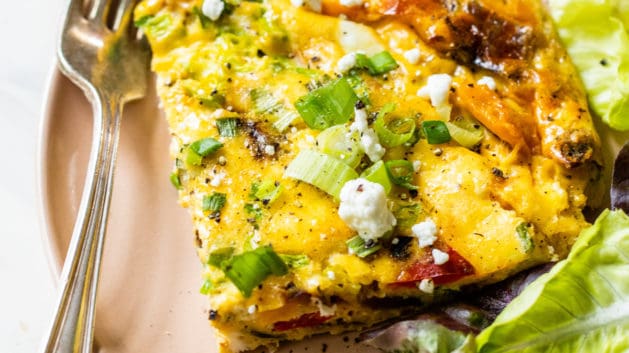
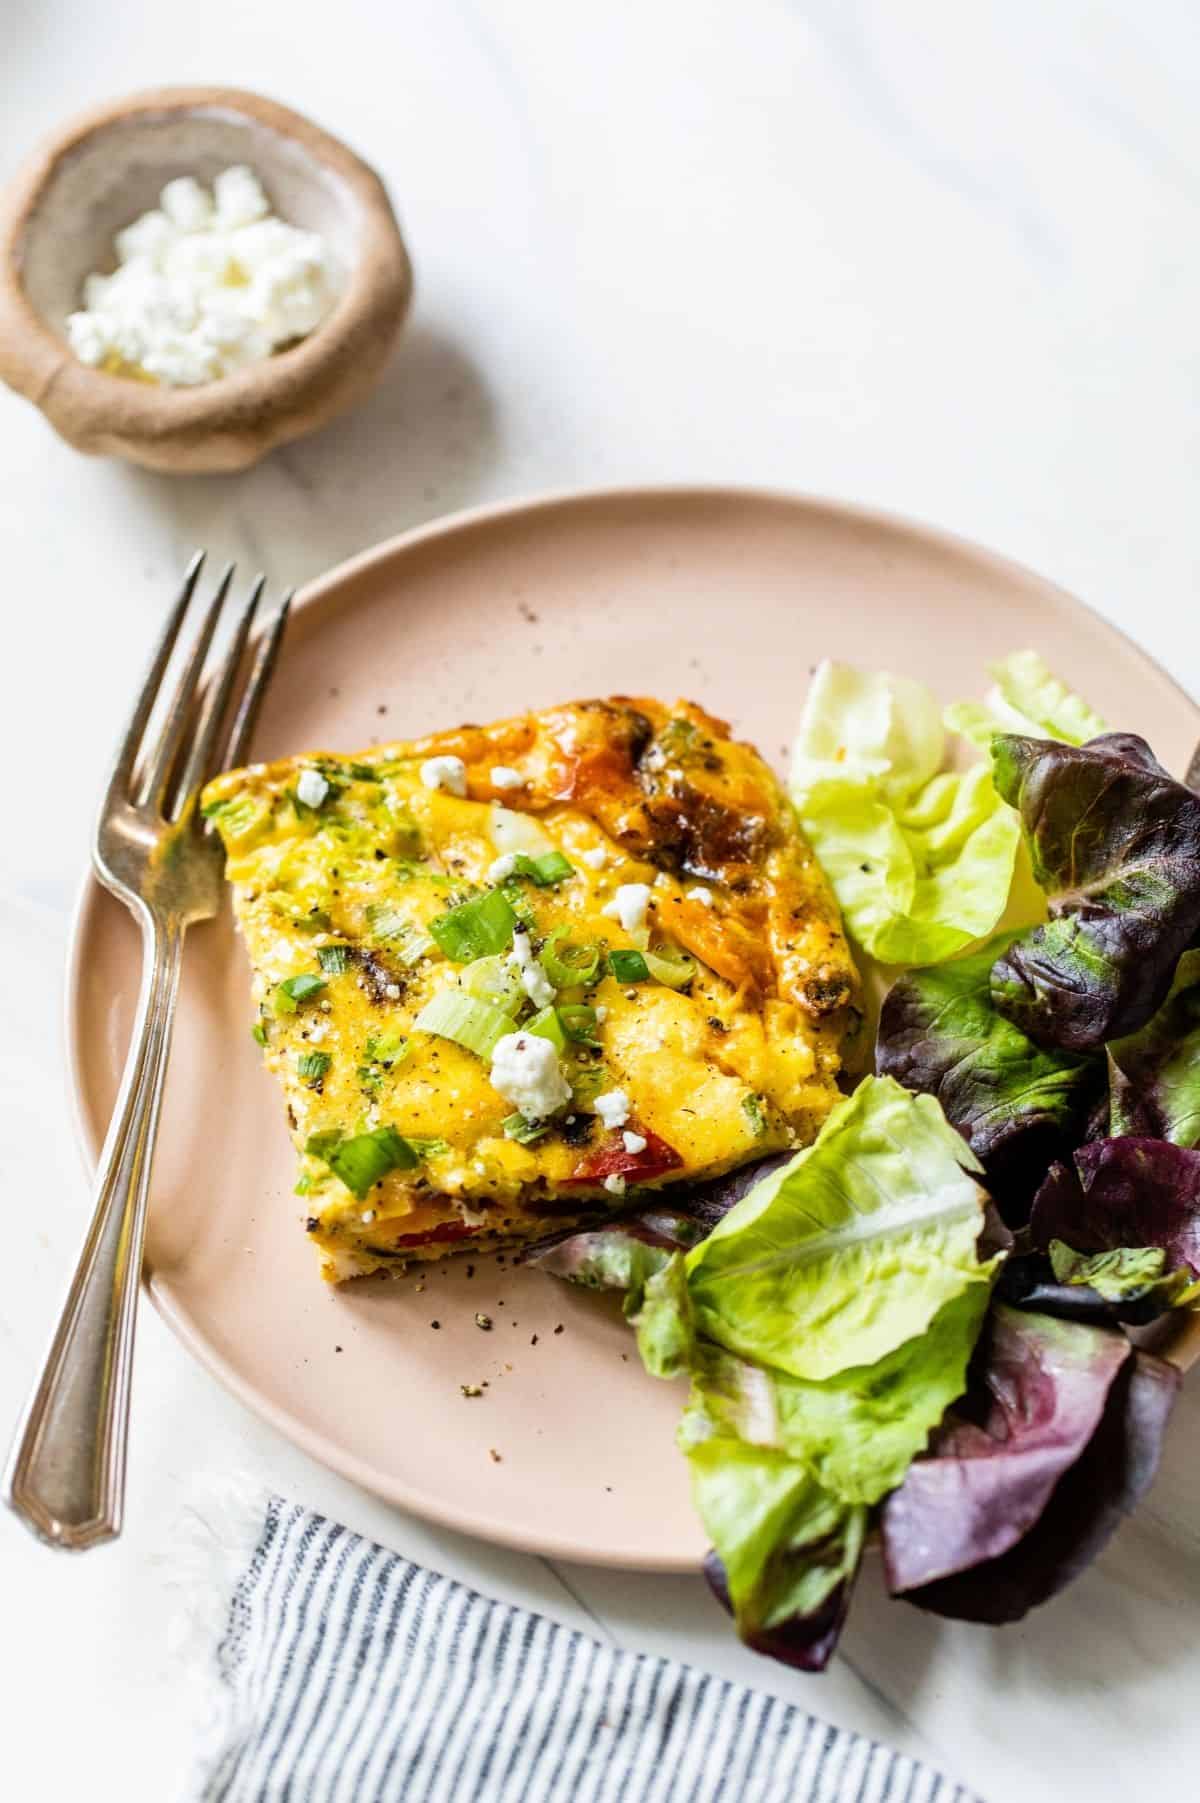
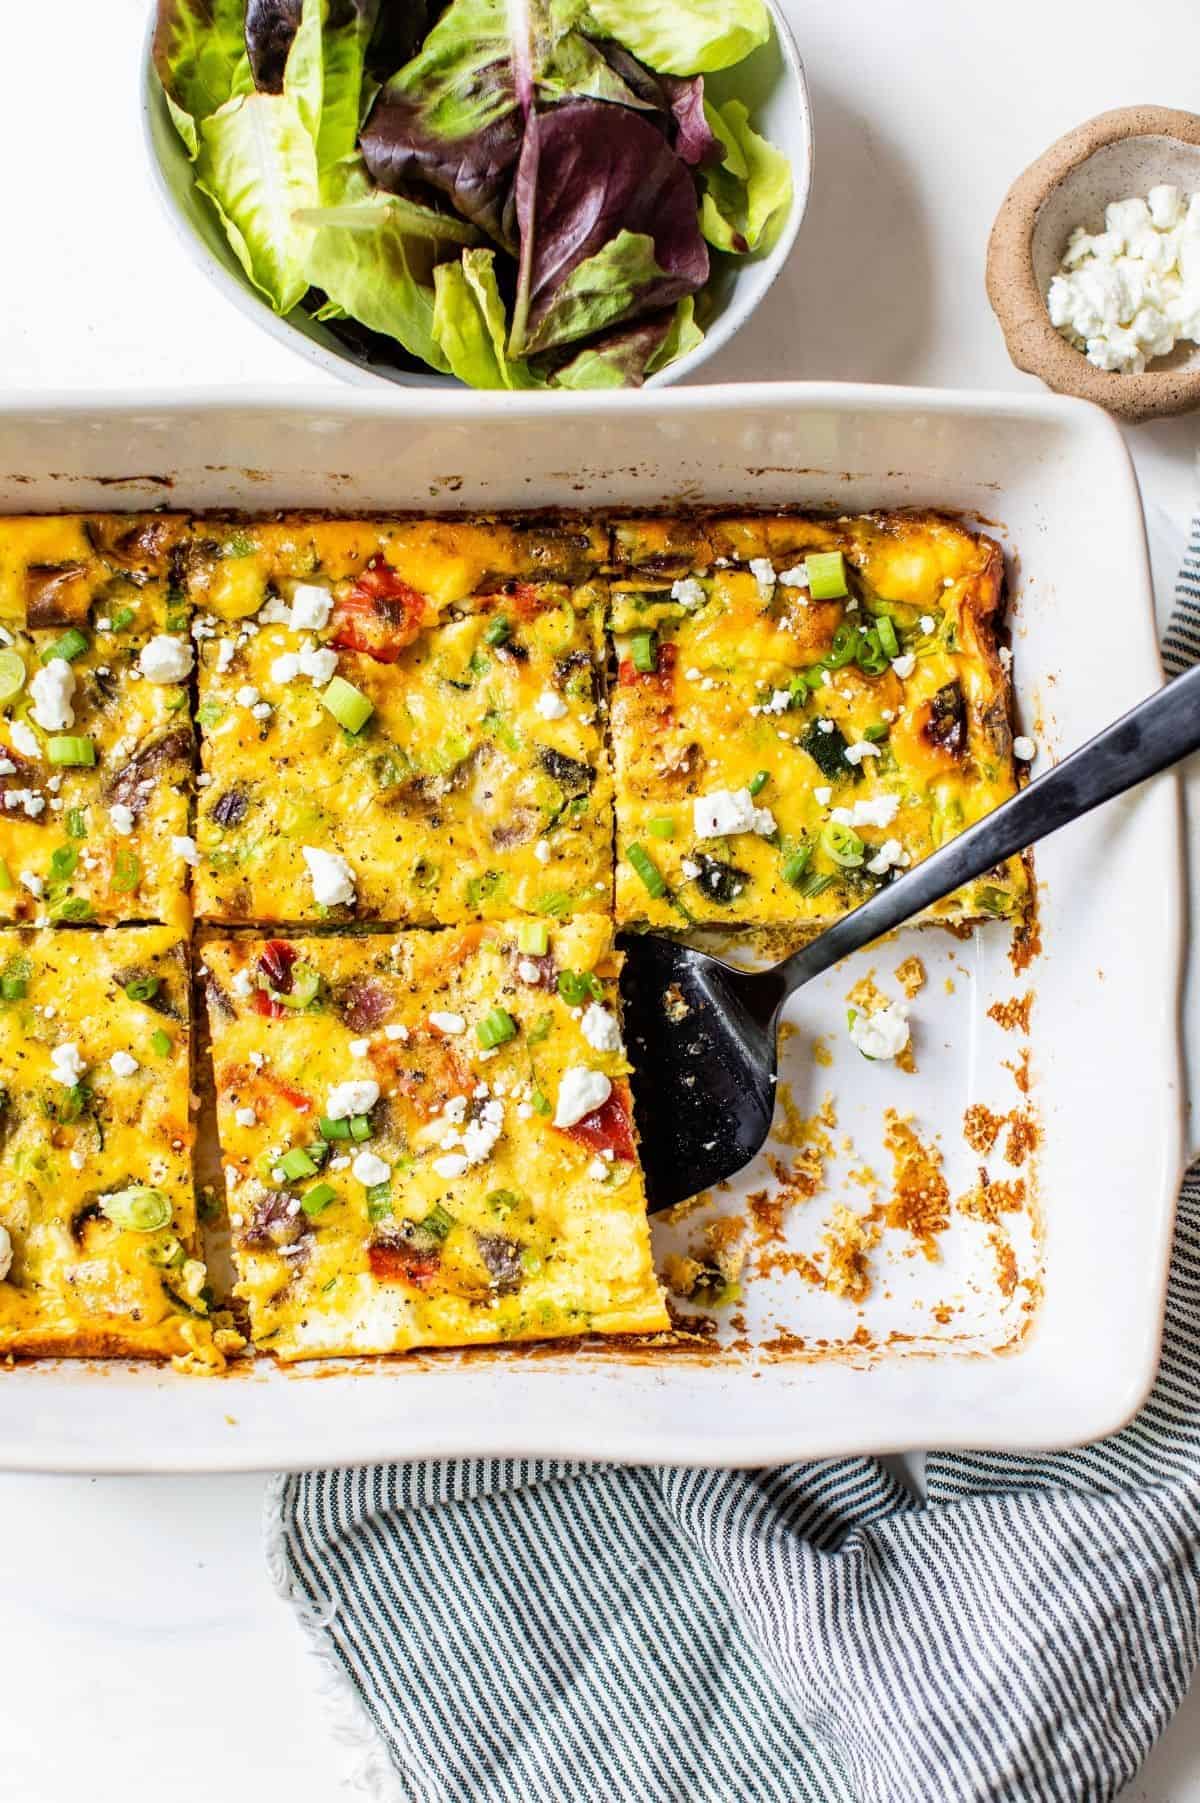
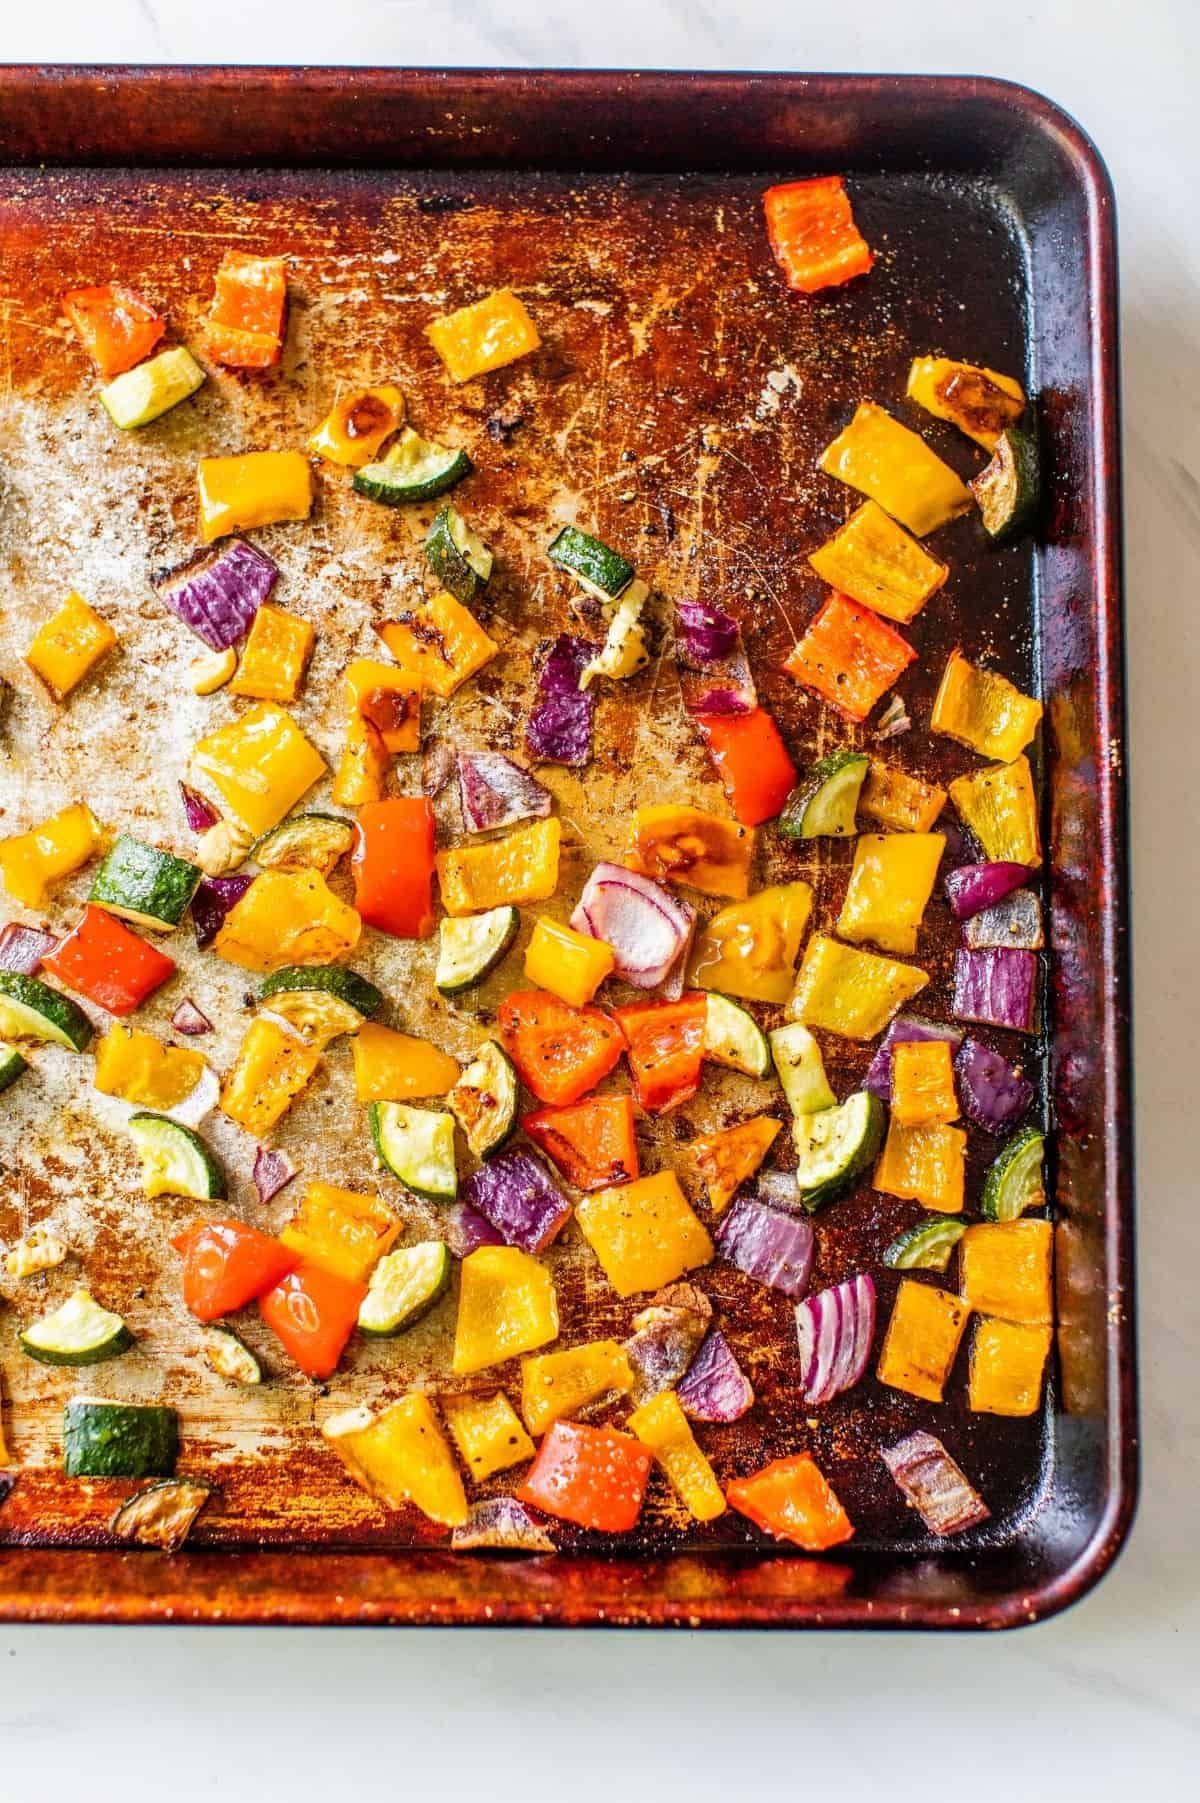
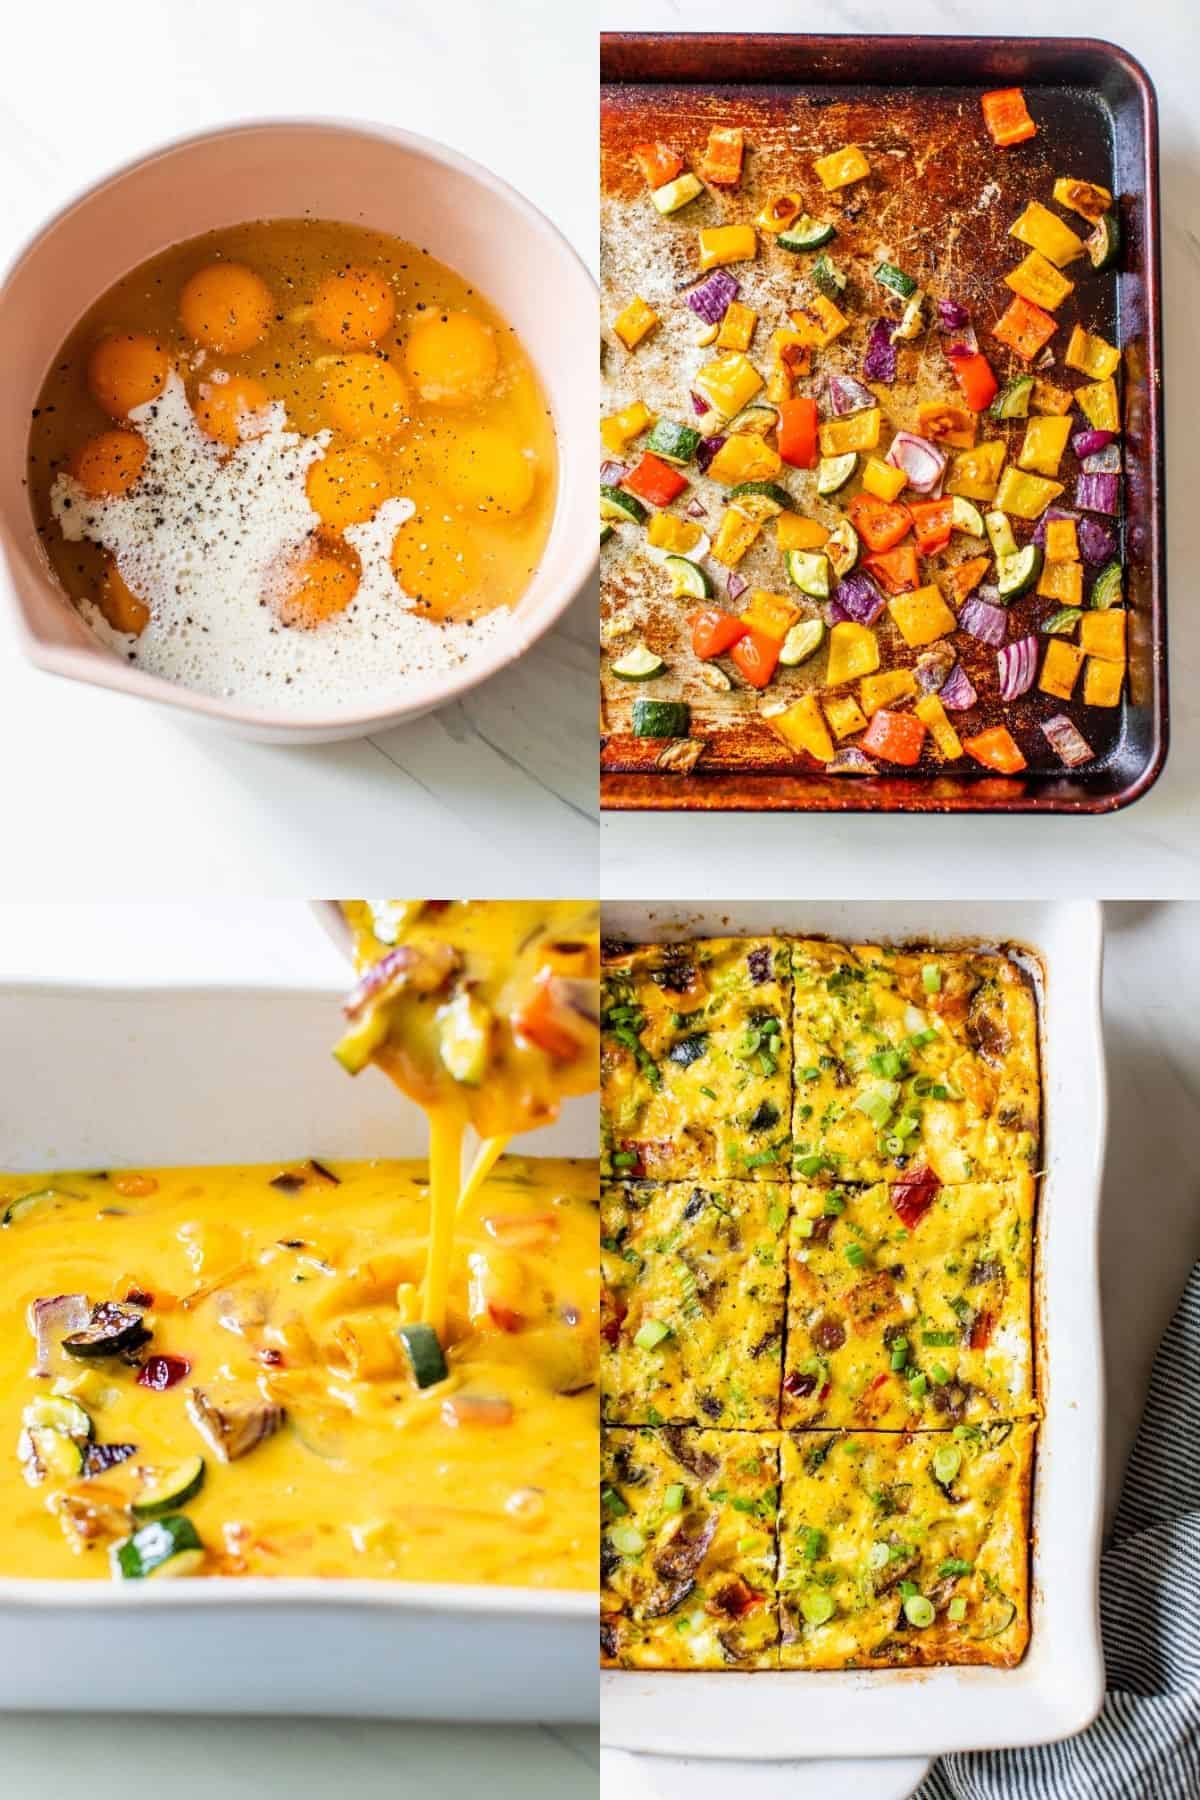
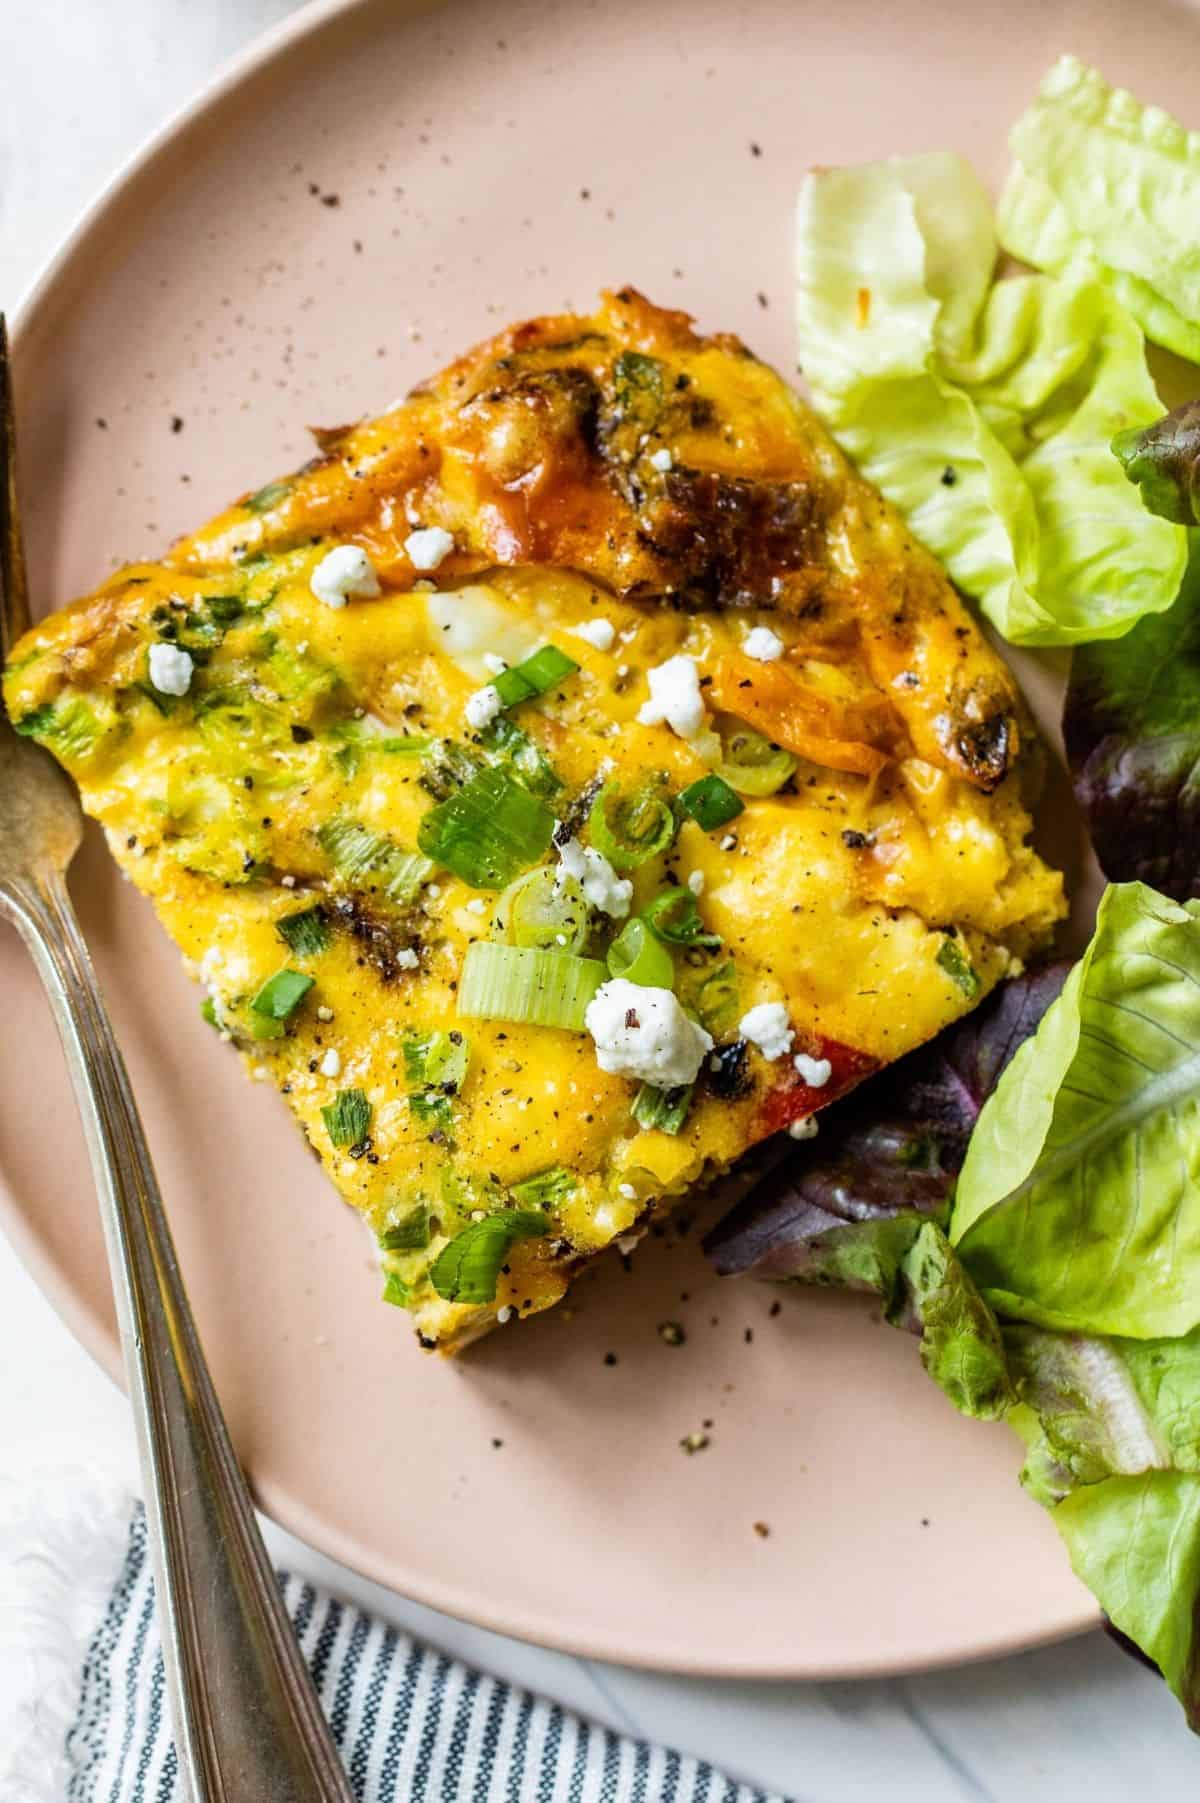
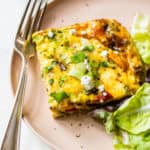
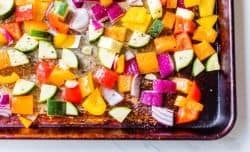


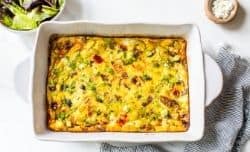
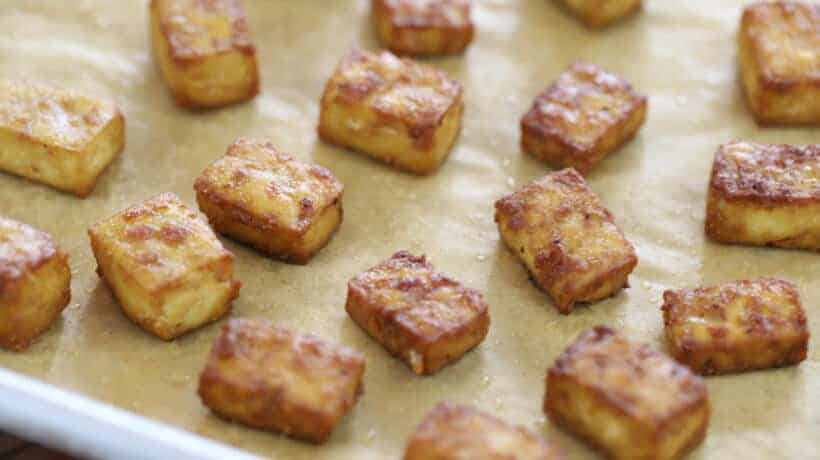

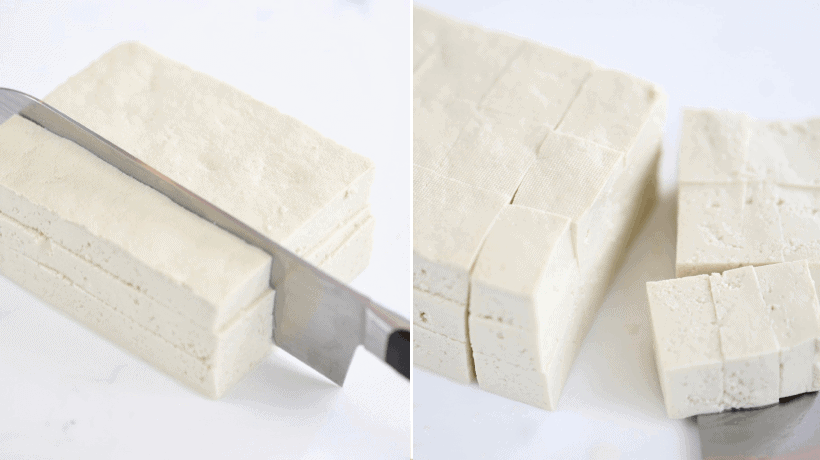

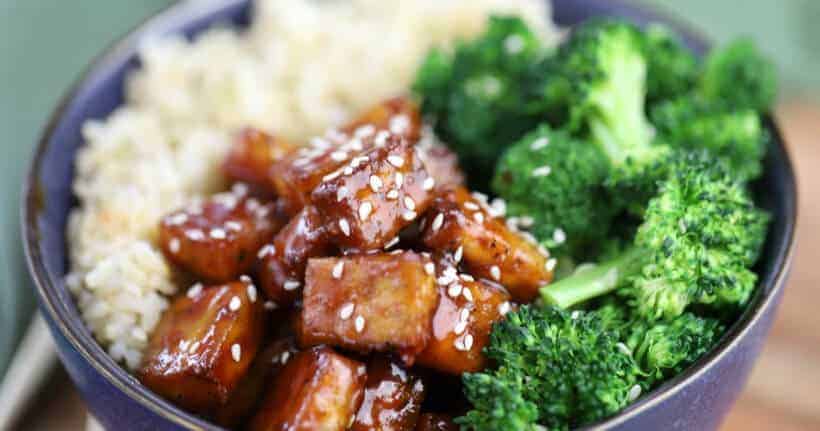
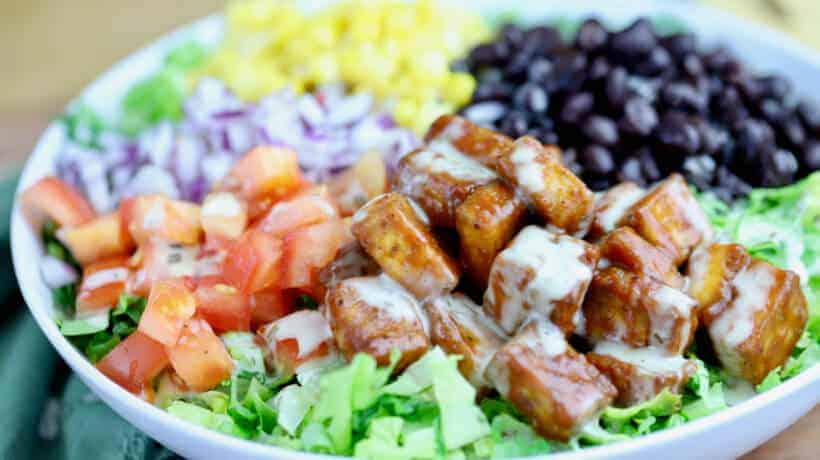
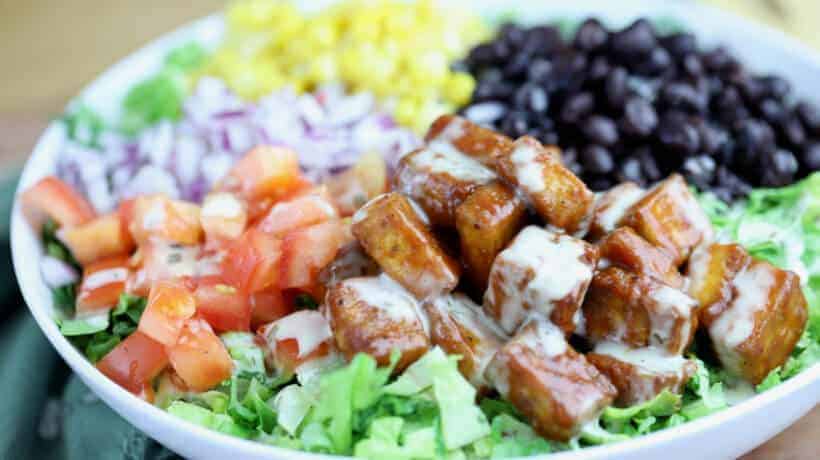
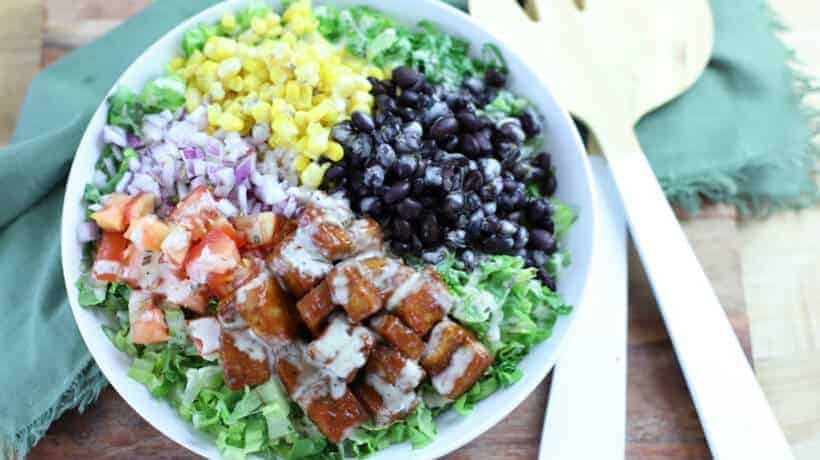
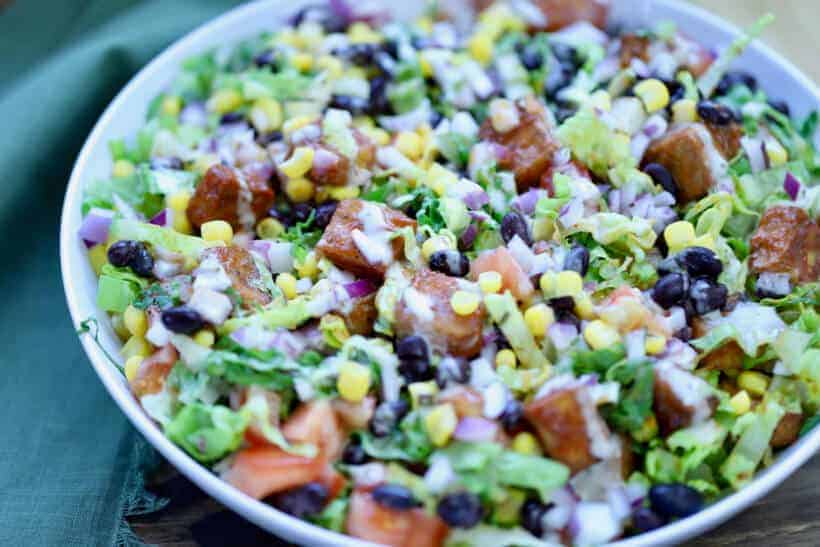

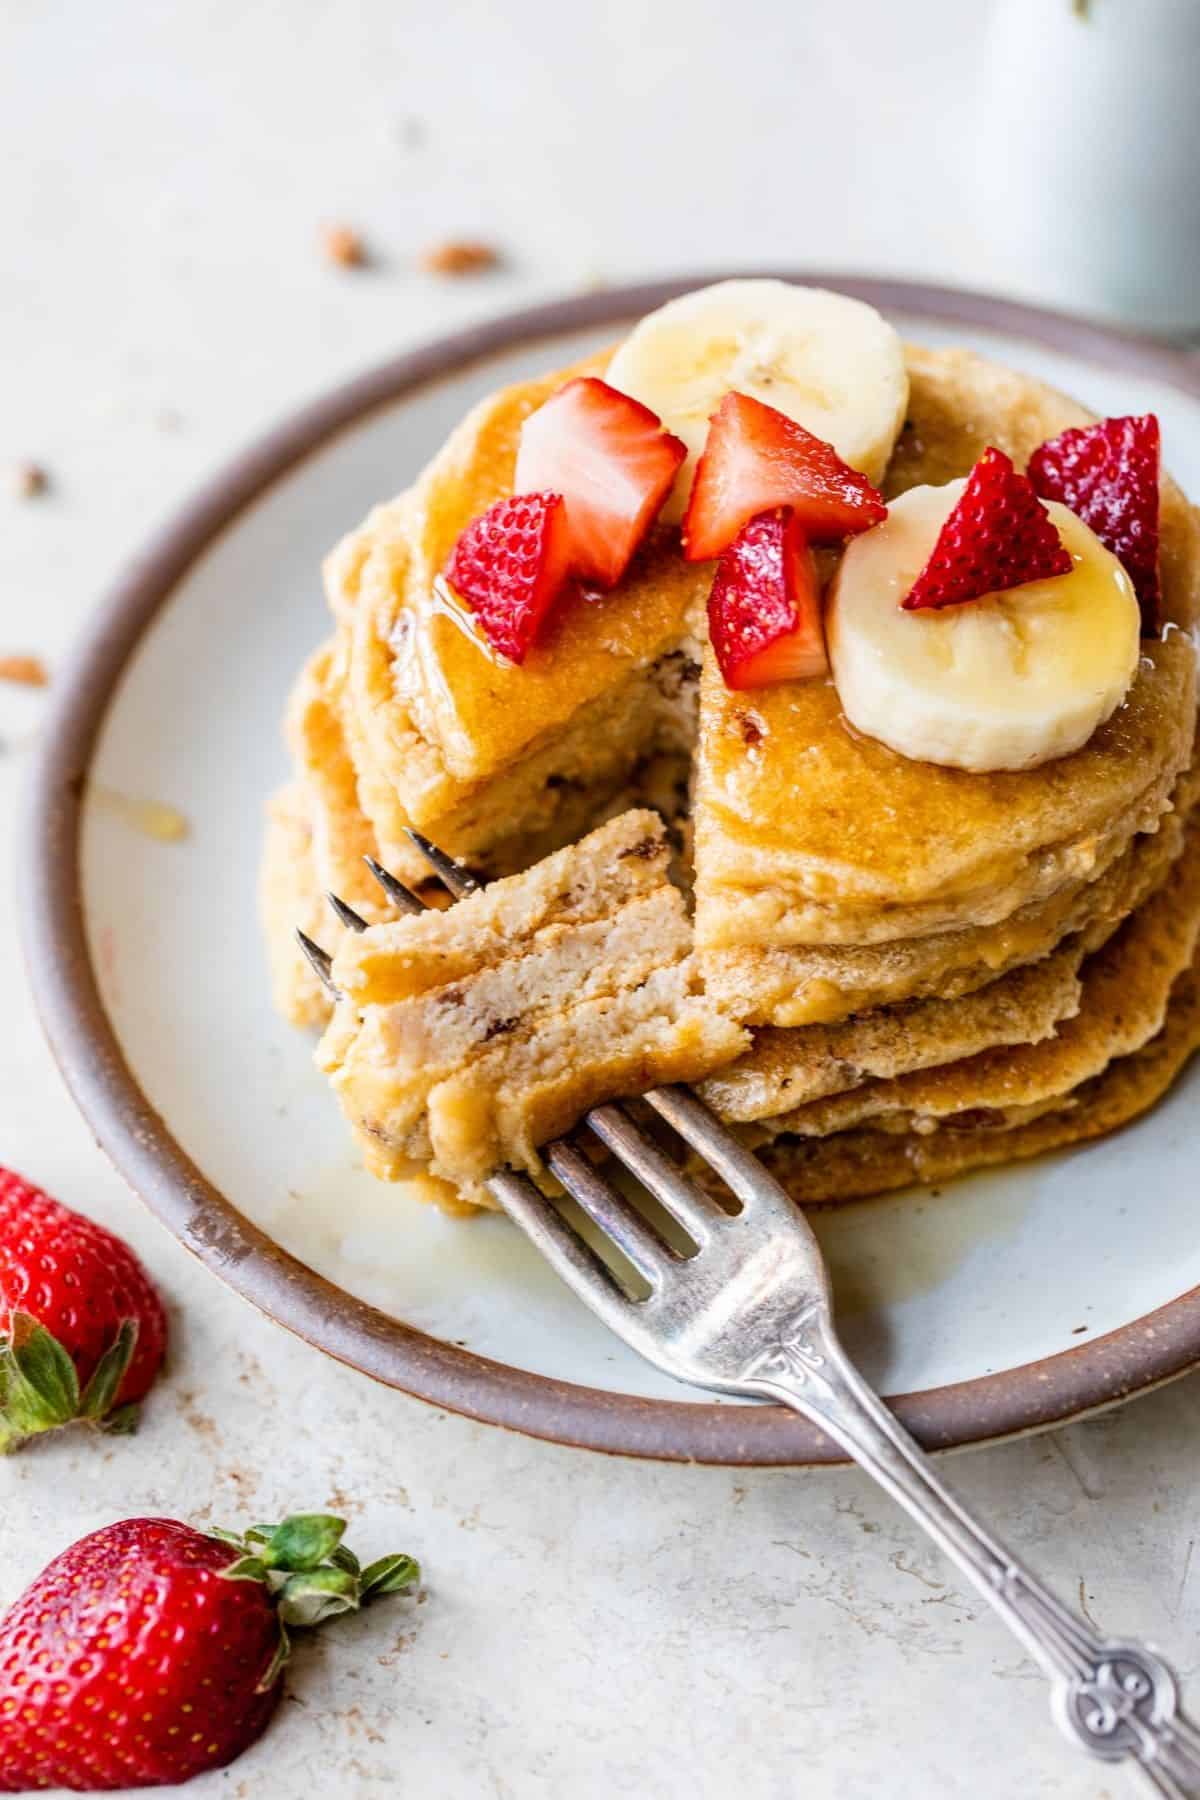
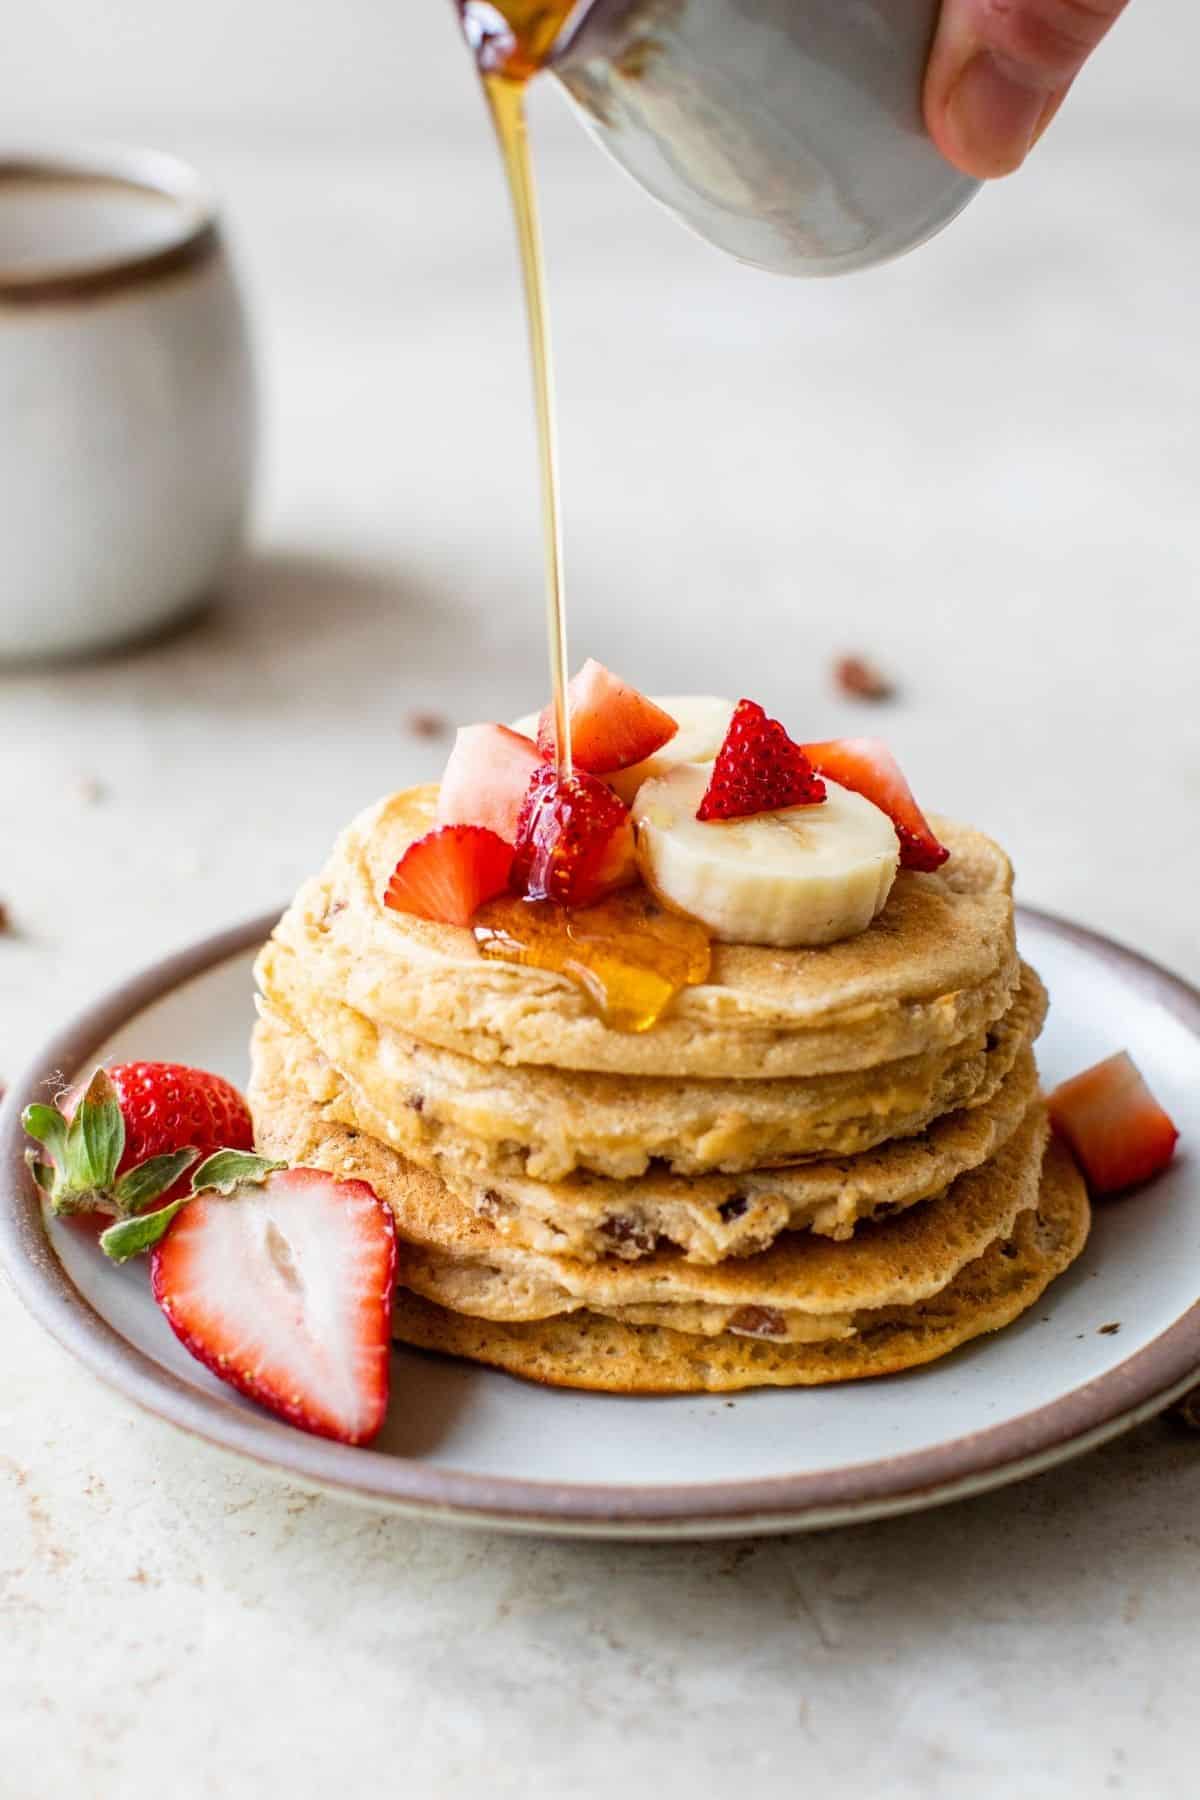
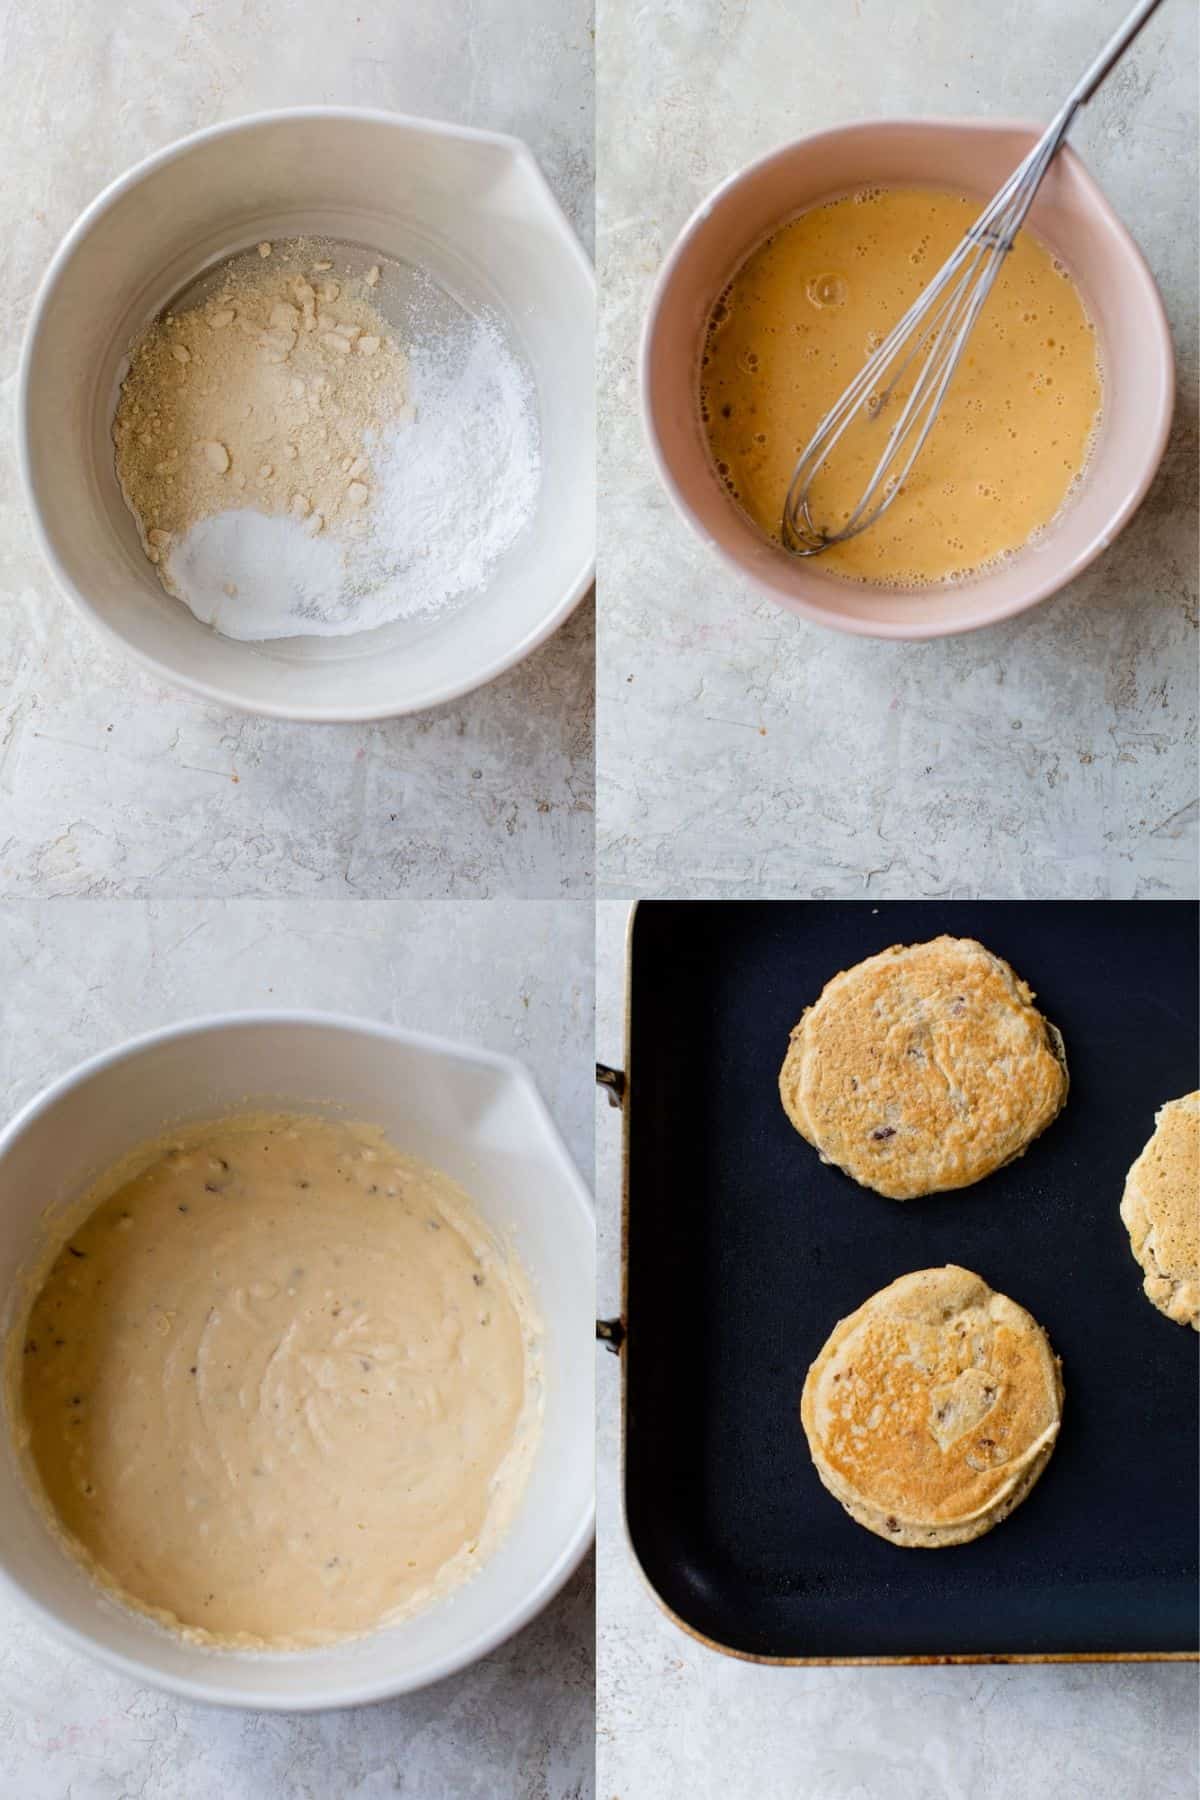
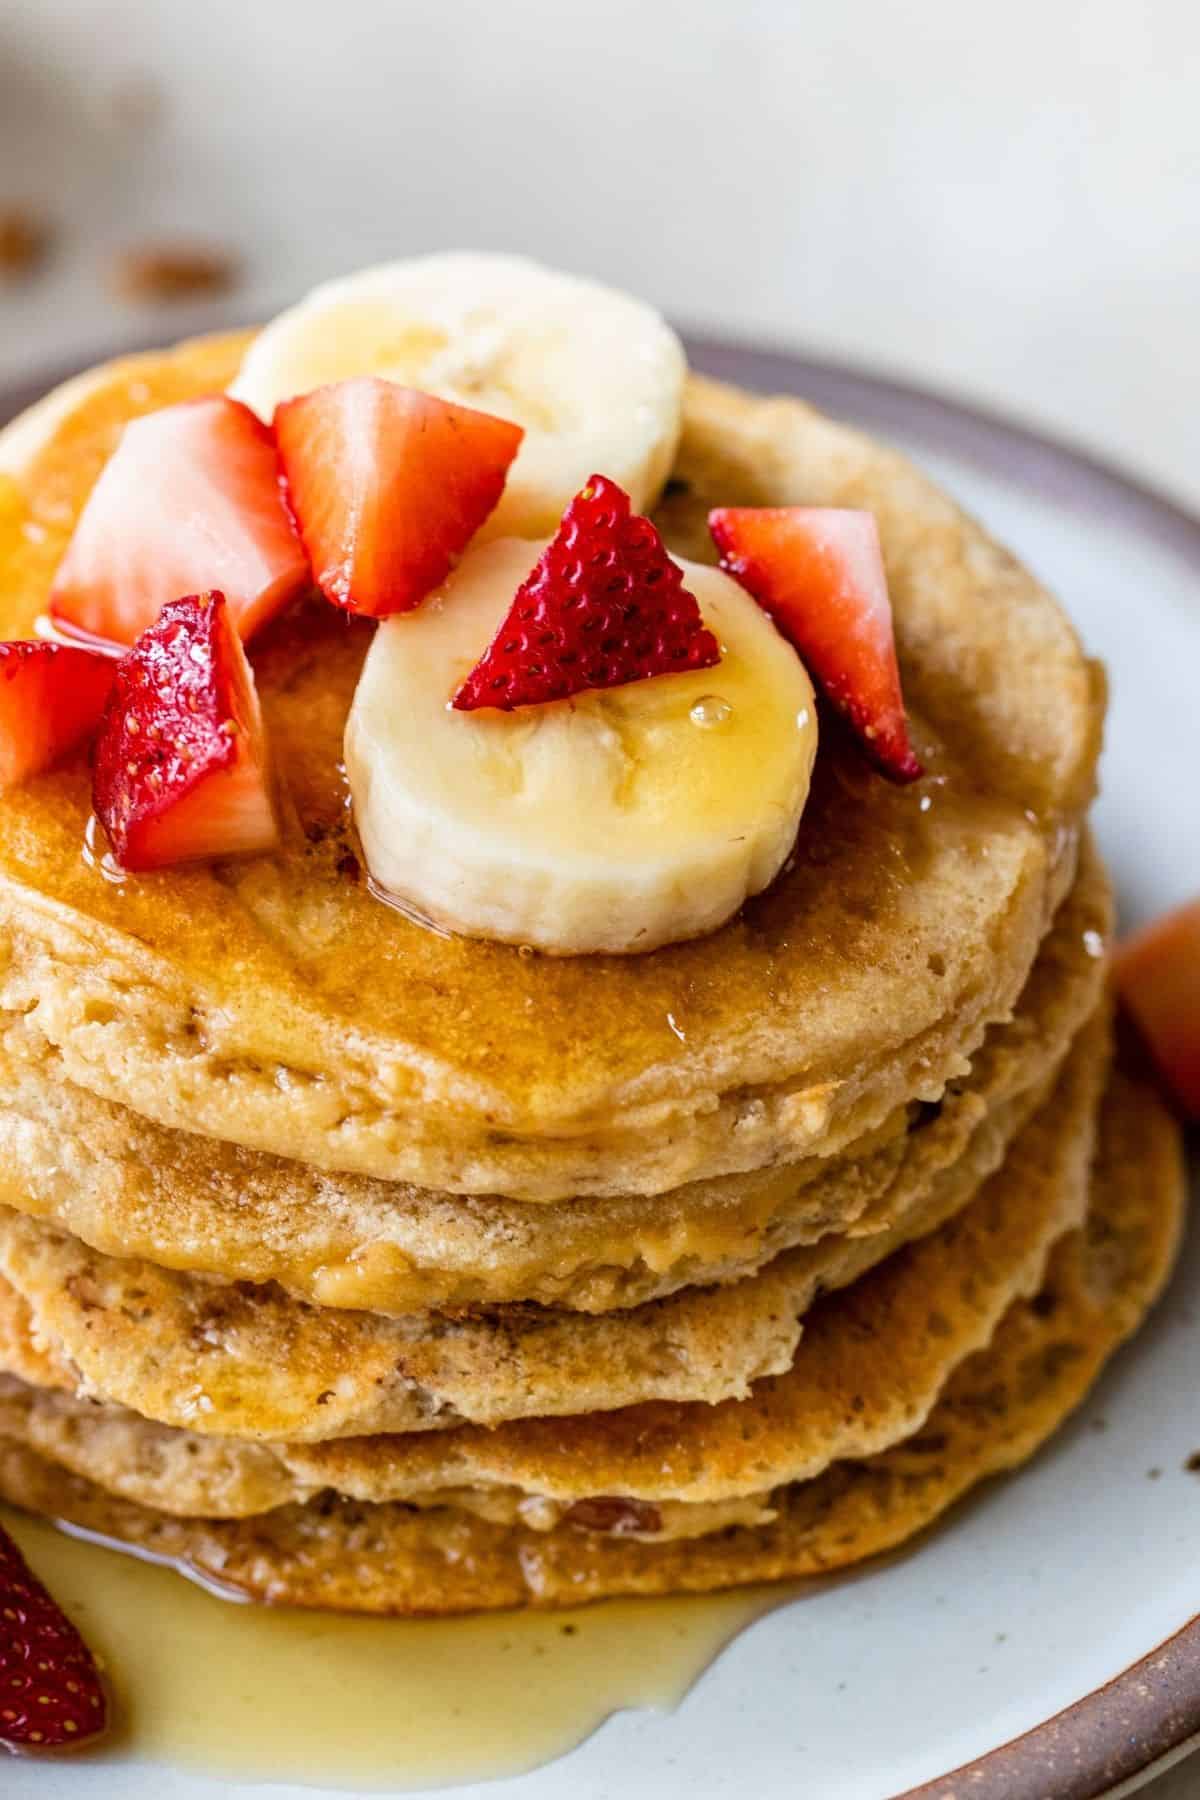
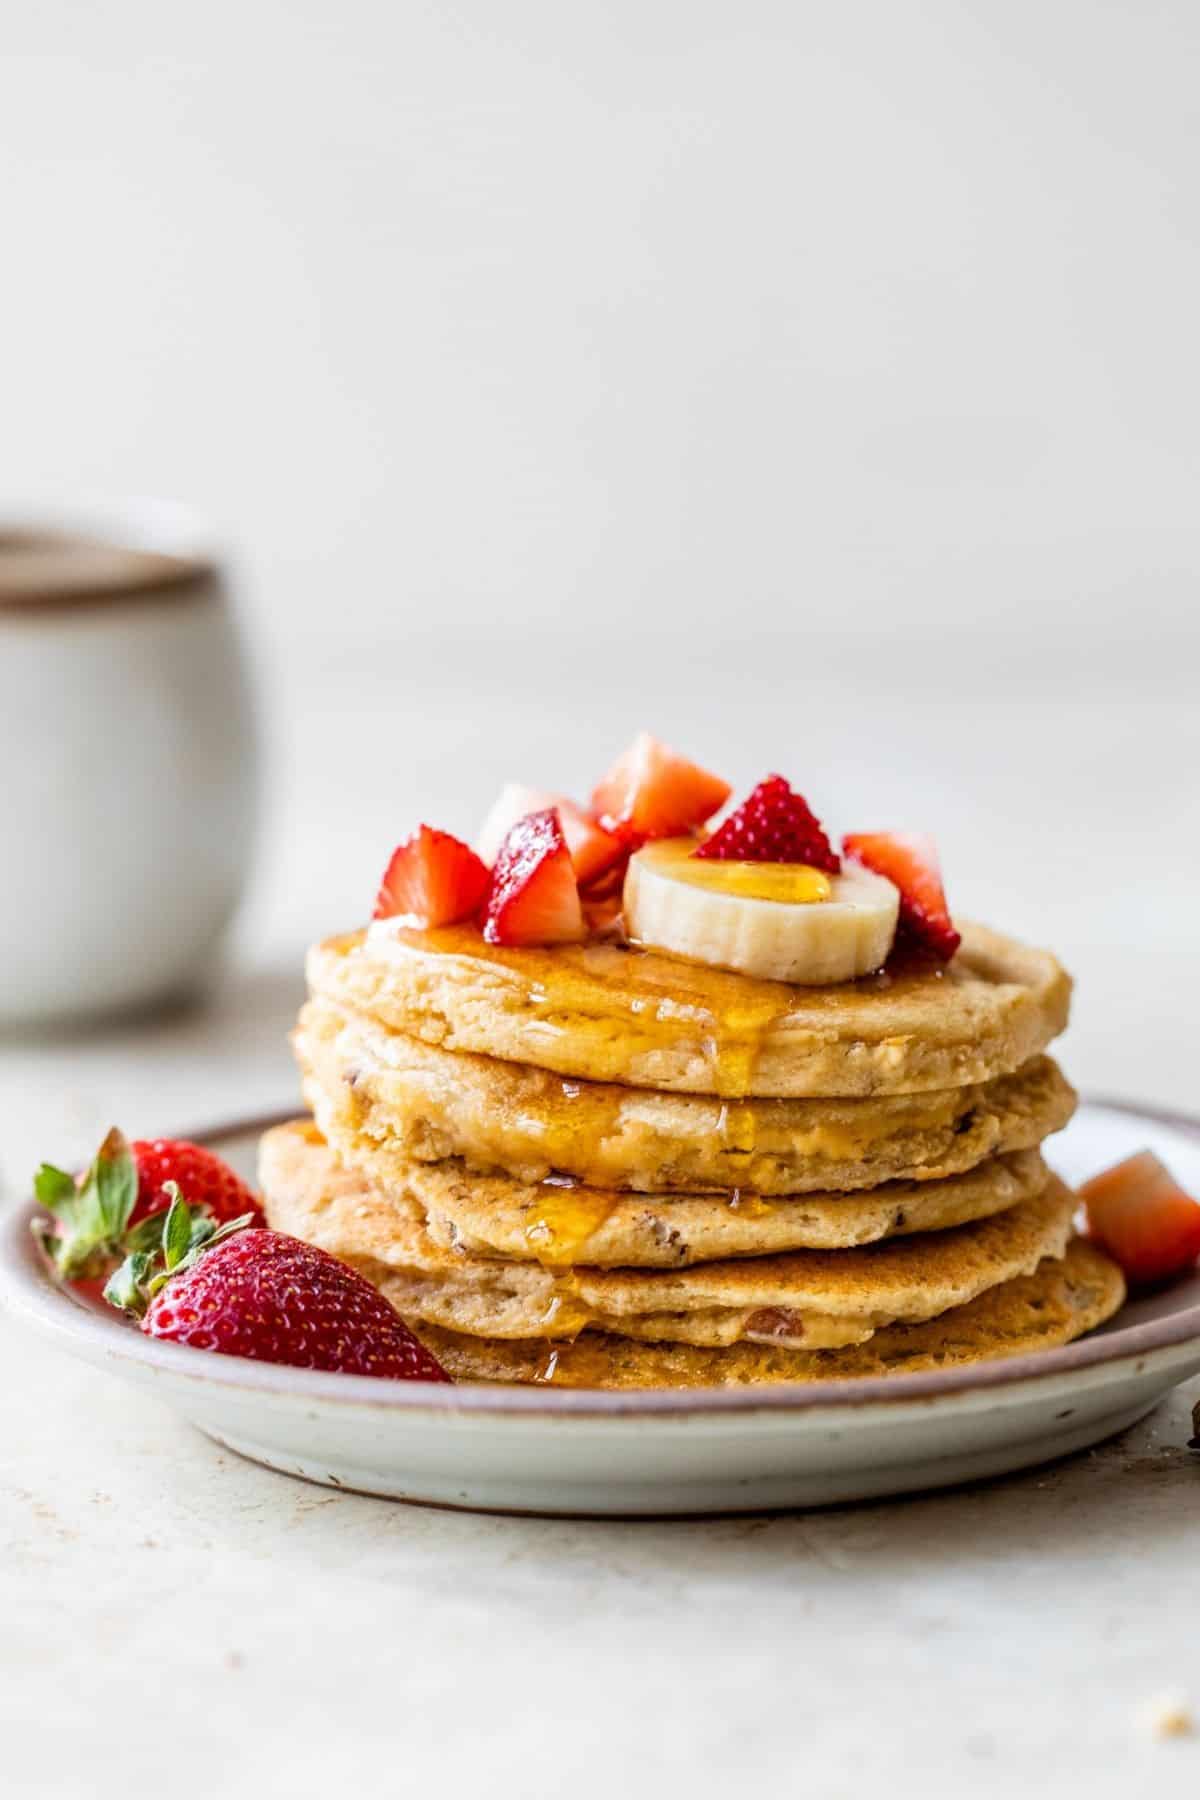

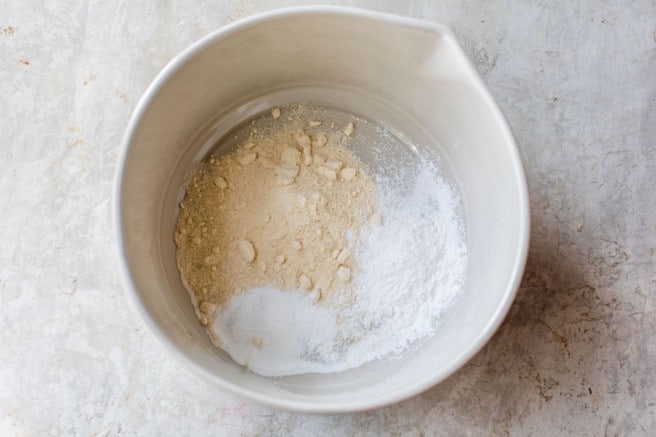
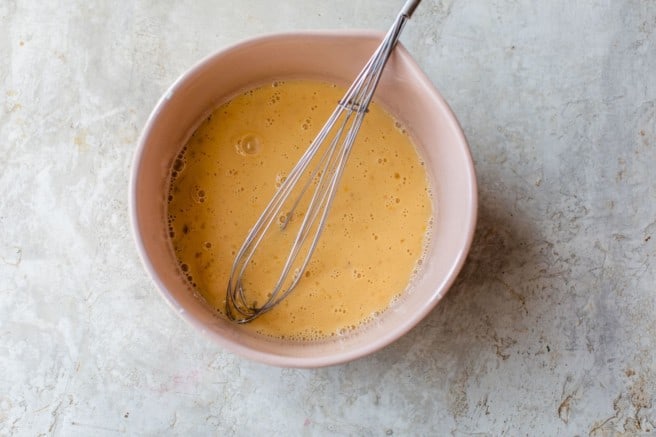
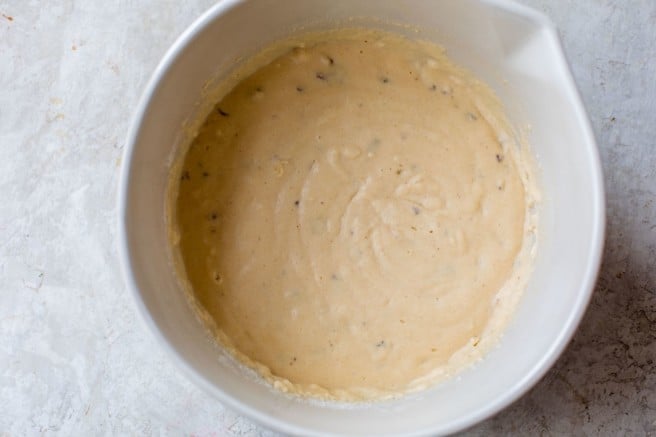
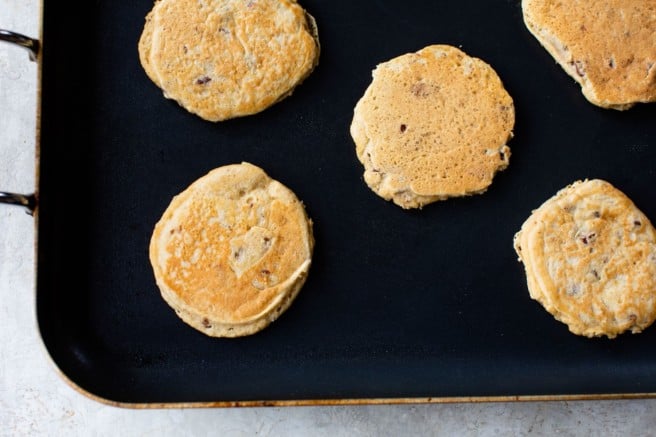
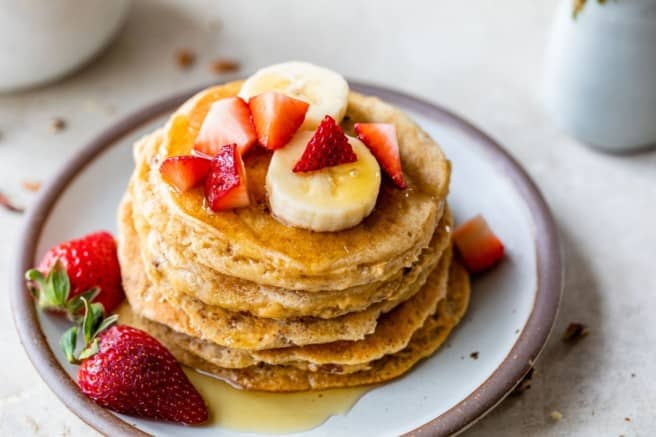
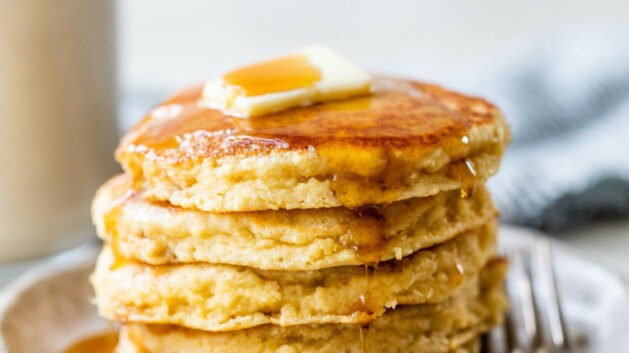
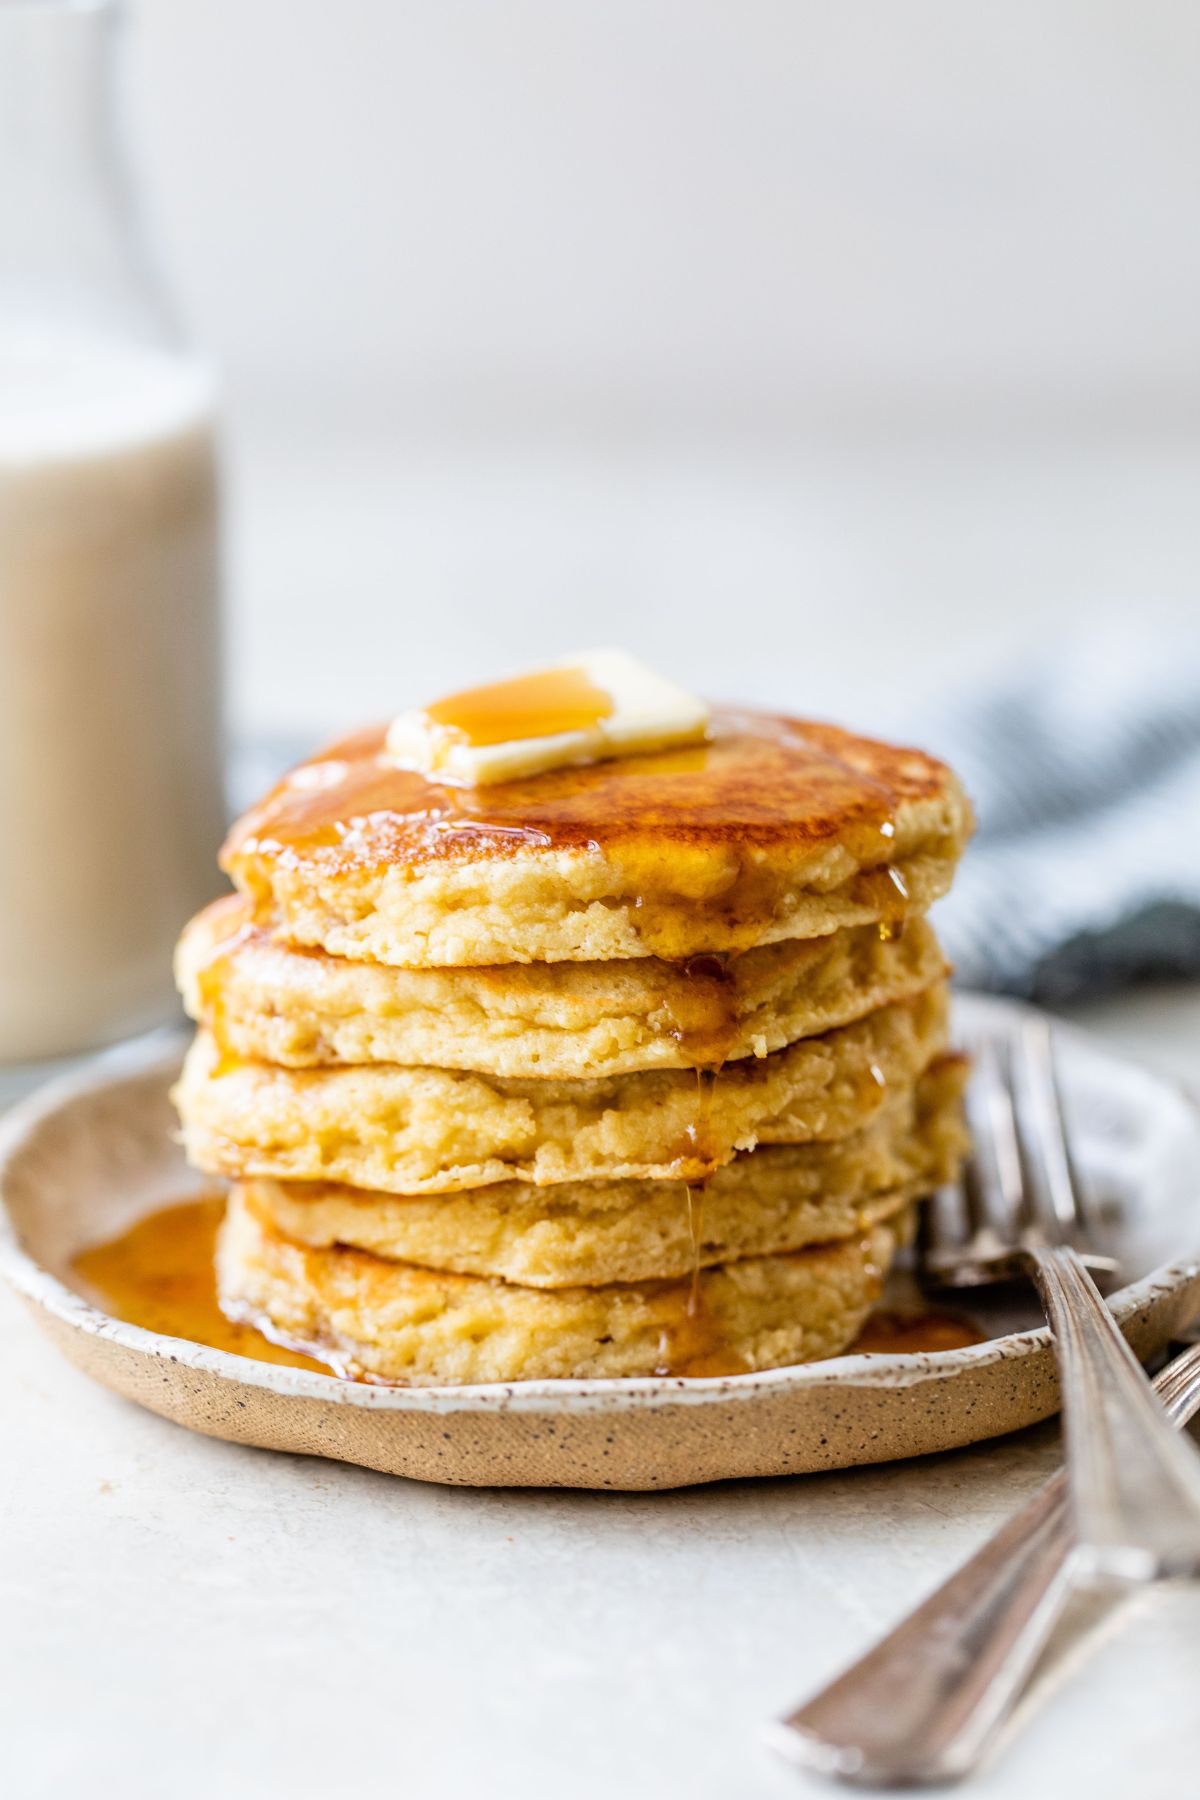
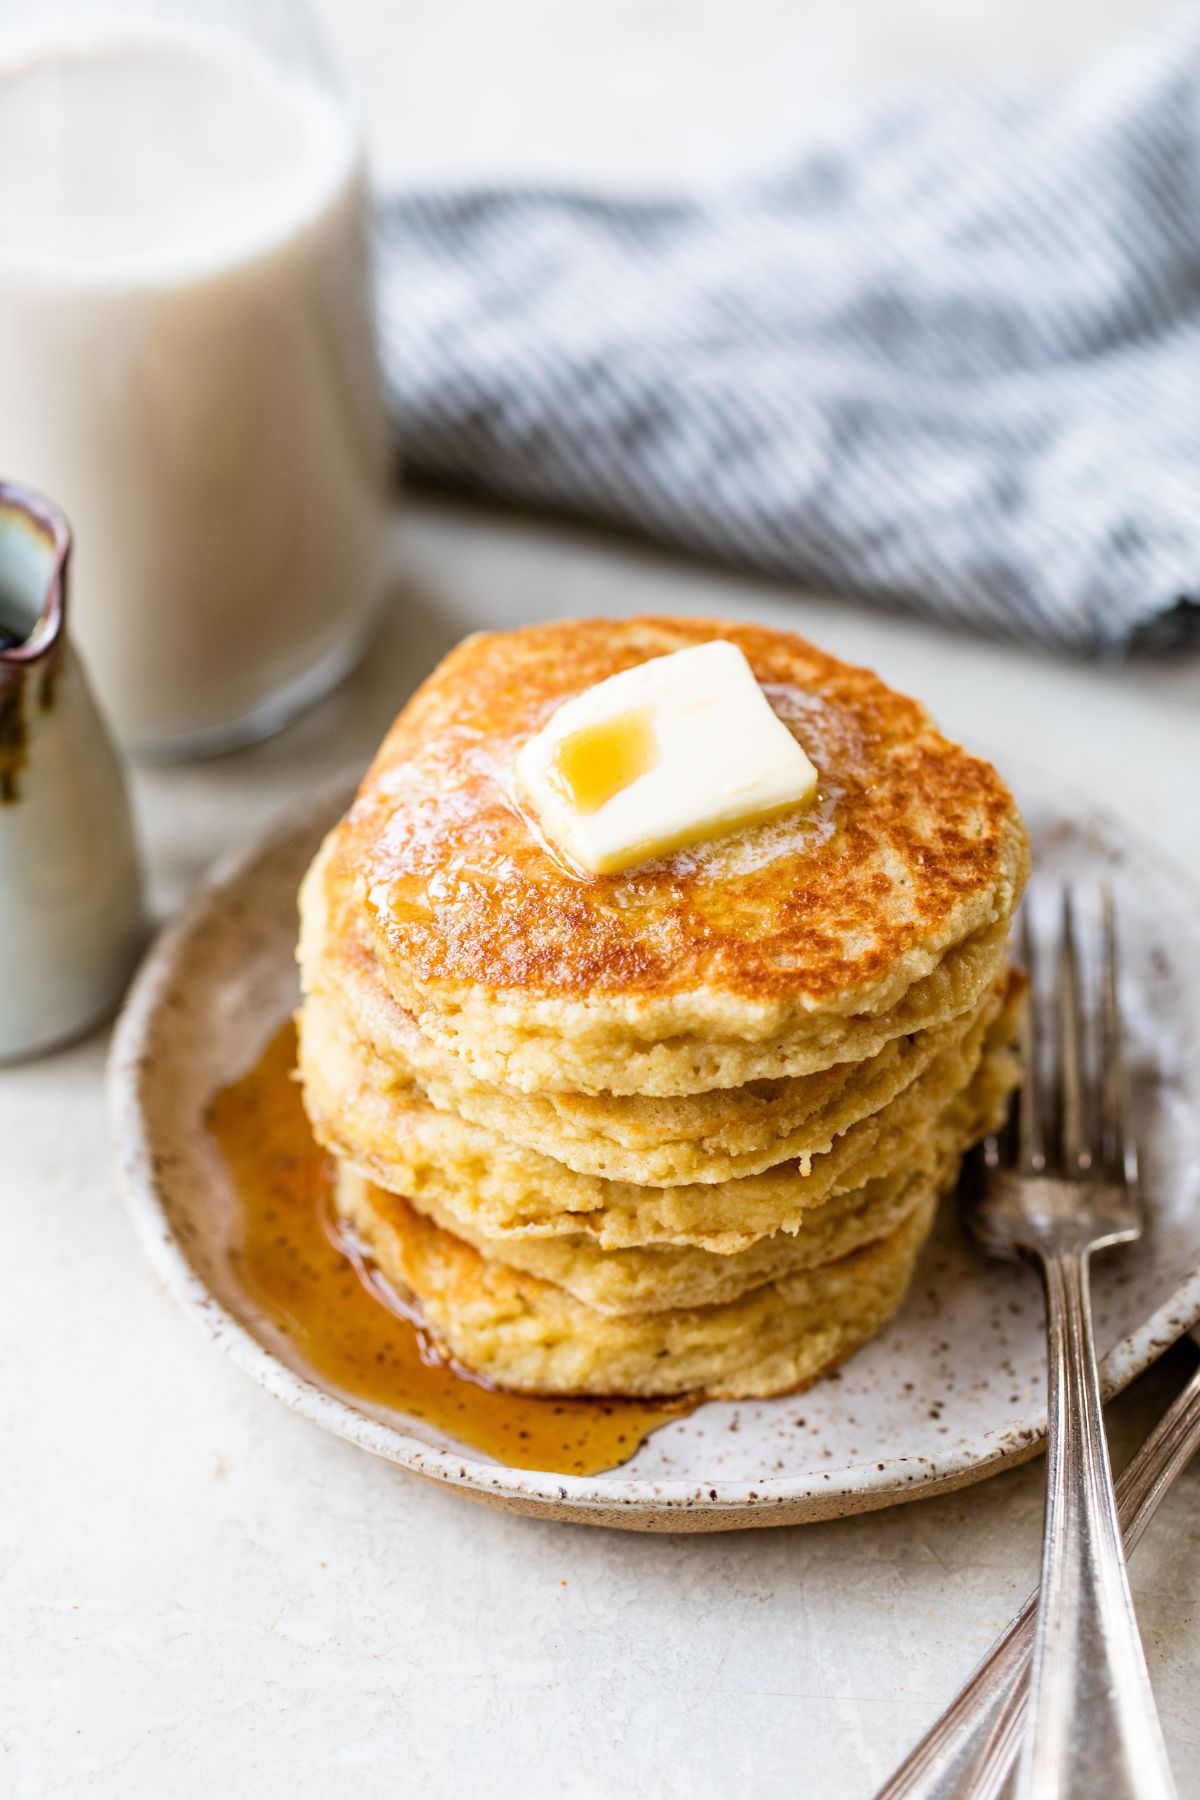
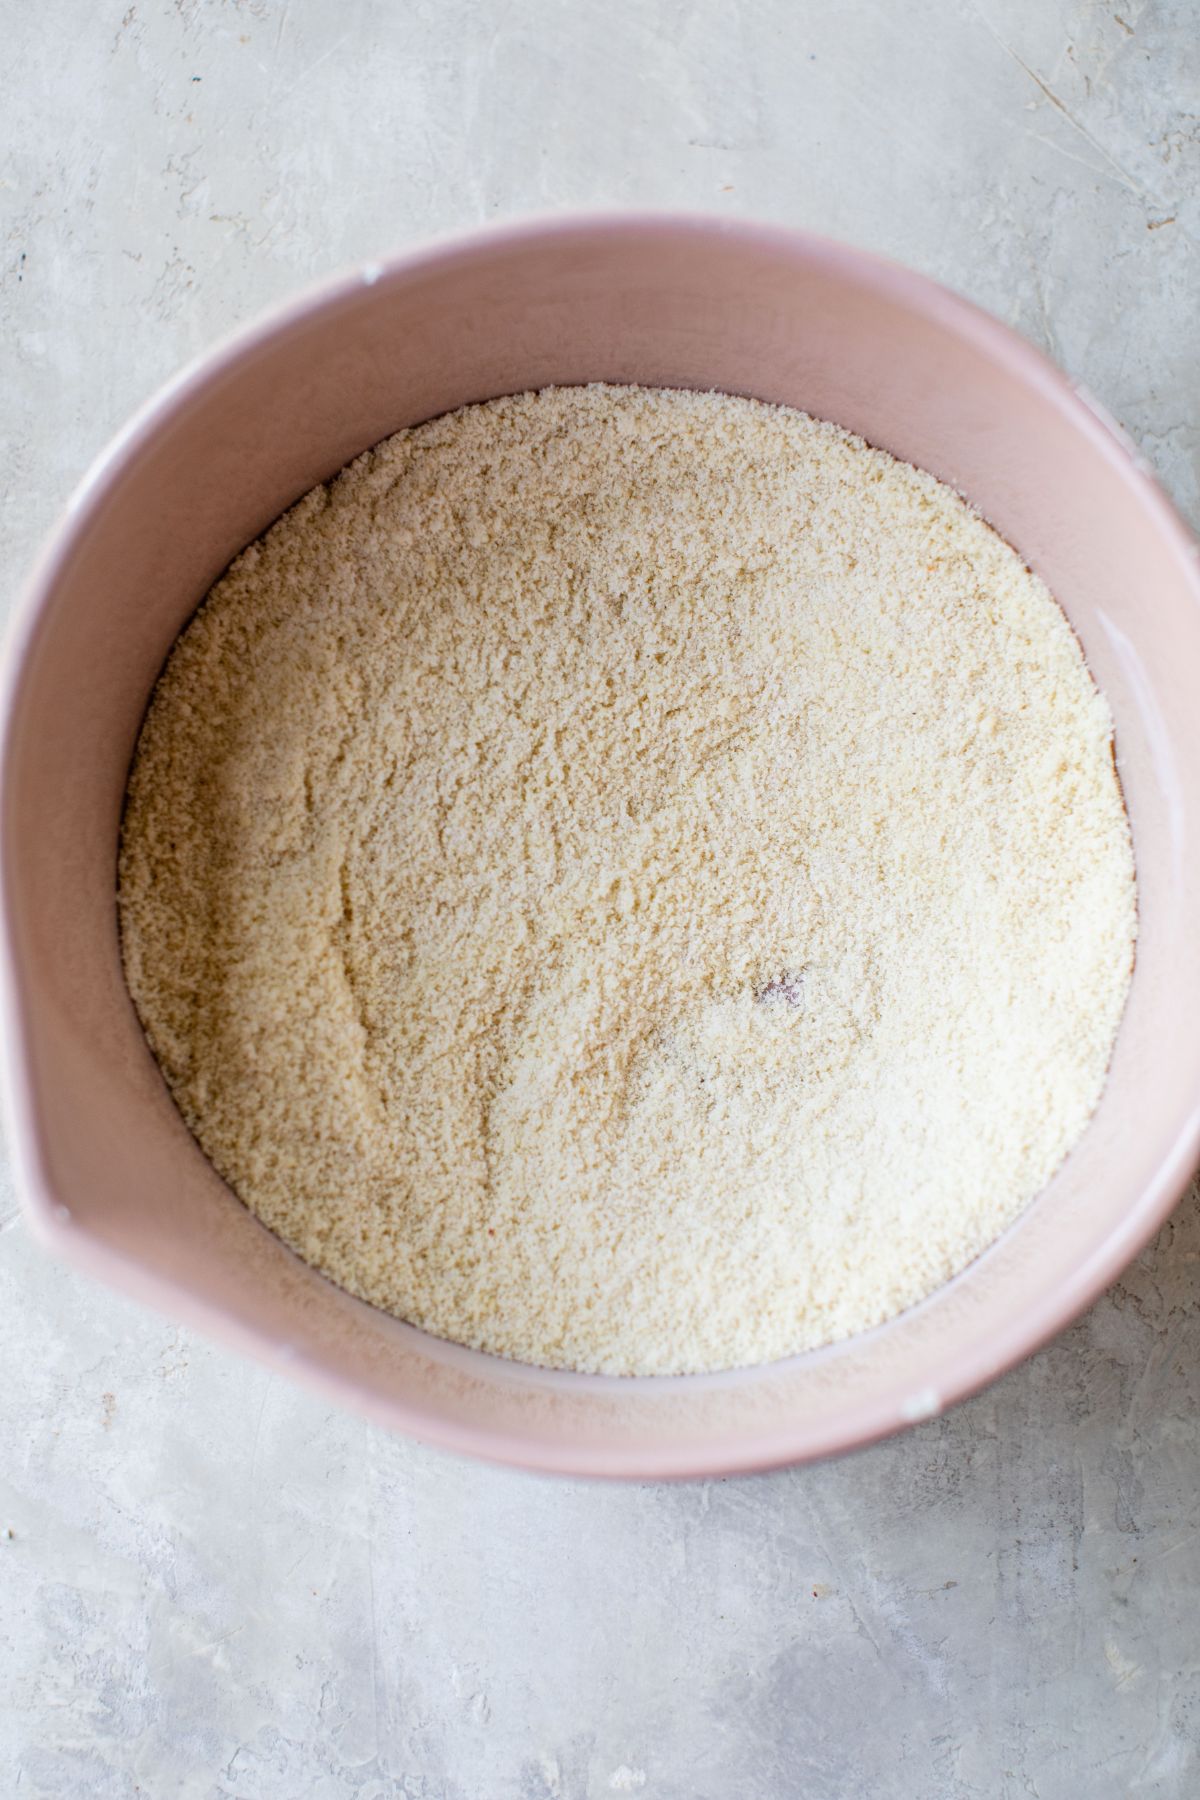

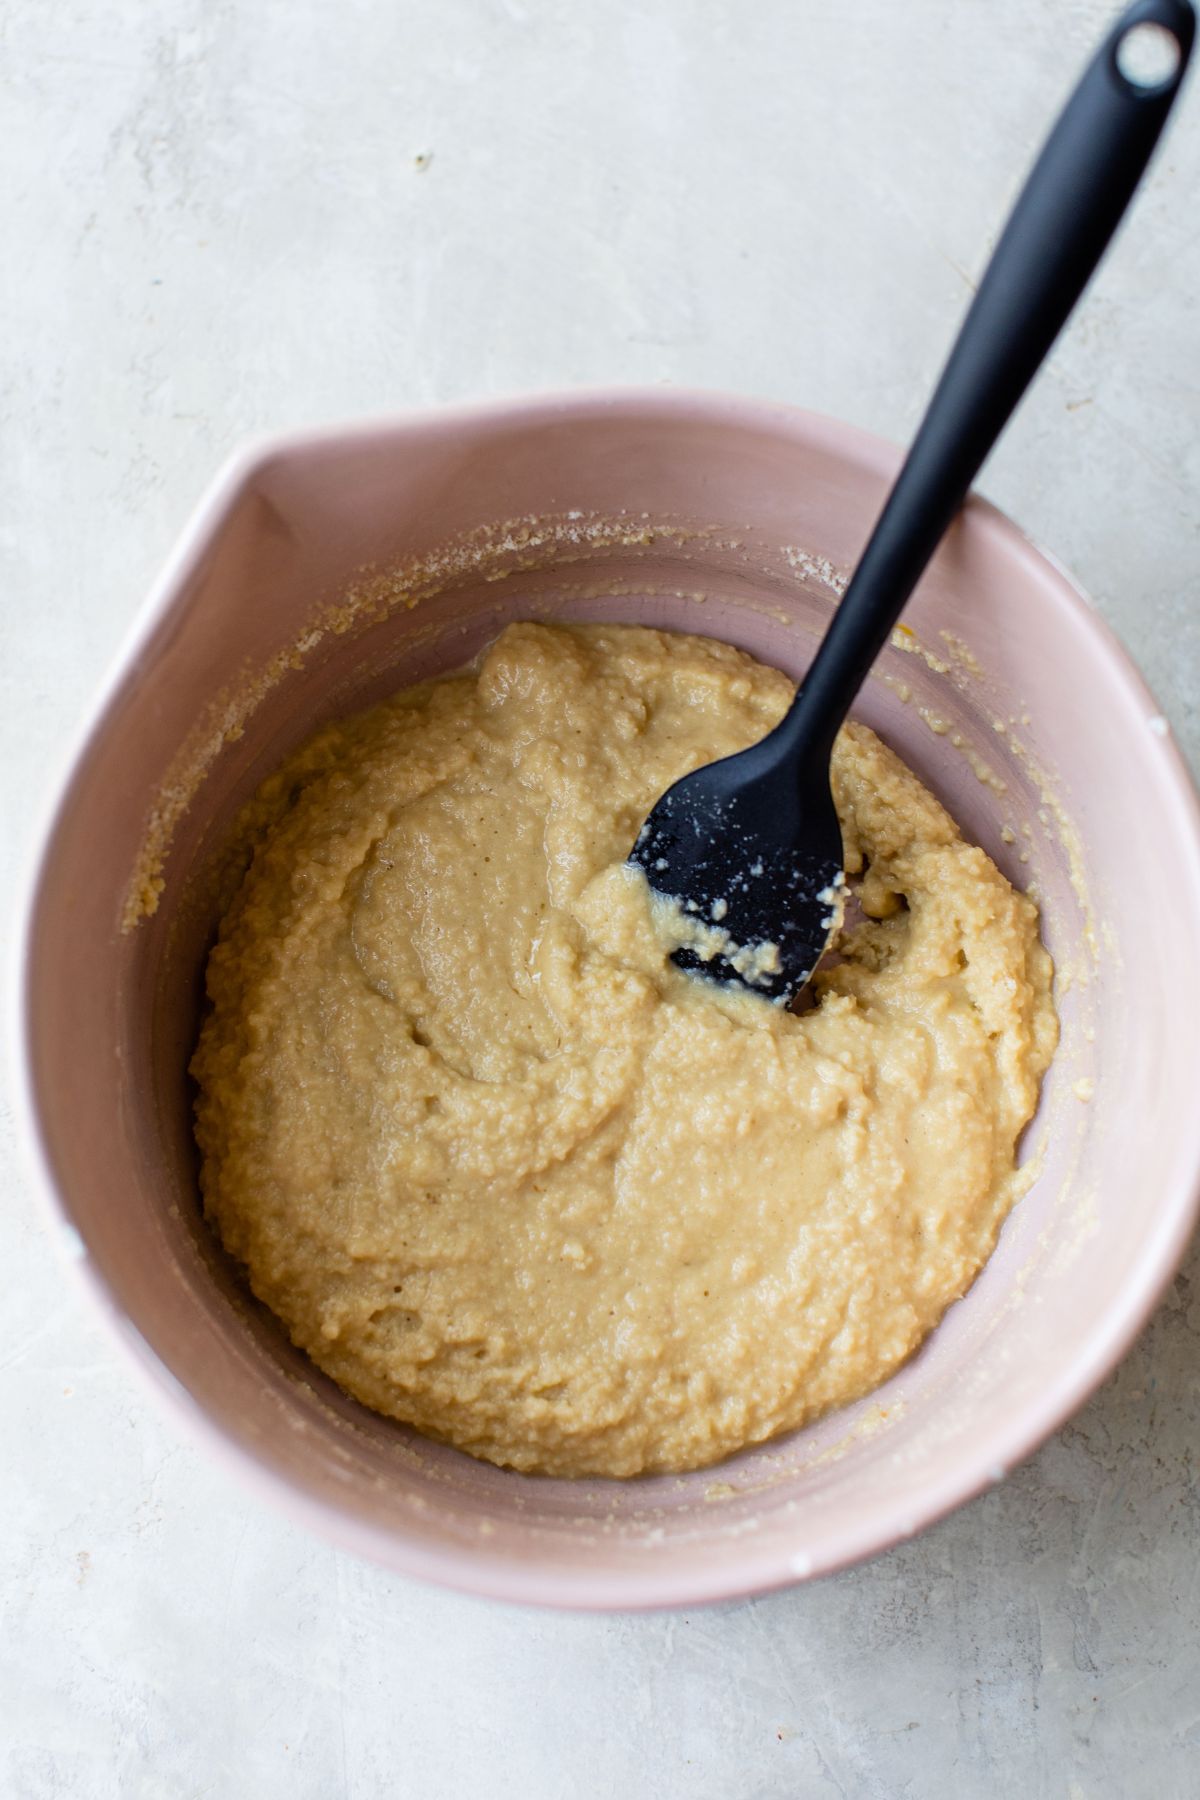
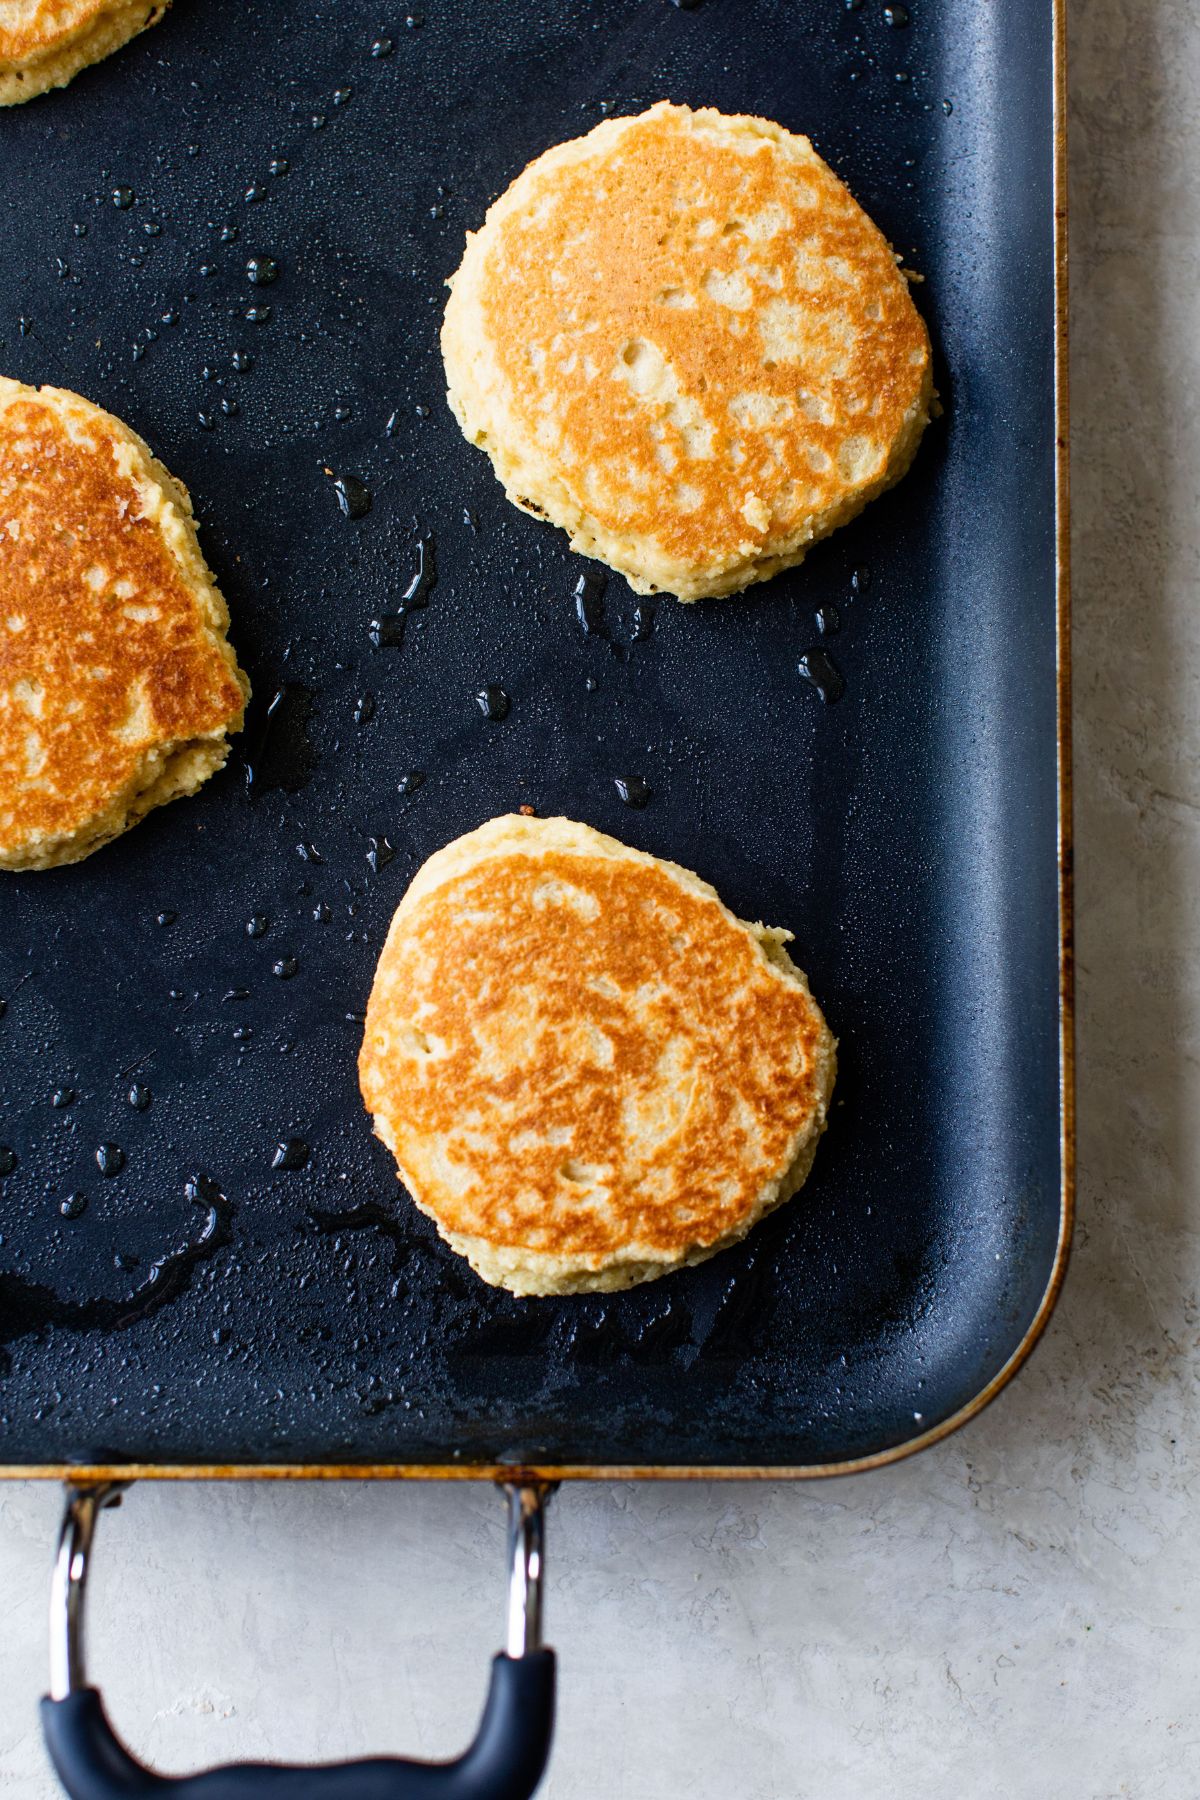
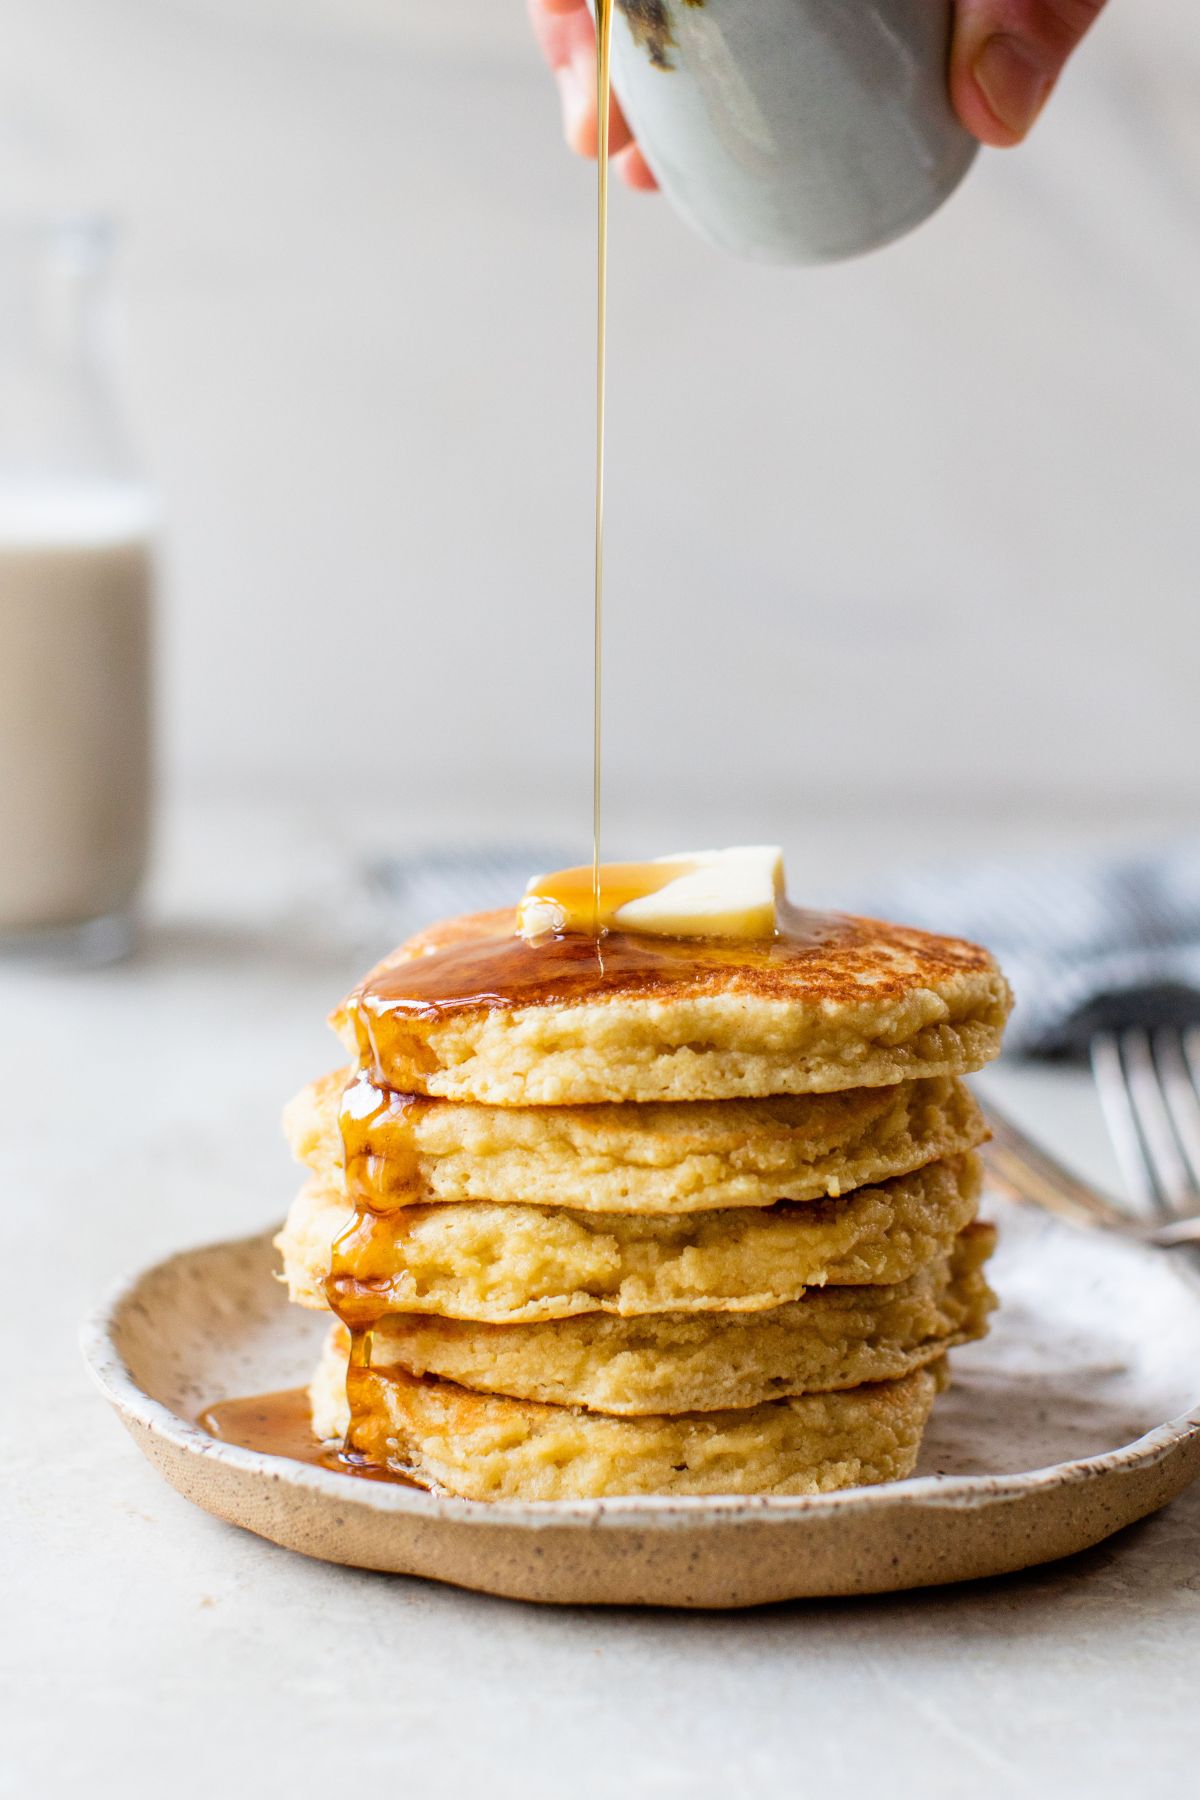


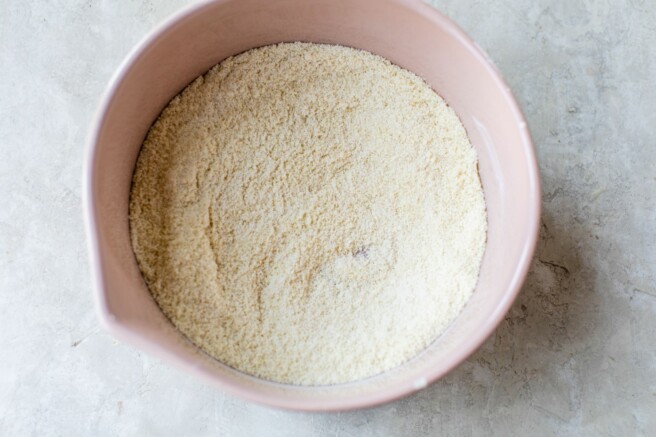

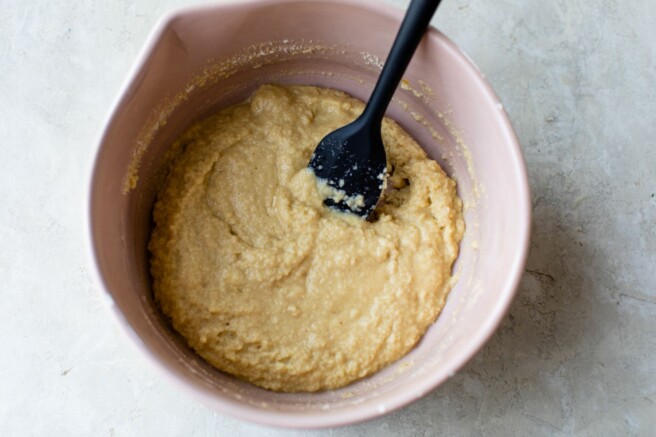
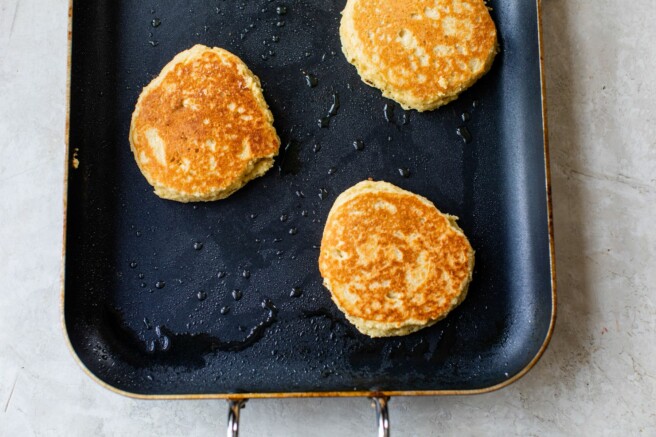

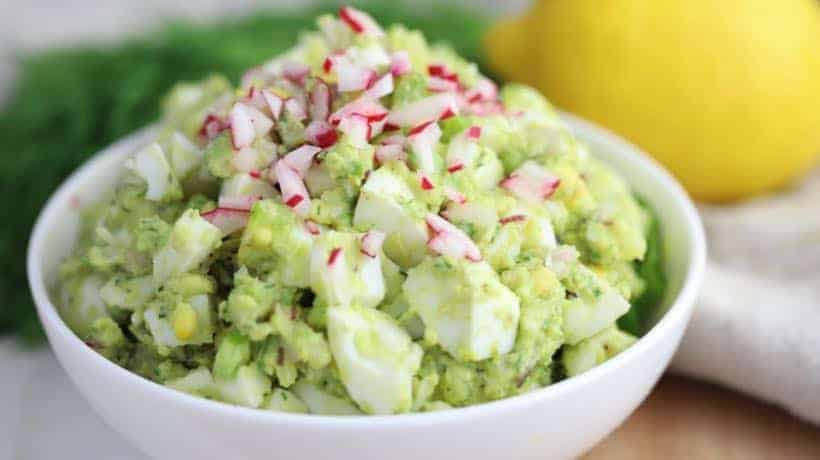
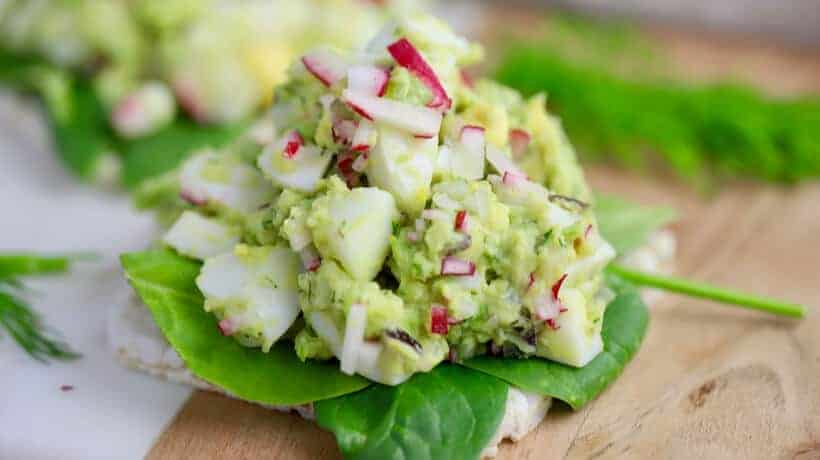
 How To Meal Prep Avocado Egg Salad